Setting up Gupshup in uContact is a simple process, but first, you must verify that you have everything required to create a provider and campaign.

1. Set up account
The uContact webhooks are also configured so that Gupshup sends the messages and statuses to the portal.

2. Create a provider on uContact
Log into uContact with a user with permissions to create SMS providers.
Then we go to Administrator → Providers → SMS
We select Gupshup from the list of providers and complete the fields:
Name
To identify the provideruser
Name of the App.password
Gupshup API Key.sms from
WhatsApp number without dots, or spaces, or signs.

3. Create campaign
Select a Gupshup provider.
Put the name of the app in the port field.
Interactive button list
Deprecated. See new formats WhatsApp/SMS providers format - uContact v6 English - Confluence (atlassian.net)
Tipo Buttons:
body: texto
header;texto(si es tipo TEXT)
type VIDEO/IMAGE/
DOCUMENT/TEXT
mediaUrl; https://<instancename>.ucontactcloud.com/attachments/
filename (si es tipo DOCUMENT)
buttons: 1 a 3
ID - title - description
footer: texto
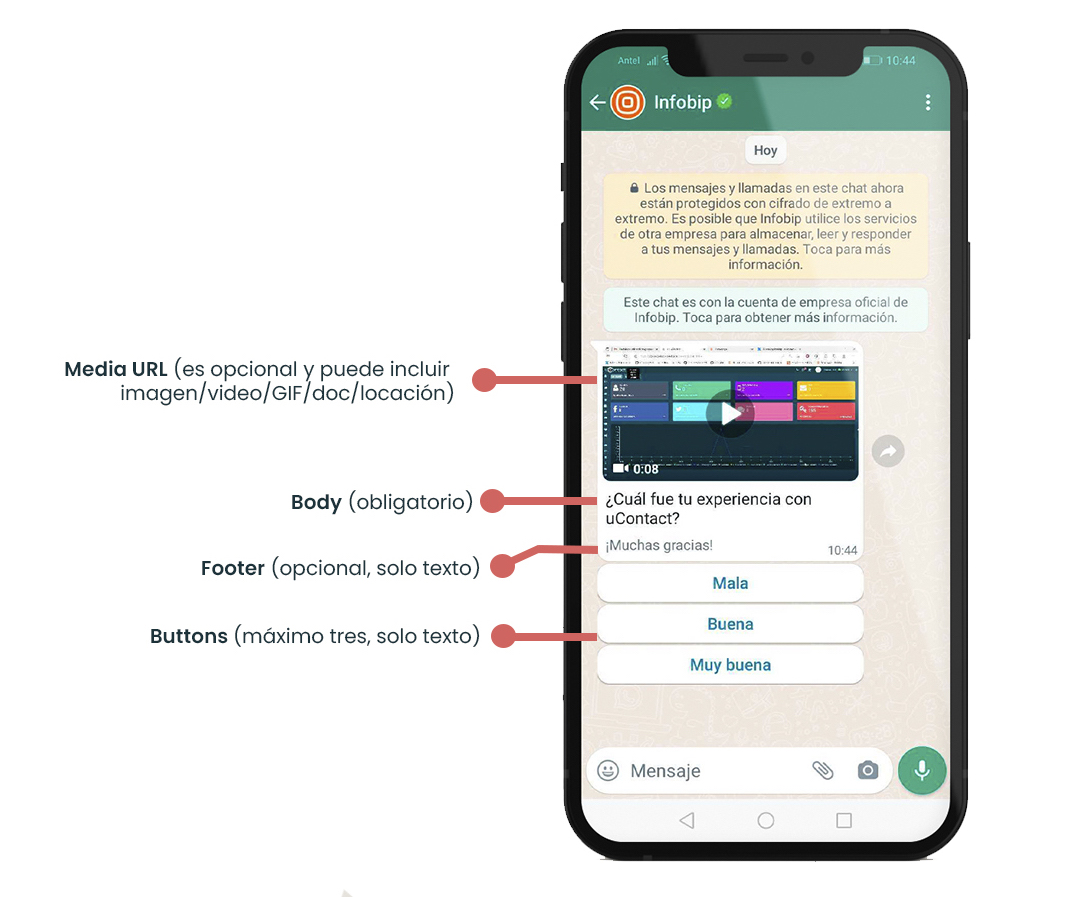
Everything shown in bold is required
Ejemplo:
|
|---|
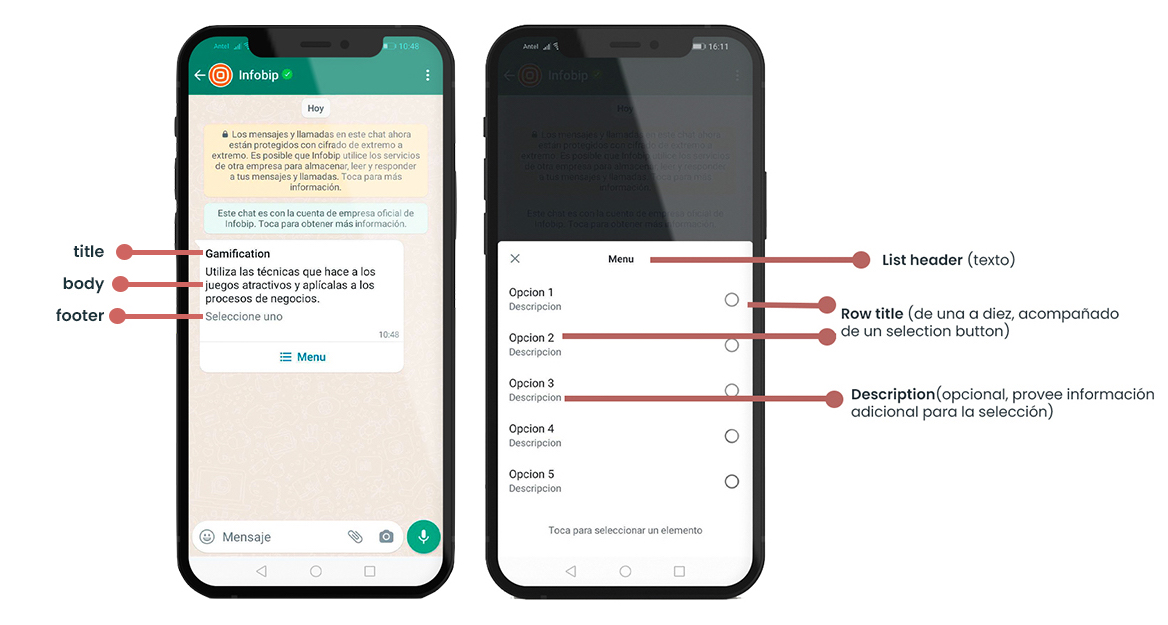
Interactive list
Deprecated. See new formats WhatsApp/SMS providers format - uContact v6 English - Confluence (atlassian.net)
Example without title for options:
Example with title for options:
|
|---|
Templates
Message templates can serve as a valuable tool to initiate conversations with users. Text-based templates can be accessed within the provider's configuration window and employed within the inbox alongside canned responses. In this process, it is essential to replace the placeholders with the specific values required as variables.

Synchronize: Clicking this button will fetch all the approved text-type templates associated with the account. Once the synchronization process is successful, campaign members can utilize these templates as canned responses.
Delete: This button is used to permanently remove all templates from the provider's in uContact.
Templates examples:
Deprecated. See new formats WhatsApp/SMS providers format - uContact v6 English - Confluence (atlassian.net)
|
|---|
|
|---|
|
|---|
|
|---|
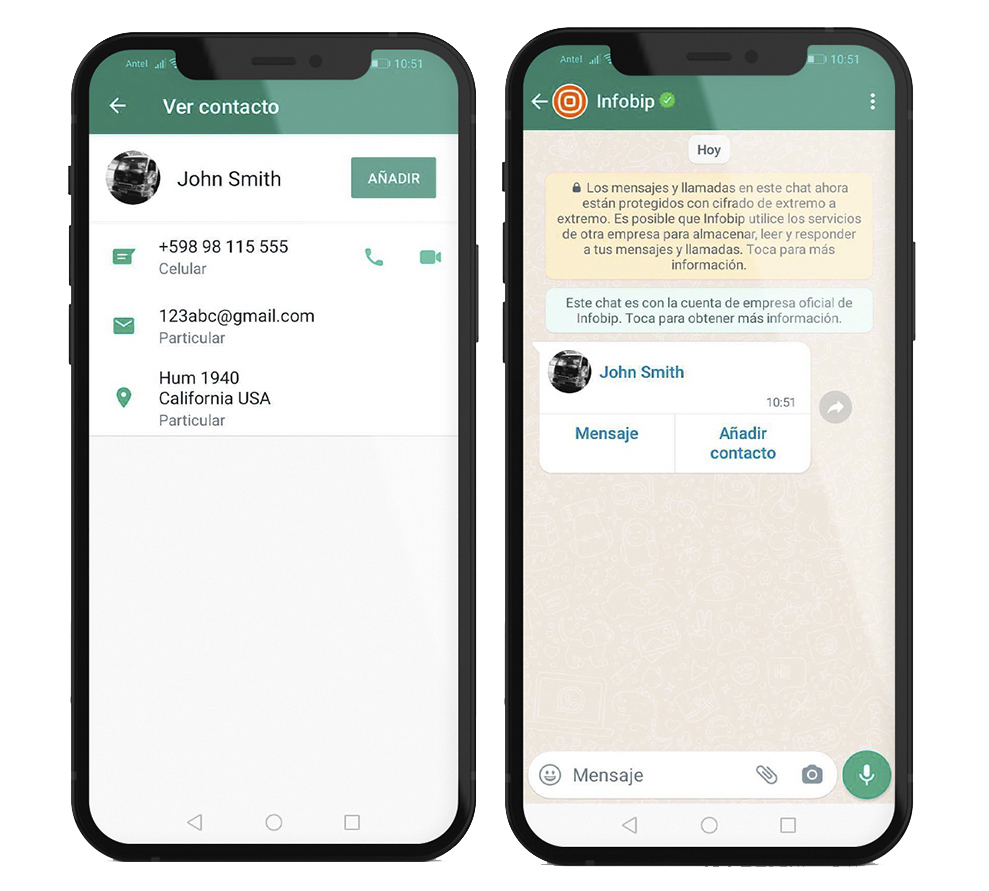
Contact
Deprecated. See new formats WhatsApp/SMS providers format - uContact v6 English - Confluence (atlassian.net)
contact;firstName;formattedName;phone;type;email;type;direction;type
Ejemplo:
|
|---|

Location
Deprecated. See new formats WhatsApp/SMS providers format - uContact v6 English - Confluence (atlassian.net)
location;longitude,latitude;Nombre;direccion
Ejemplo:
|
|---|
NGINX
To receive the messages un uContact is necessary to add the following code snippet to your NGINX configuration.
location /Integra/resources/Gupshup{
     proxy_pass http://localhost:8085;
     proxy_set_header Host $host;
     proxy_set_header X-Real-IP $remote_addr;
     proxy_set_header X-Forwarded-For $proxy_add_x_forwarded_for;
}