uContact Bots
The bots allow the execution of flows that use a Javascript engine allowing you to perform almost any action if you have the necessary programming knowledge.
From simple answers to transfers, queries to the database or execution of web services are just some of the programmable activities for bots.
To get started with bots you will need to log into uContact with a Supervisor type user with permissions to use the Workflow Designer.
| Tip |
|---|
To start creating bots you must have bot licenses available. They can be requested by sending an email to Integra Support. |


Bot development
This is the core, here its behavior is defined and that it is well created is essential for its implementation.
For this we go to the Workflow Designer, there a blank page will open and on the left, in the activities menu, we will see a dropdown called Bots located at the end of the list.
From here all the activities to be carried out by the bot will be taken.

| Tip |
|---|
To consider:
|
Bot Activities
The activities allow to control the operation of the bot.
| Expand | ||||||||||||||||||||||
|---|---|---|---|---|---|---|---|---|---|---|---|---|---|---|---|---|---|---|---|---|---|---|
| ||||||||||||||||||||||
Here we will describe the function of each activity
BotStartActivityThis activity is the first of the flow, it must always be included in all the created flows, it indicates to the bot where the activities begin. 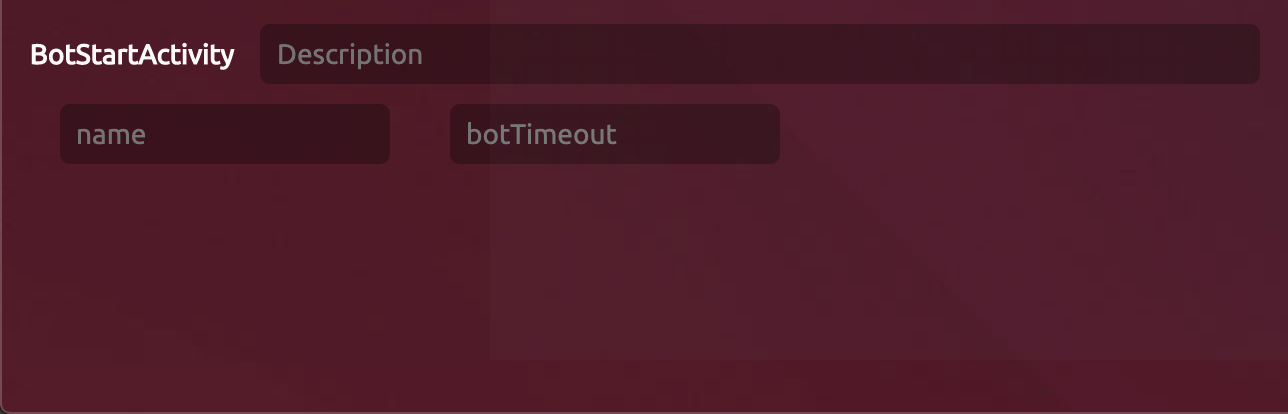 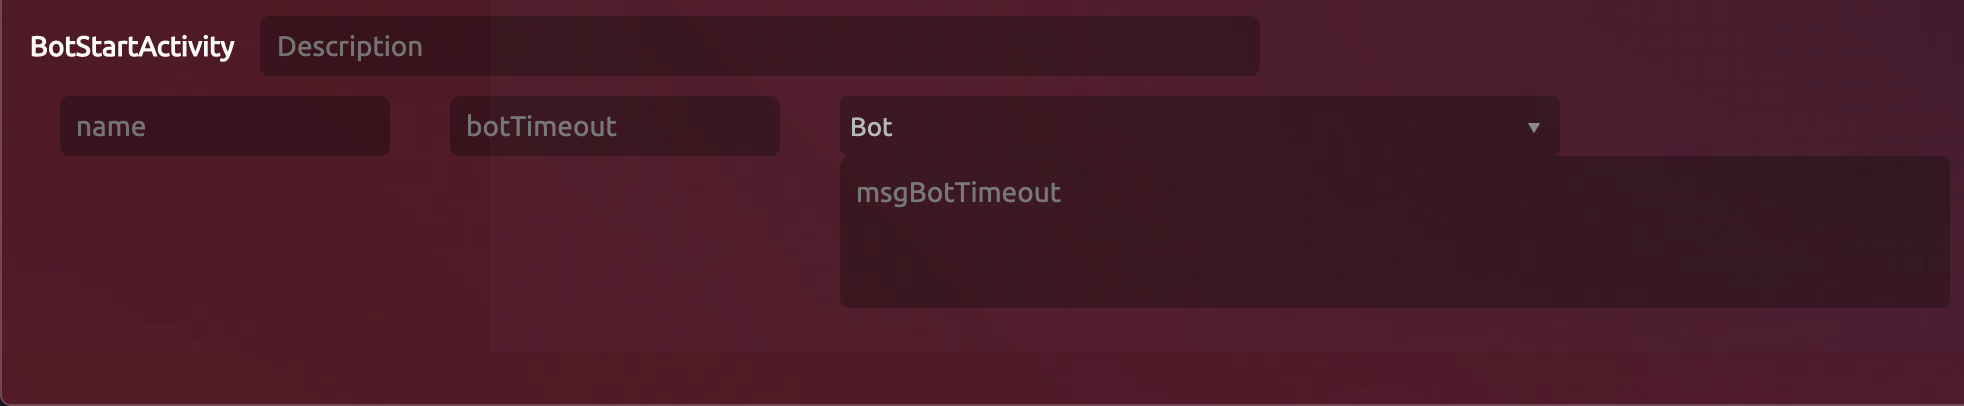
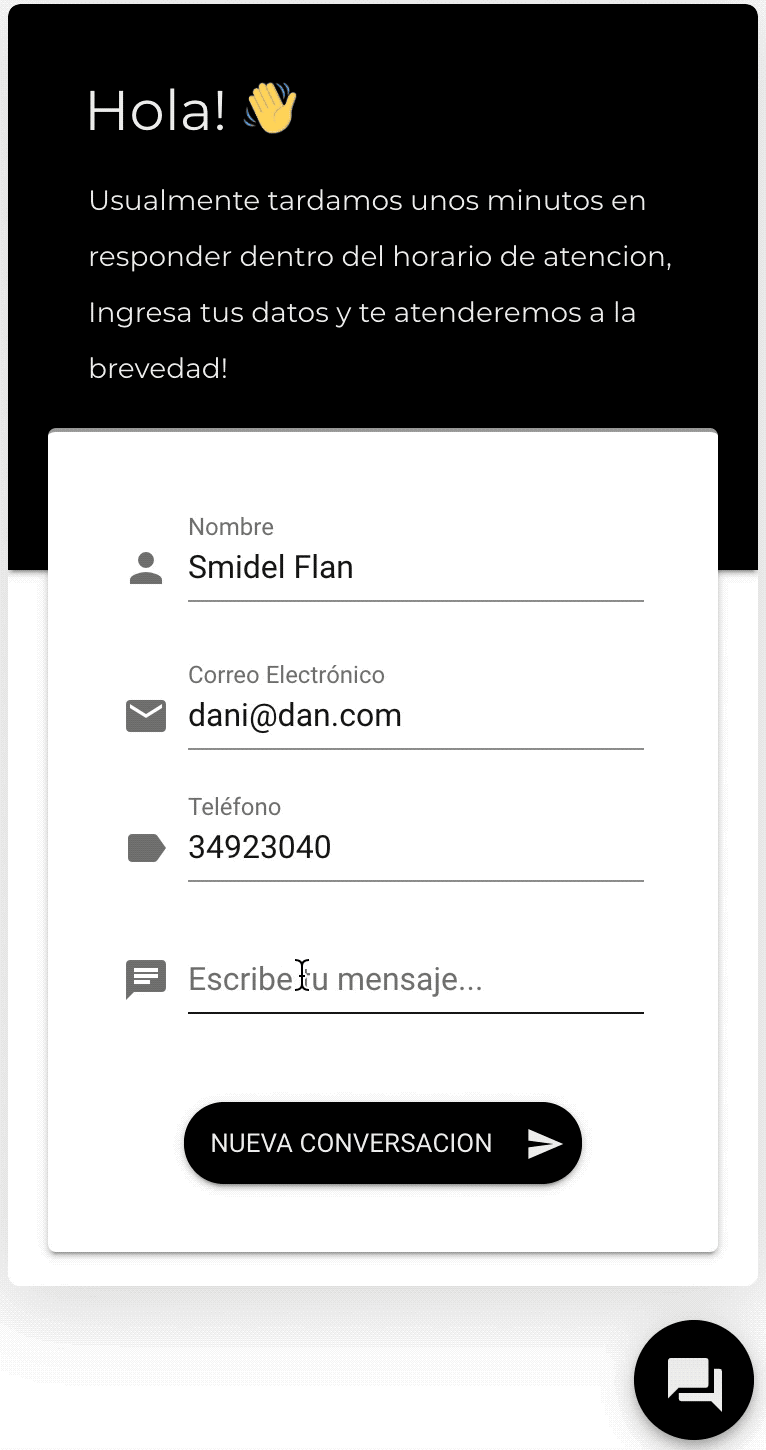
SendMessageWith this activity we will interact with the client, it allows to send a message after each time the client writes. This field can work in 3 ways Send a simple message To do this we simply write the message you want to send in the message field. 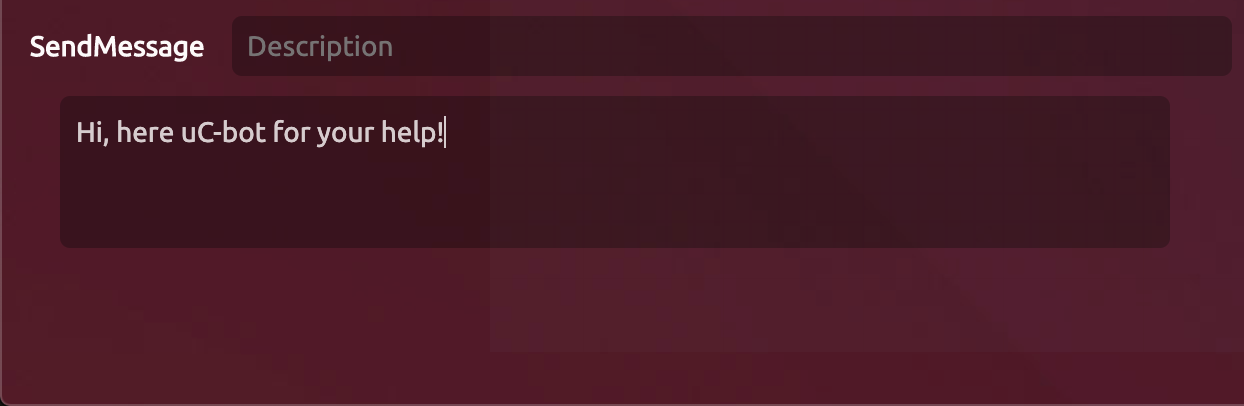
Send options After introducing yourself, you may want to give the client options and thus make decisions based on their response. To do this, you must write the options in the message field, indicating the option number and separating them with Enter. The customer receives the options to select. Send Message with results Other activities allow you to create and store data in variables, such data can then be used to show the customer. For example: 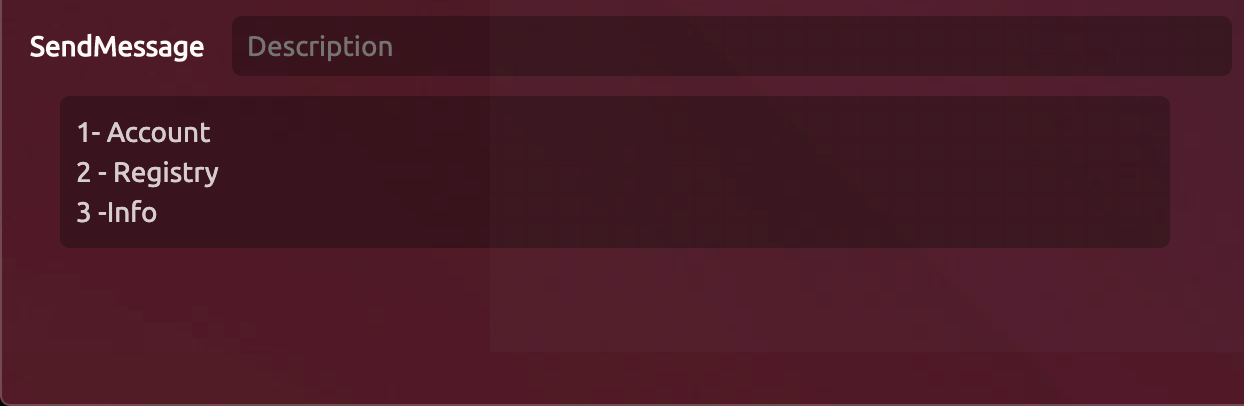
IsOnTime This action allows evaluating a response and activating a route or another depending on the time that is entered. Example: The client writes to the bot and selects to speak to an agent. After reading the response, you can decide to send it to one campaign or another depending on the time the interaction is.  
You can add more schedules by connect them with “&“ mon,tue,wed,thu,fri;09:00-18:00&sat,sun;10:00-13:00 Example: EvaluateEvaluate an answer and based on it decide one way or the other, evaluate can be chained one after the other in case we have multiple options and each one performs different actions. 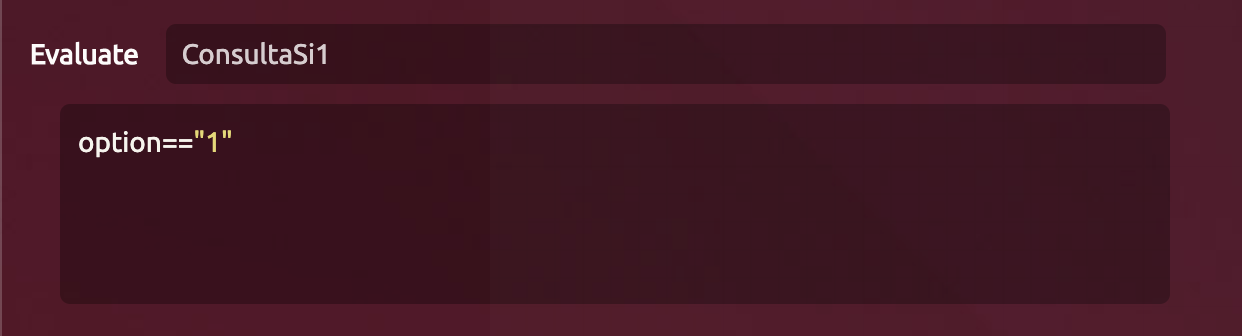 
ReadMessageWith this option the bot will read the response sent by the client and then be able to evaluate it or save it in a variable. 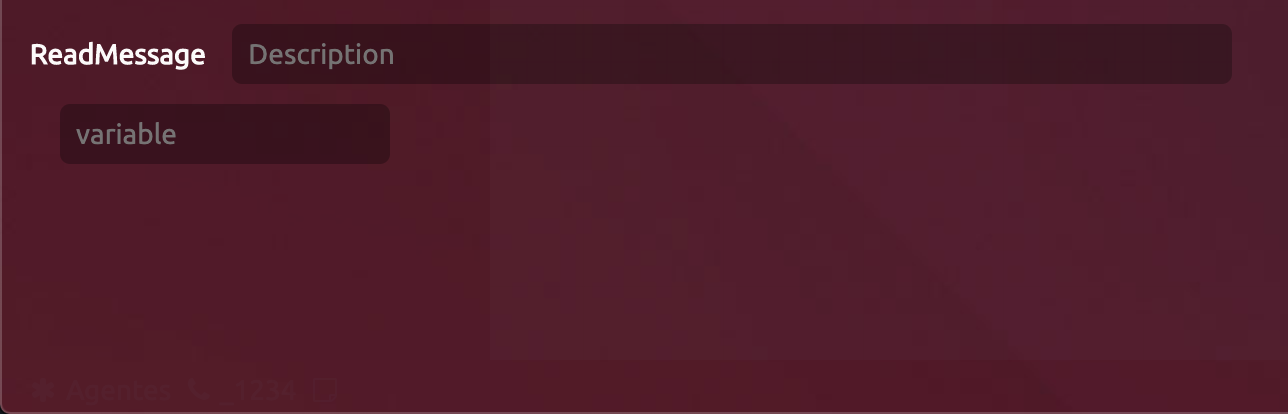 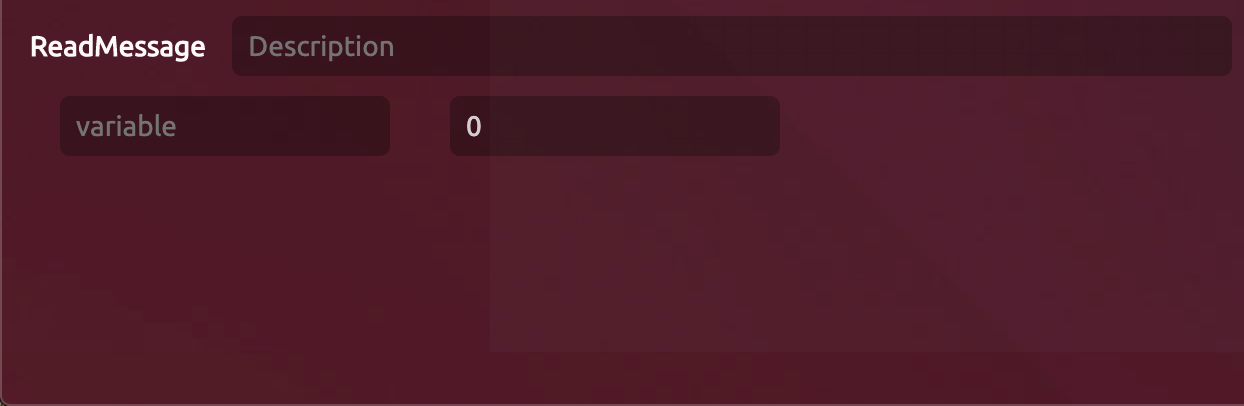
ReadFileMessageThis option is similar to the previous one except that it is used to save an image after requesting it and thus it will successfully reach the agentworkflow. ProcedureThis activity allows you to execute JavaScript code. For example, if you want to parse a response from a web service or increase the value of a variable, you can do it here. ExecWebServiceAllows to execute a Web Service  
ExecQueryHere you can query the database.  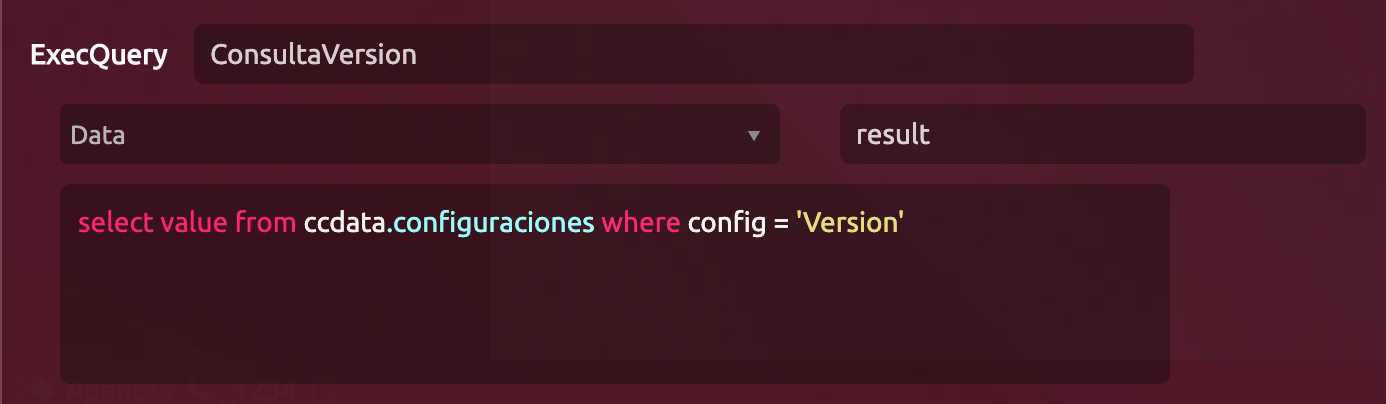
DispositionIt allows to create dispositions to the interaction with the bot, in this way you can track the interactions. The dispositions are inserted directly in the DB, therefore they do not necessarily need to be created in the system, even if they are created in uContact they will not execute actions such as schedule or respool.  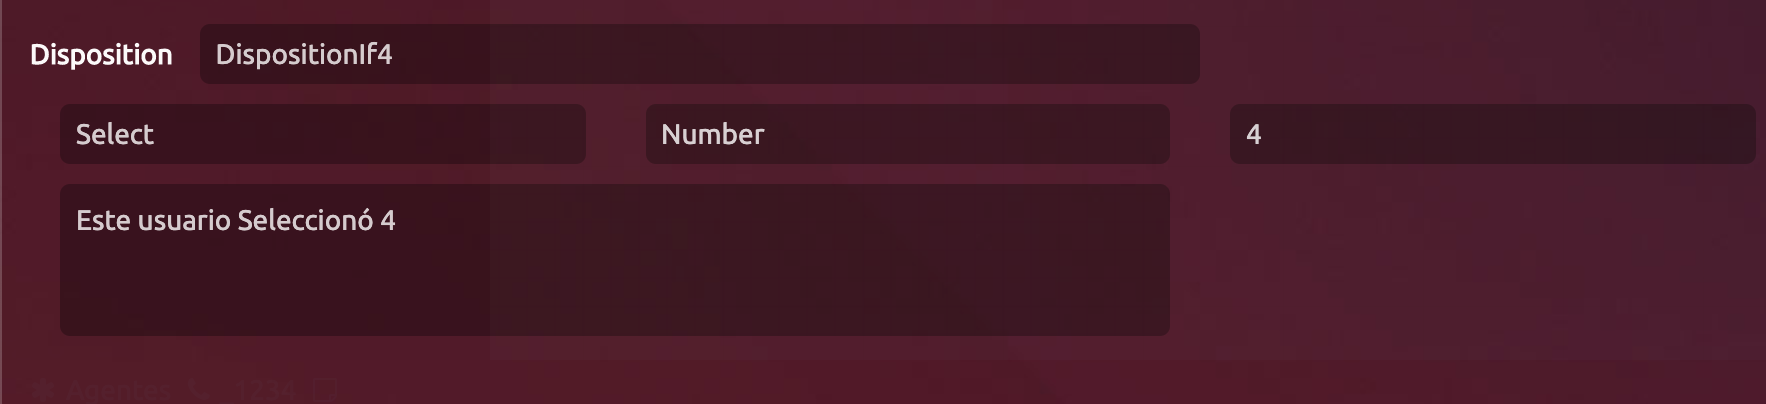 TransferBotWith this option you can transfer the interaction from a bot to a campaign on the same channel that is being used.  For it to run correctly, we must indicate the exact name of the campaign to which you want to transfer in the destination field.

LogOpAllows you to print a variable in the IntegraServer log. formato: 
formato:  FinishInteractionThis action must be at the end of each flow, it indicates to the bot that its flow has ended and closes the interaction with the client. 
SetClientNameThis activity takes the content of a variable and assigns it to the interaction's customer name and in turn assigns it to the bot's CLIENT_NAME global variable. 
Example:
SendAttachmentThrough this activity it is possible to send files to the client. 
Usage example: application/pdf|20200504/filename.pdf to send a file found in etc/IntegraServer/web/attachments/20200504/filename.pdf SendEmailAllows to send emails. 
The template variables can be replaced by other variables that we have in the bot even by global variables. |
| Expand | ||
|---|---|---|
| ||
There are customer data that are obtained from the interaction, they can be used in different activities. The global variables are: For all channels
Webchat
SMS - WhatsApp
Messenger
|
| Note |
|---|
|
See how to create your first bot flow or download an example flow and start working with them!

Bot Functions
Function bots are bots that are used as functions. Its purpose is to be able to modularize certain sections of the bots in order to facilitate their development, testing, and maintenance.
Function bots do not consume bot licenses and are uploaded to the server with the context 'botsFunction'.
| Info |
|---|
The context 'botsFunction' will not exist until the first BotFunction is created |
| Expand | ||
|---|---|---|
| ||
All bot activities can be used in BotFunctions, but they will start with BotFunctionStartActivity instead of BotStartActivity. BotFunctionStartActivityIn order to create a bot function, we have the BotFunctionStartActivity. 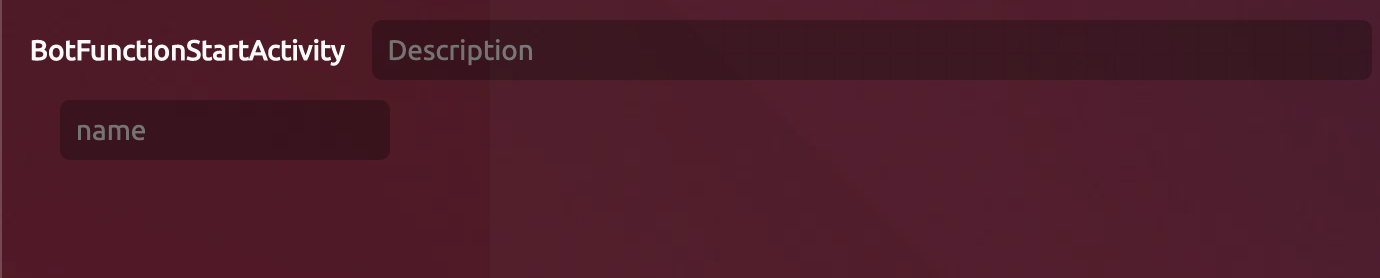 This activity, unlike the BotStartActivity, only has the 'name' field. In other words, the initial activity of a function bot does not have the 'bot_timeout' field, or the 'timeout_message' field, which means that the timeout that will be taken into account is that of the Bot that calls the function bot. GoToFunctionThis activity allows you to nest both bots and bots functions. Suppose that you have a bot named B and a function bot named BF and B has the GoToFunction activity and in the name field it has name = "BF" assigned. When executing the GoToFunction activity, bot B execution stops and BF begins to execute. After BF finishes executing, it will return to B to continue executing the following activities. It is in this way that it is possible to nest several bots or bots functions to an initial bot. 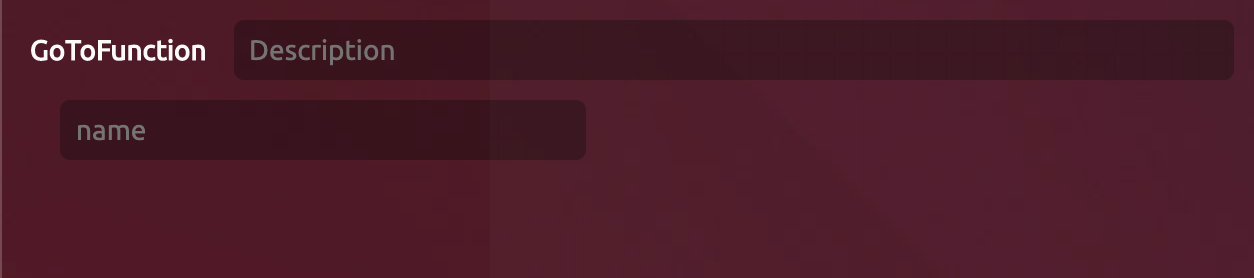
|

Bot Administration
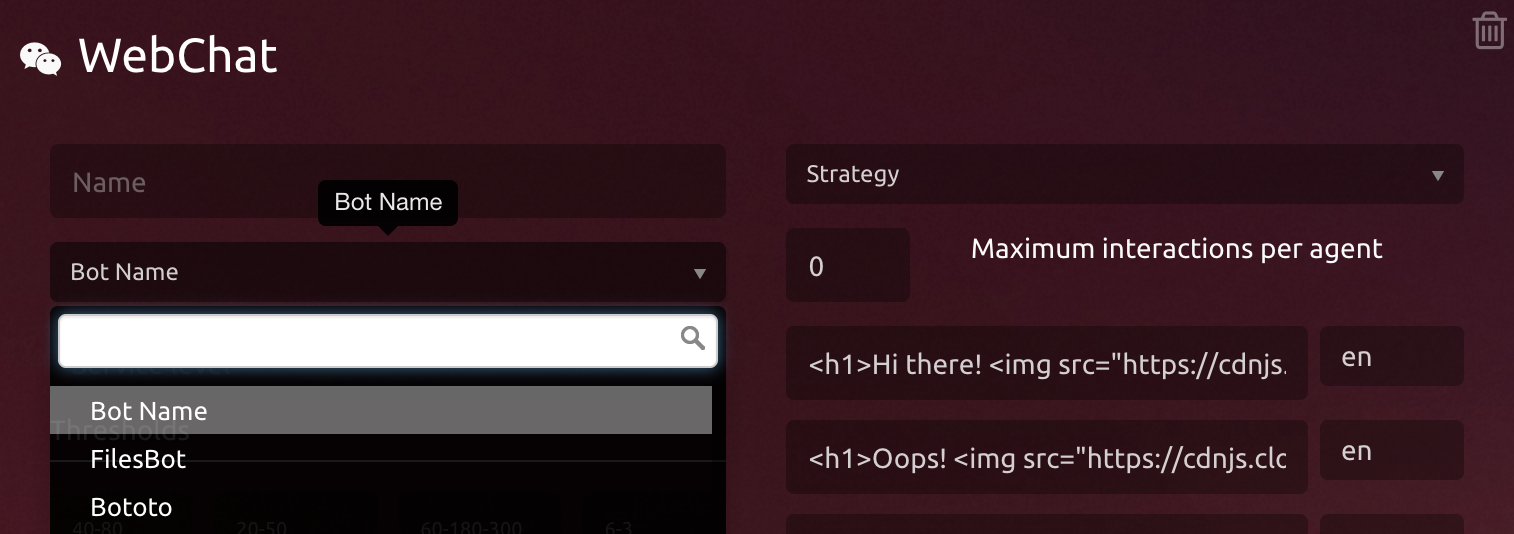
Since update 6.275 in the configuration of SMS, WebChat and Messenger campaigns we will see a drop-down menu called Bot Name, when it is displayed all the created bot flows will be listed.
After selecting the desired bot for the campaign, simply press the Save button and your campaign will start working with bots!
| Warning |
|---|
|
| Tip |
|---|
|
Create the first Bot
In this section we will see how to create a basic flow, as an example and practice, that contains the following actions:
Presentation - SendMessage
Options - SendMessage
Get reply - ReadMessage
Evaluate the answer - Evaluate
End interaction and make disposition - Disposition
Insert a user into a table - ExecQuery
Transfer to a campaign - TransferBot
Check the system version and save the variable - LogOp
Use the variable in a response and end the interaction - SendMessage
| Expand | ||
|---|---|---|
We will start by adding the BotStartActivity action and giving the bot a name. This name is the same name that will be shown in the settings drop-down menu. Then we will add two SendMessages that will be sent in a row. The first will be our presentation, in it we will warn the user to select one of the options that we will give him below. In the second we will give the options, making one per line and starting with number and hyphen. In this instance the bot waits for the client's response, for this we must add the ReadMessage activity and our flow will look like the following:  Now we will add the Evaluate to analyze the response obtained. We put 4 options so we will use 4 Evaluates. In each one we will indicate the condition that the variable must have for it to be valid For each option we will add its destination, that is, in the second and fourth Evaluate we will use ExecQuery and in the third a TransferBot. In the first ExecQuery we will write an insert, in the dropdown we select the database in which it is performed and in the variable we will put a name to use later in the response, in this case it is In the second, it will make a query for the version of the system, in the drop-down we select the database in which it is performed and in the variable we will put the same name to use later in the response, in this case it is In the TransferBot we will simply put the name of the campaign to which the client will be transferred. So far it only remains to add a SendMessage returning the response and followed by a FinishInteraction. Now it only remains to join our flows or adjust it to our needs by adding dispositions, logs or WS and they would have something similar to the following: 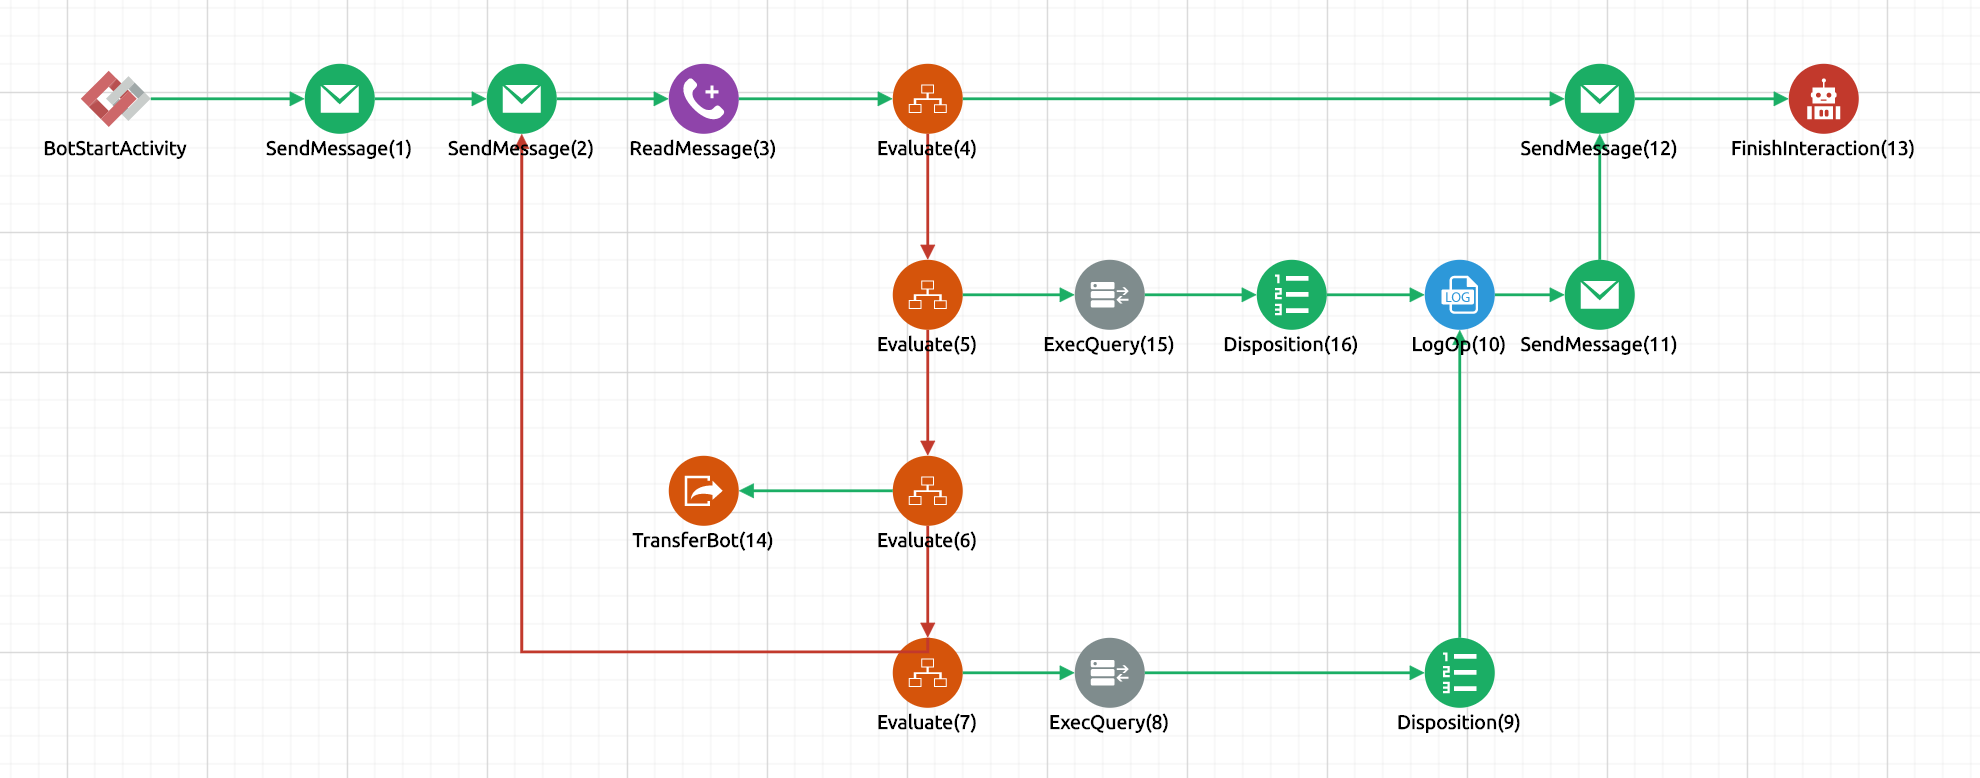
|
Simple bot example
| View file | ||
|---|---|---|
|
This is the introduction to Bots.
Soon we will add posts and videos about it.