| Table of Contents | ||
|---|---|---|
|
Configuration
Allows the user to create Email Campaigns.
Campaign Data
Campaign's name for identification purposes.
Is the calls percentage that were attended by the agent before a stipulated time.
Is
Email Management
To manage the configuration of the email campaigns in uContact, it is necessary to have a user with administrator permissions in the system.
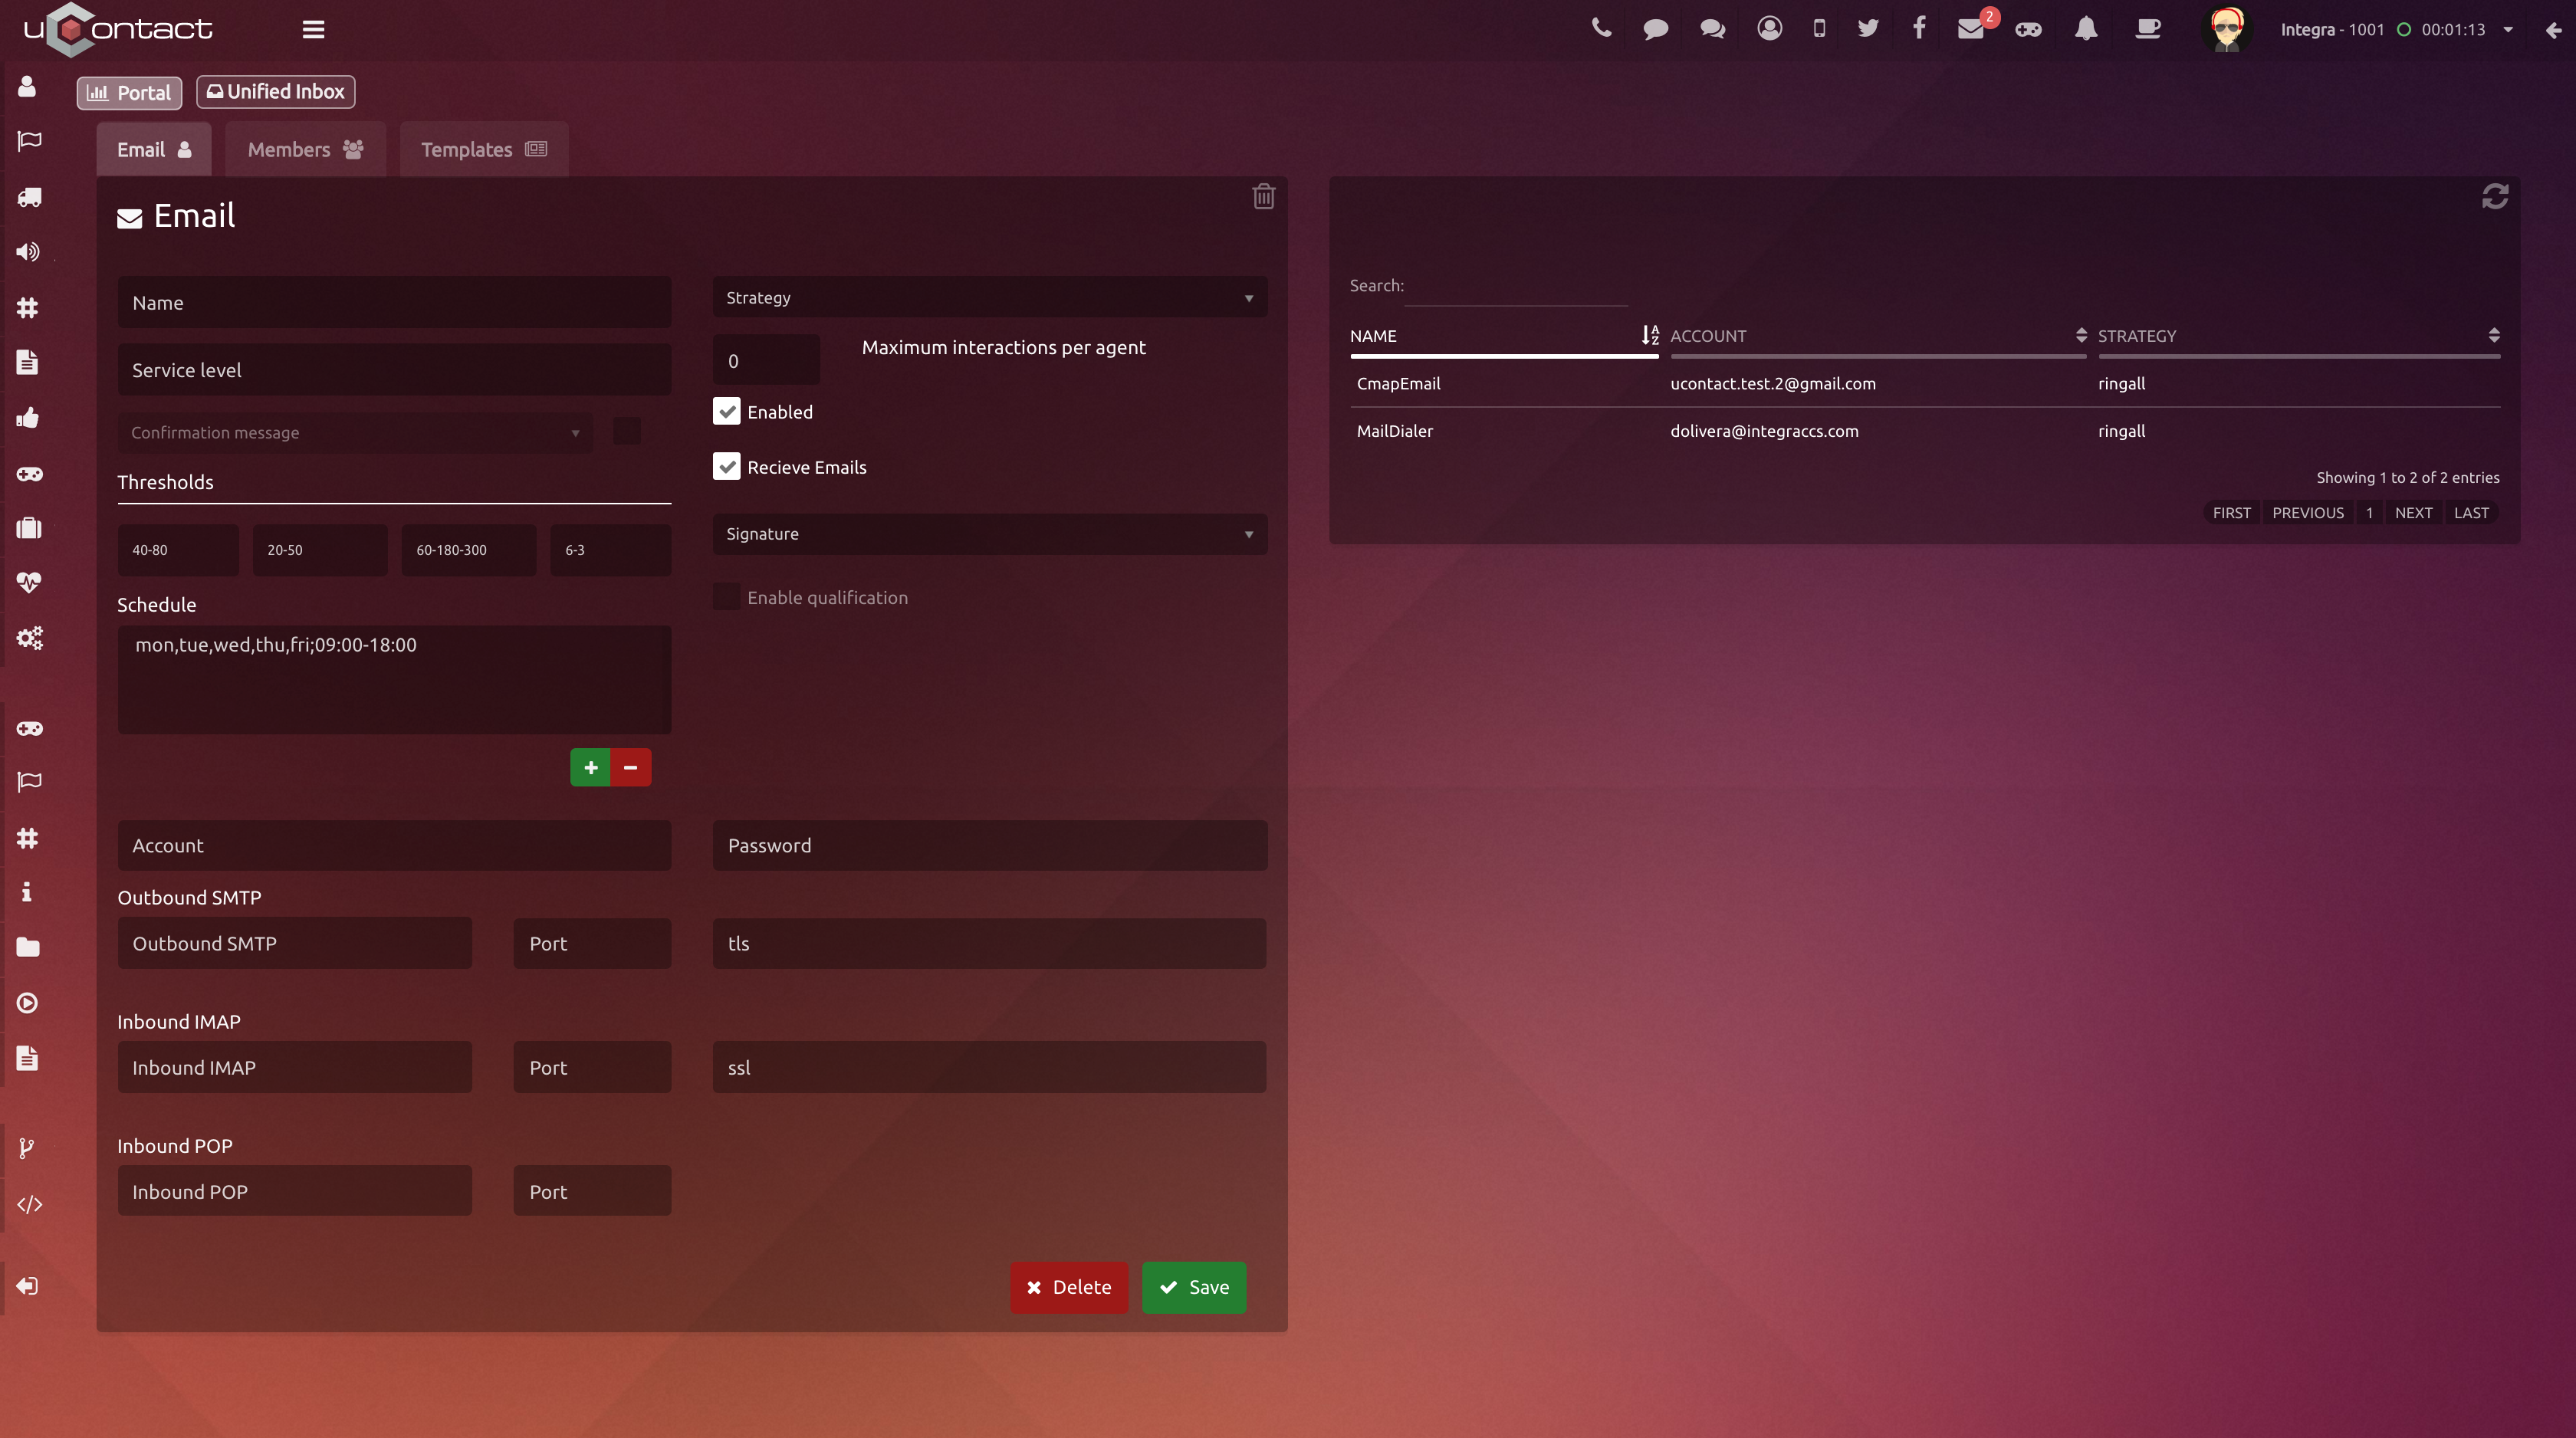
Basic email settings
Here you can create email campaigns.
Campaign data
Name
Name of the email campaign.Service level
It is the time in which the interactions that arrive at the campaign must be answered, if the waiting time is greater than that stipulated in the field, the level of service drops.Strategy
To know more about this, please visit StrategiesSchedule
It is the behavior that the campaign will have.
TimeFor more information on the different strategies.
Schedules
available
Schedule in which the campaign will be available, that is, with available agentsto handle
theinteractions.
To add a schedule configuration
you must add itis with the '+' button
and a new window will appear to add the schedule.
To delete a schedule, select itor remove a selected one from the list
and presswith the '-' button.
From name
It is the name with which the email account assigned to the campaign is displayed when it reaches the recipient.
Email Data
Account
Email account that is going to receive the emailsIt is the mail by which emails will be received.
Password
Account The password assigned to the account. If
this one it is
wrong written
the user incorrectly, it will not be
notified and possible to create the
campaign can not be created till the password of the account is rightnew campaign, the user will be warned in case this happens.
Outbound SMTP
Protocol for simple assigned email transferencetransfer of assigned mail. This is mandatory to send emails.
Inbound IMAP
Protocol for accessing internet messagesInternet message access protocol assigned. This is mandatory only if Receive Emails is active.
Port
Designated port numberPort number assigned for each protocol.
| Tip |
|---|
To finish the creation process, the user must click |
the "Save" button. |
| Expand | title | Parameters Details
|---|
Advanced Settings
These parameters already have a default value for the
proper functioningcorrect operation of the campaign.
To
see more about its function visit Important concepts - OmnichannelMaximum Interactions per Agent
Limits the amount of active interactions the agent can get. The rest of the interactions wait in queue.
The system can have a non working Email campaign, without the need of deleting it entirely and lose information. If
learn more, go to Conceptos importantes - Omnicanal.
Parameters
Maximum interactions per agent
The number of interactions of this campaign that the agent can have at the same time. It is only required for the nocall strategy.
Enabled
If it is checked, the campaign can be used.
Receive Emails
If enabled, emails
sent to the configured email address will
enter the systembe queued as an interaction to the portal. In addition, the IMAP and POP fields will be mandatory. If this checkbox is empty, the campaign will not require incoming ports and will not receive emails either, but it will be able to send.
Signature
Within the Templates section, a
new onesignature template can be
configured and used as a signature that will becreated and assigned here. When an agent
respondsanswers/
sends and email through the specificcomposes an email via this campaign, the assigned signature will
loadbe loaded automatically.
Enable qualification
When this
check is active, it enables two more fields that
will beare used to configure the
ratingqualification of
eachoutgoing
email generated in the campaignemails.

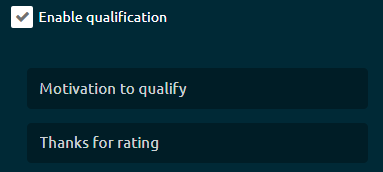
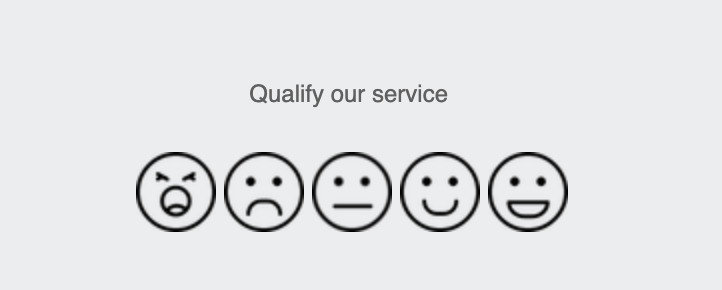
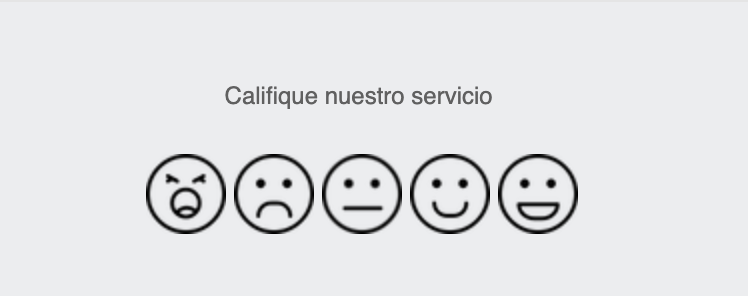
Motivation to qualify
This is the title of the
rating, an example could be '
Rate our service' and it will be
right above the rating icons.
Thanks for rating
Clicking on this field
will
show us a modal to
compose a thank you message that
is shown to the
customer after
rating.
| Rw ui textbox macro | ||
|---|---|---|
| ||
Once we have everything configured and saved, when an email is sent through this campaign, the recipient will be able to qualify it. |
These metrics to campaign statistics in real
Thresholds
They are metrics to carry out the statistics of the campaigns in real-time, they are measured in time (seconds).
Confirmation
Messagemessage
If this
boxfield is activated
with the check box next to it, the campaign can have a Template adjudicated. This one will work the following way,, a Template can be assigned to the campaign. It will work as follows: when a client sends
a mailan email entering through that campaign, the client will
getbe answered with an automatic
mailemail containing the
template adjudicatedawarded Template, and
anthe agent within the campaign will
getstart the interaction.
Maximum interactions in queue
The number of maximum interactions in the queue.
Encryption/Security
The user has three different options
: TLS, SSL
y, and SMTP.
Example forGmail
settings example:
Outbound SMTP
Ports
smtp.gmail.com
587
Inbound IMAP
imap.gmail.com
When the three options are correctly configured, the status of this one will be green, on the contrary will be red, indicating that fields must be checked and corrected.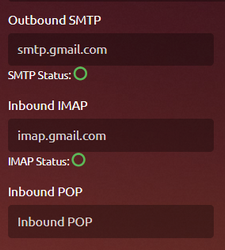
993
Outlook settings example:
Outbound SMTP Ports
smtp-mail.outlook.com 587
Inbound IMAP
outlook.office365.com 993
Once the campaign is created, this one will appear in the list it will be displayed on the right side of the screen.
If This way, if the user selects a campaign from there, all its data will load in the section of it, the data of said campaign will be loaded in the fields of the section on the left, so enabling the user can always to modify itthe campaign.
| Rw ui textbox macro | type |
|---|
| Tip |
Apart from that, the The campaign can be deleted by selecting it and clicking on the "Deleteremoved from the system when selected by clicking the "Remove" button. |
Members
In order to To add or delete agents from a campaignremove agents to campaigns, the user must go to the Members on section at the top left cornerof the setup screen.
Add
Membermember
In the Campaigns column, select one or more campaigns to which you want to add or remove members.
We select one or more agents from the Agents column and press Add.
In the Members column, we will see the agents added to the campaign.
| Rw ui textbox macro | ||
|---|---|---|
| ||
To see more about this screen go to Members - Omnichannell |
| Rw ui textbox macro | ||
|---|---|---|
| ||
| Note | ||
IMPORTANT |
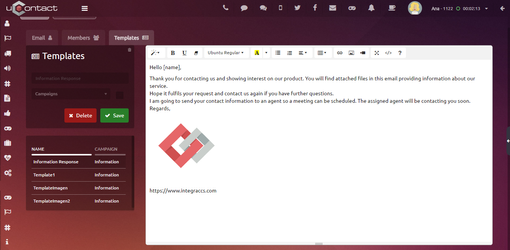
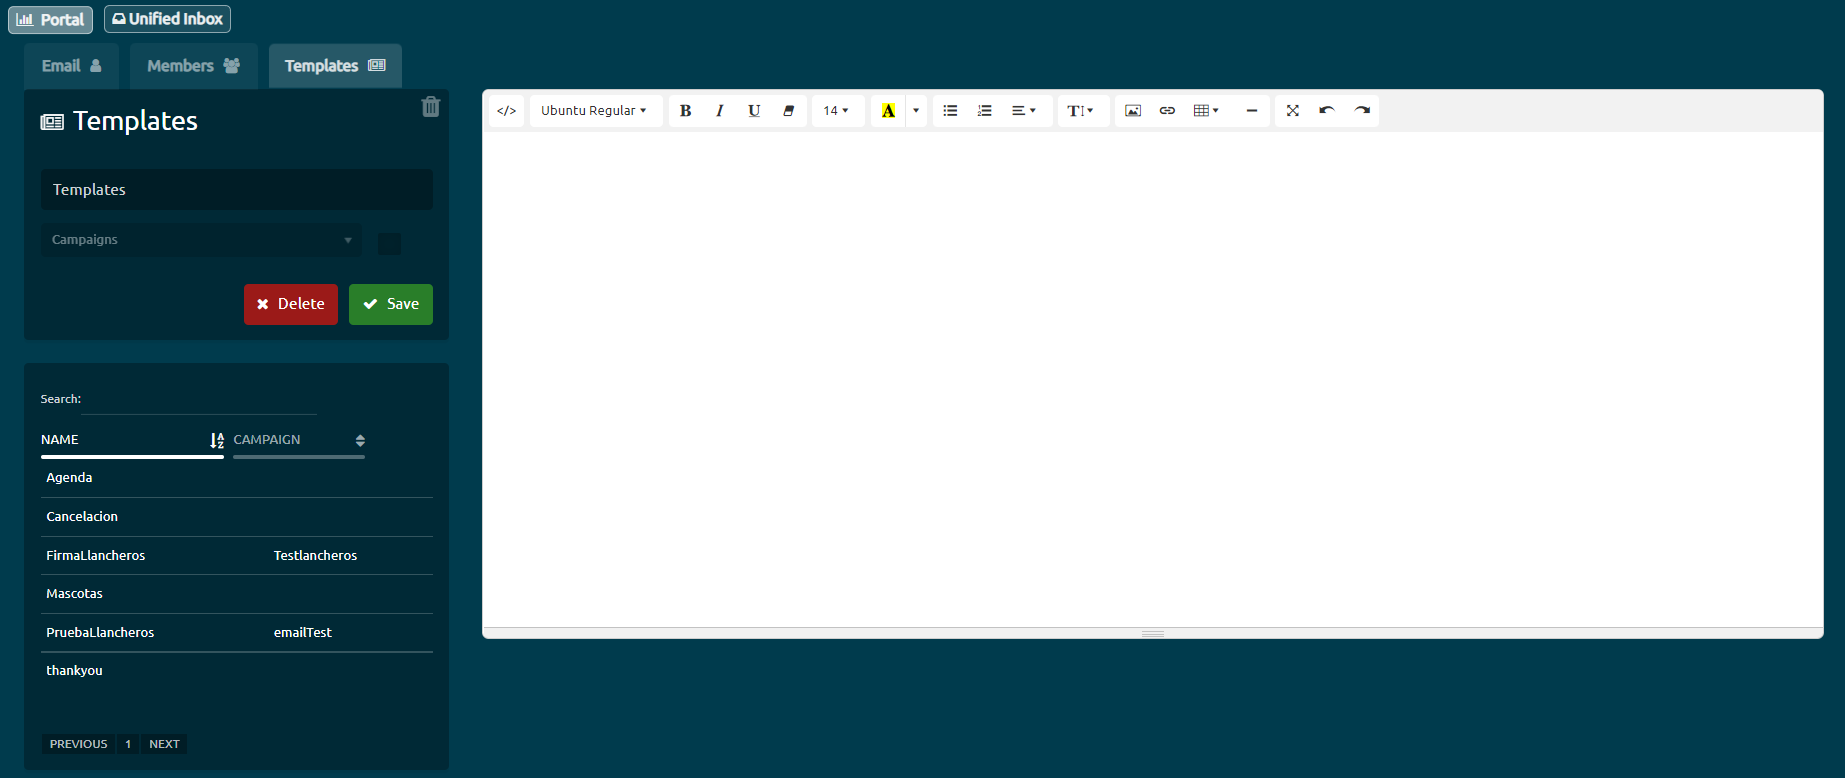
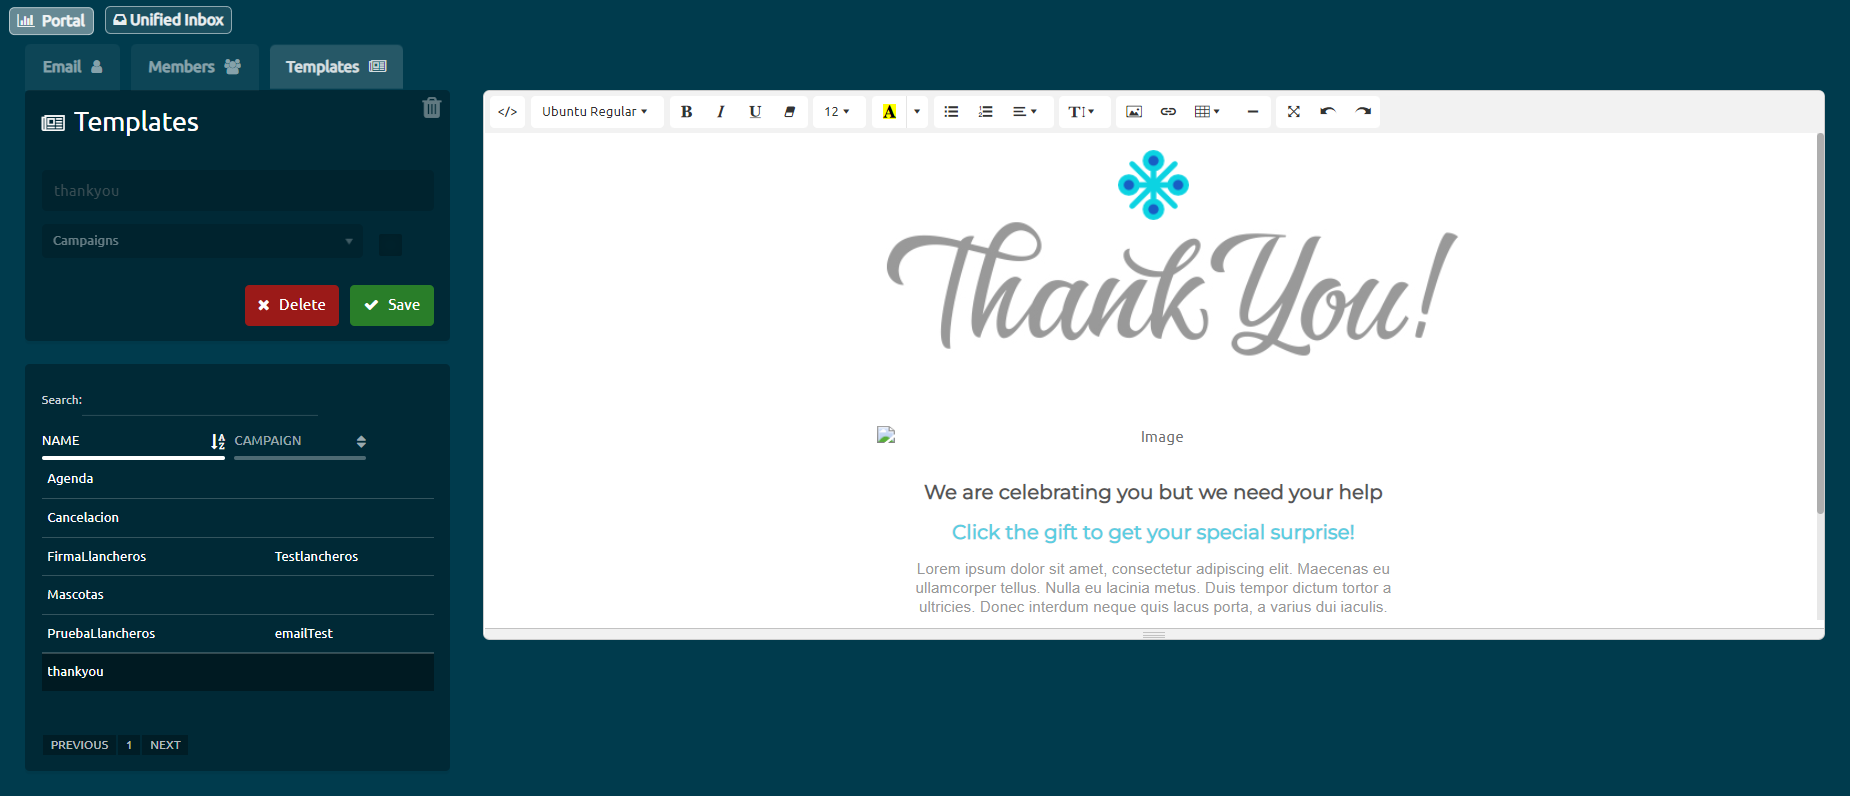
Templates
Easily design your own Templatestemplates.
Each one of this is these can be assigned to a specific campaign.
How to create a template?
To create a new
Templatetemplate, the user must specify
itsthe name
onin the
top boxupper field and the campaign
assigned to this one on the bottom boxin the lower one, which is optional by
checking the boxactivating/deactivating the same with the checkbox next to it.
In case
the template is created without an assigned campaign, the template will appear for
every campaignall the campaigns in the system.
If the user wants to edit an already existing
Template, first of all select this onetemplate, they must select it from the table
belowand
the template will appear ready to be modified.Agent
This is how the agent uses Email in the portal.
| title | Start email interactions |
|---|
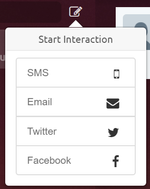
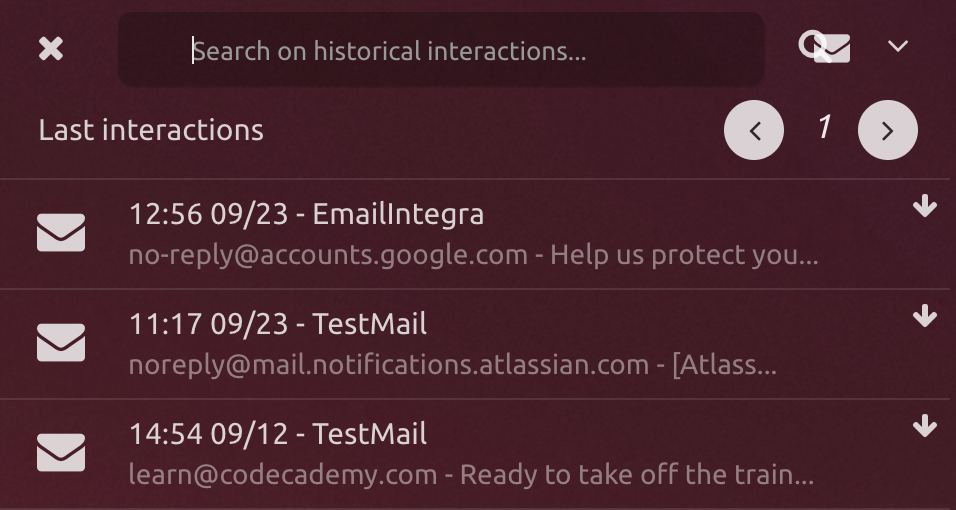
Next to this searching box, there is an icon where the user can easily start interactions.
The following box will unfold:
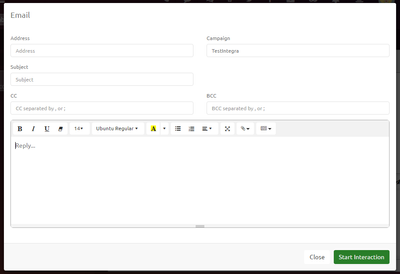
And inside the Email option:
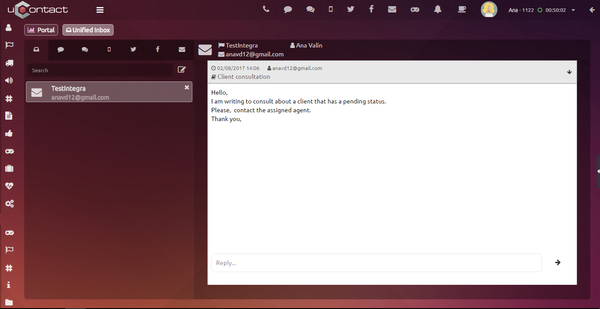
The agent will have on his Inbox the Email with which she/he started an interaction.

This Email will unfold on the right side of this section, showing its history of conversation and the client's information:
- Email Campaign's name
- Client's Email
- Client's name
When the user opens up the email, this one can be answered to the same user that sent it, or Forward it to as many other users as the person wants.
| Expand | ||
|---|---|---|
| ||
In section on the left, the user has an interaction searching box.
Can search by campaigns name, client's email, subject and client's name.
|

| Rw ui textbox macro | ||
|---|---|---|
| ||
An email can be forward, by clicking on the arrow icon next to the answering box.
|
Supervisor
Monitoring
Here the statistics in real time are shown.
| Expand | ||
|---|---|---|
| ||
Left down table
Right down table
|

| Expand | ||
|---|---|---|
| ||
When an agent has an active interaction, the supervisor can click on it an the following options will appear:
|

Recording
In this section, the supervisor will see every Email chat interaction.
| title | Search Recordings |
|---|
Parameters for filtering
- Start date
Start Date Search Email recordings . - Final date
End of recordings that we get from the search. - Email
E-mail client we want to find . In this field you can put a part of the mail and the search will be the same. - Subject
Inbound mail subject. - Campaign
Select the campaigns Email available on the list. - Agent
Select the agents who attended the Email.
Email Viewer
When the user clicks on one of the mails, the following opens up:
| type | tip |
|---|
 , lets the user print the selected email
it will deploy so that the user can modify it.
Email Dialer
Allows sending emails in bulk.
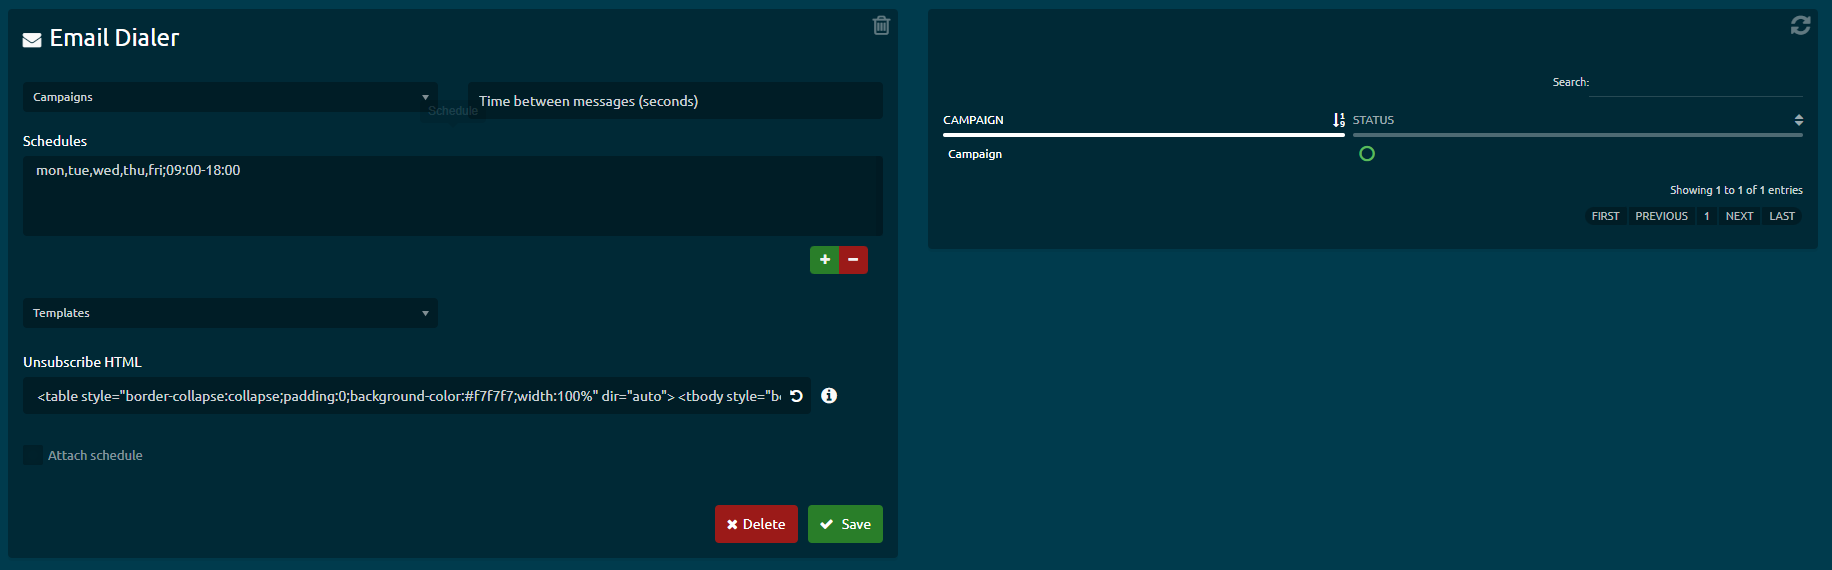
How to create email dialers?
To create a dialer, the user must fill in the next fields:
Campaigns: All email campaigns will be listed and one of them will be associated with the campaign to be configured.
Time between messages: It will indicate the time, in seconds, that it takes to enter a new interaction after having finished one.
Schedules: Schedule a date on which you want the dialer to work. As an example, you can set the dialer to work from Monday to Friday from 1:00 p.m. to 6:00 p.m., which will start dialing if it is within the established schedule.
Templates:
A template already created will be awarded in the Templates section of Email campaigns.Unsubscribe HTML:
The unsubscribe link is a programmable HTML component that gives users the option to stop receiving further emails in the future. For correct operation, the following tag should be inserted in some part of the code: <a id="unsubscribe_link">Text to show</a>Attach schedule:
The user will be able to attach an event in the mail. The following will be displayed to configure it:
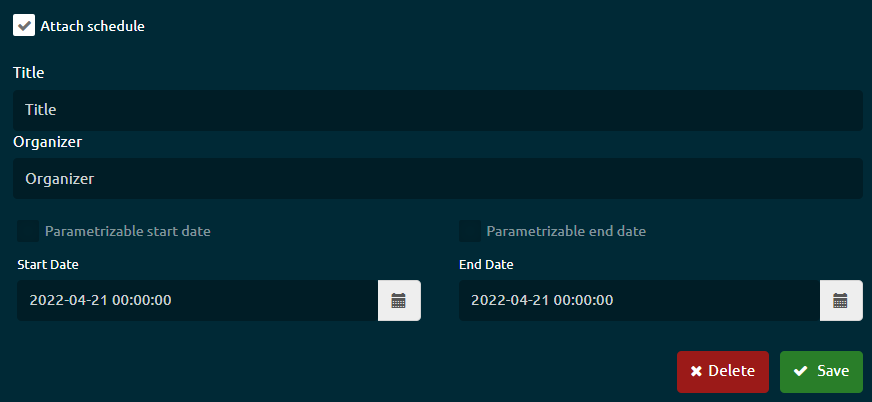
Title
Name of the event. The event title can also contain parameterizable variables, the latter will be the variable detailed in the .csv uploaded for the dialer. Example: ${variableName}Organizer
Detail of who organizes the event. The name of the event organizer can also contain parameterizable variables, the latter will be the variable detailed in the .csv uploaded for the dialer. Example: ${variableName}Parametrizable start date
You can choose a start date using parameters. The latter will be the variable detailed in the .csv uploaded for the dialer. Example: ${variableName}Parametrizable end date
You can choose an end date using parameters. The latter will be the variable detailed in the .csv uploaded for the dialer. Example: ${variableName}Start date
Using the calendar, a start date will be selected.End date
Using the calendar, an end date will be selected.
Email lists
Lists for email dialers are uploaded and managed on this screen.
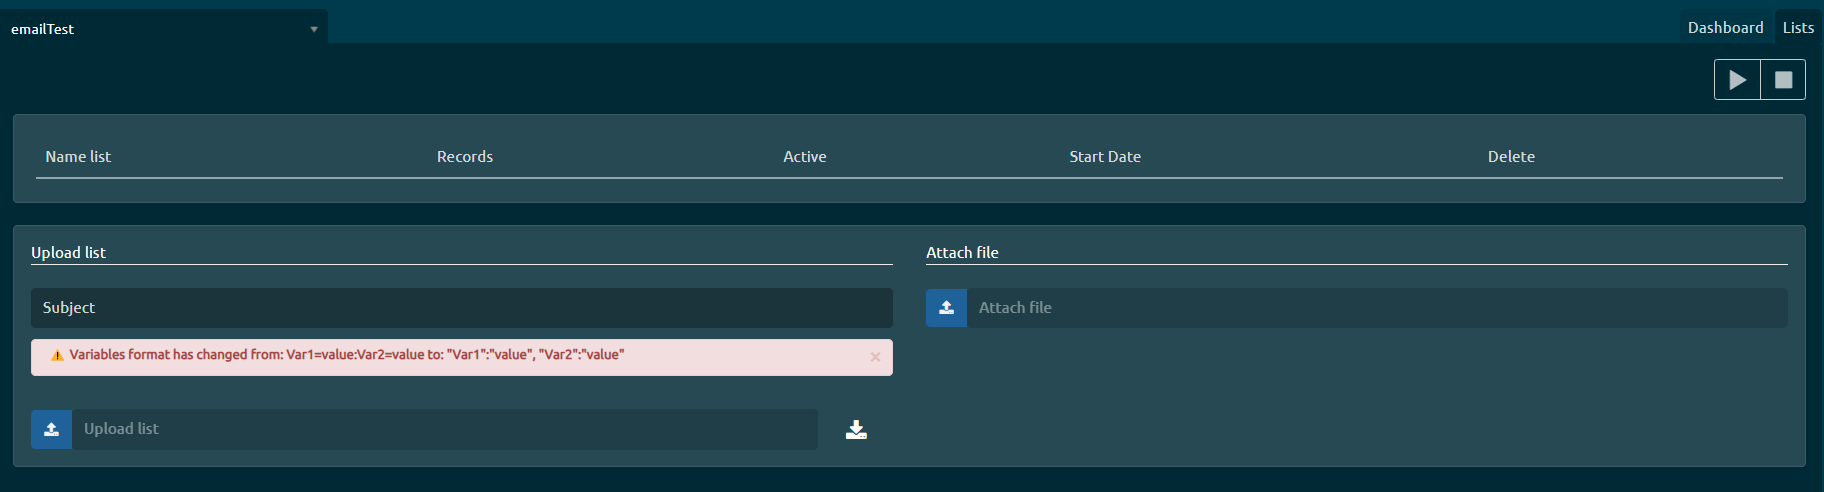
Subject
The subject with which the dialer mails will be sent is detailed.
Upload list
A .csv file can be uploaded as a massive contact record to send the desired email.
| Info |
|---|
The csv to upload must have the following format:
For example:
|
The campaign parameter should match the name of the email dialer campaign for which the record will output. (Mandatory)
The recipient's mail must be valid, otherwise, when the dialer starts, it will not be sent and therefore it will be marked as failed. (Mandatory)
You can write the message you want to send. If it is not specified in the list, then the template associated with the dialer will be sent, if one exists, otherwise it will be an empty message.
In case you want to add attachments, you must first upload the attachment in the Attach file section of the screen. Once the file is uploaded, a text will appear that must be copied and pasted in this division of the CSV to upload.
The variables will represent the generic fields in the associated template. When the mail is sent, these variables will be the ones that will be replaced by the values indicated in this parameter. The generic fields in the template must be indicated as follows:
Hello ${name}, where name will be the name of the variable. The values of the variables must be separated by a comma and must be written as follows: "nameVariable1":"value,"nameVariable2":"value".
If the priority is not specified, it will default to 9999.
| Info |
|---|
A .csv file can be downloaded as an example of the structure to upload the lists. |
In the upper right corner, we will see a Play button to start the dialer and a Stop button to stop it.
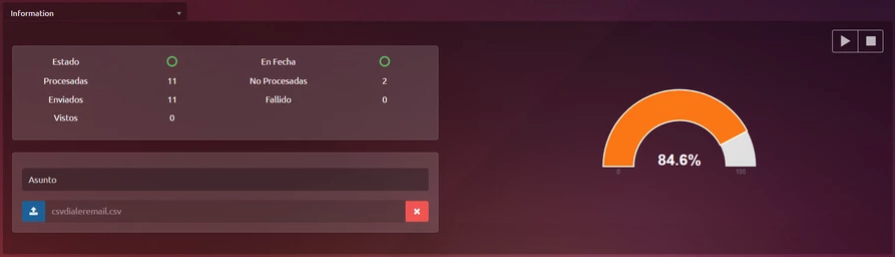
When the dialer starts, a graph will appear indicating the percentage of processed emails.
When it reaches 100%, all existing emails in the registry will have been sent.
Email Supervision
Monitoring of email campaigns
Here you can see the statistics in real-time of the Email campaigns.
Information on screen
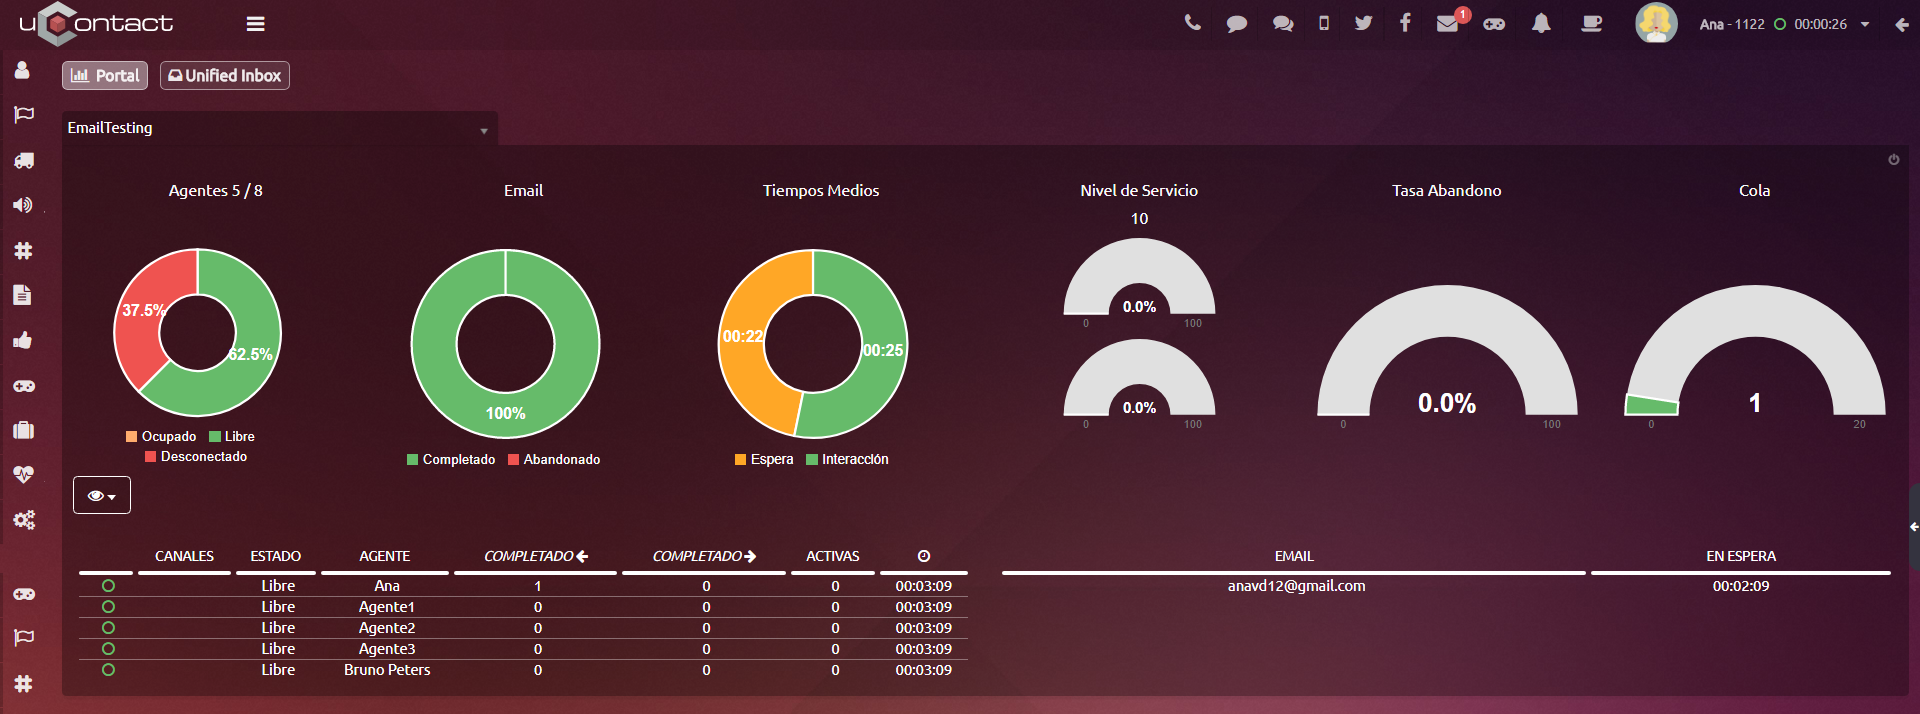
Lower left table
The table in the lower-left section shows:
Icon: Agent status icon. Along with the status, an icon may appear: in case the agent is on a call, a phone will appear; and if the agent is on break, the image corresponding to that break will appear.
Channel status: If the agent finds an active interaction, depending on the channel, its corresponding logo will appear: SMS, Webchat, Email, and Social Networks, among others. They can appear together if it is the case.
Status: Agent status in real-time. The status can be Disconnected, Busy, Free, Free on break, and Busy on break (break being any of the available ones).
Agent: Agent name.
Completed: The number of Emails completed by the outgoing and incoming agents.
Active: Indicates the interactions that the agent keeps active.
Time: Time since the agent's last status change.
Lower right table
The table in the lower right section shows the data of the email clients that are waiting:
Email: Email with which the customer sent the interaction.
On hold: Time the customer has been waiting to be answered.
Actions with agents
When clicking on an agent with active interaction, the following options will be displayed:
Spy
The supervisor will be able to view in real-time the emails exchanged between the agent and the client.Monitor screen
Allows you to view the agent's screen in real-time. To see this button, the monitor screen option must be enabled in Configuration - Agents.Info
It displays a window with all the information about the agent.Pause
The supervisor will pause the agent's session, preventing the entry of interactions.Chat with agent
It gives us the possibility to send a message to an agent.Log out agent
The supervisor will be able to log out the agent from the portal. The agent must enter his username and password again to be able to enter and continue working.
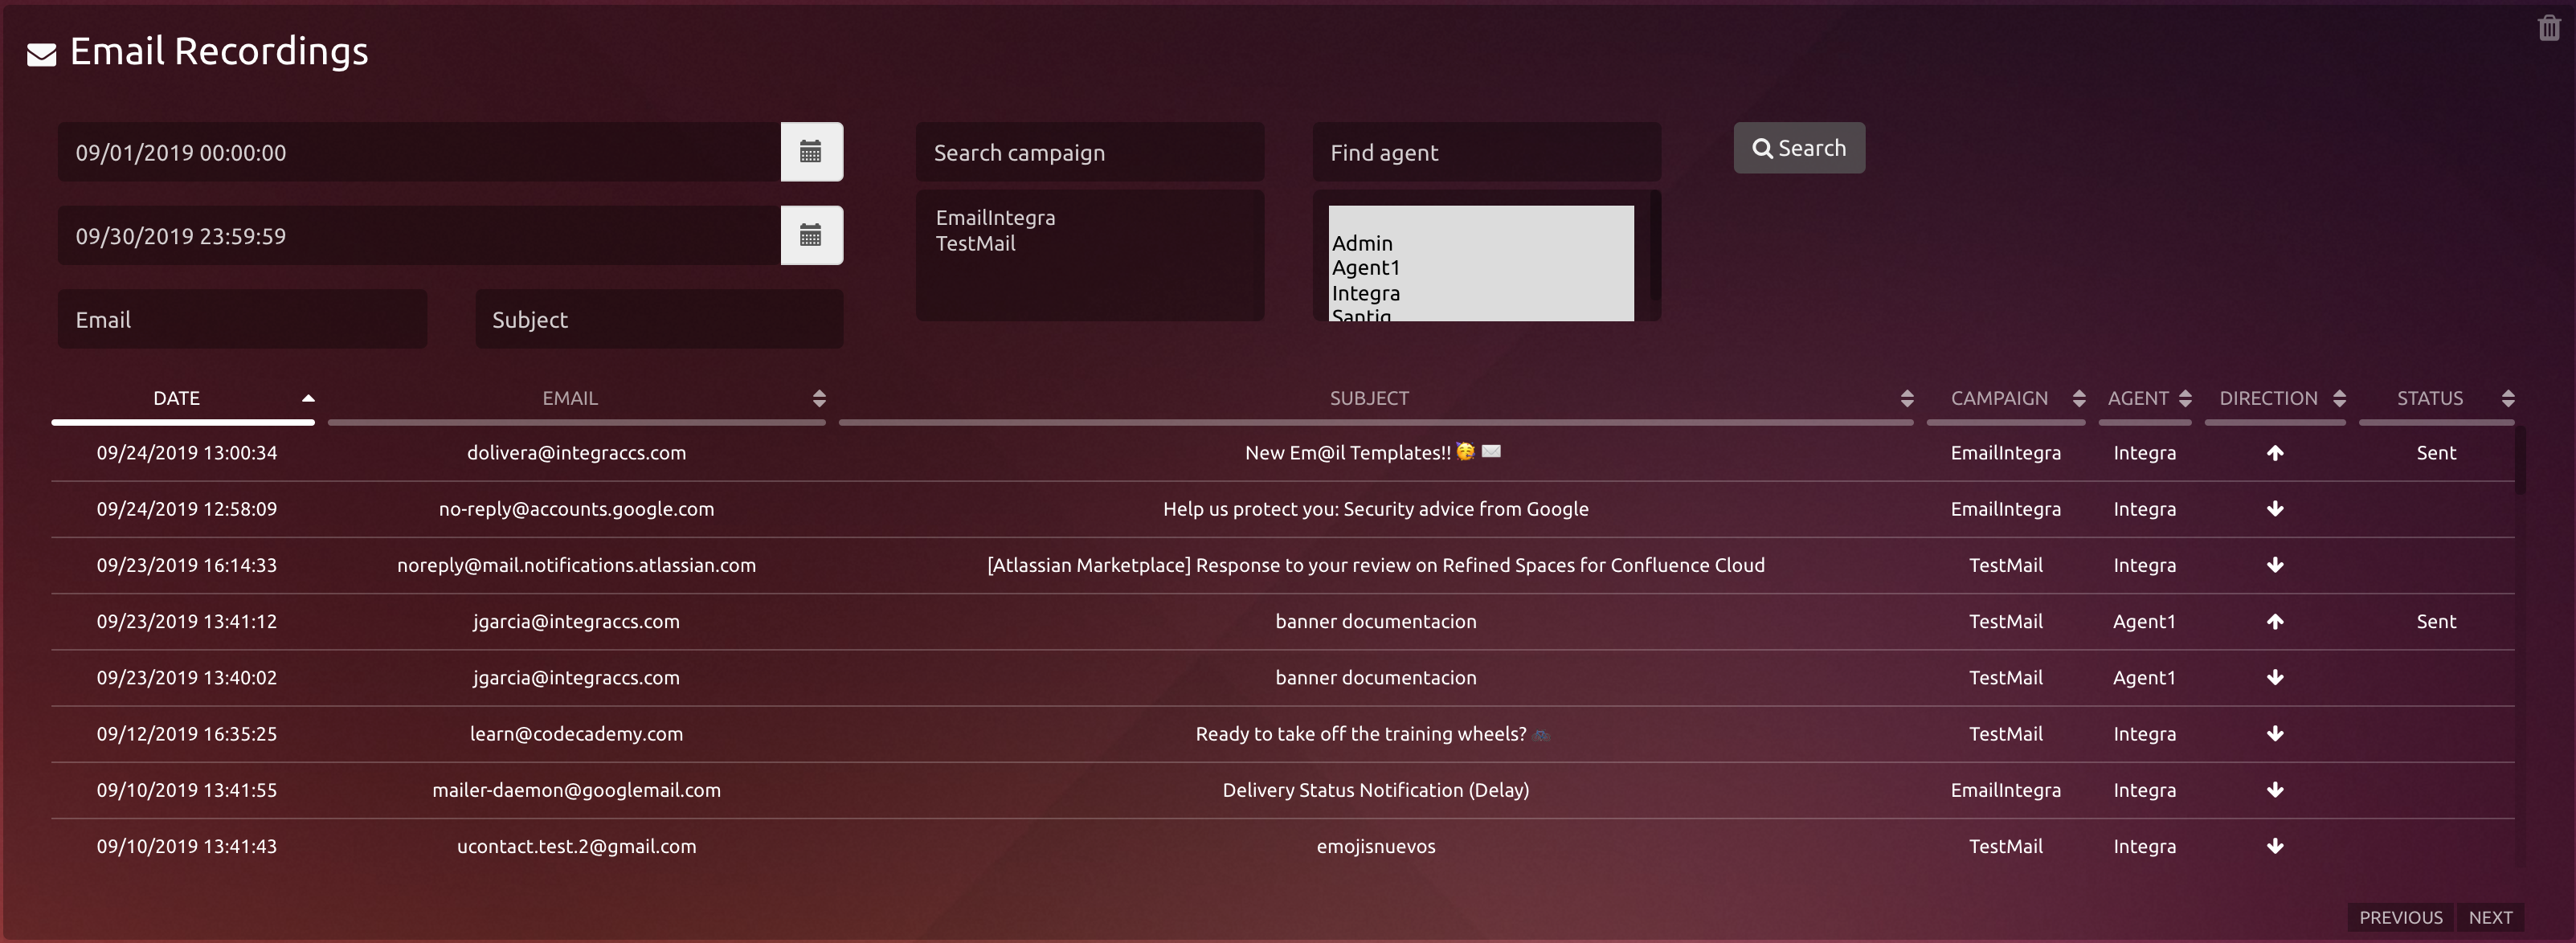
Email Recordings
In this section, you can see all the email conversations.
Recordings search
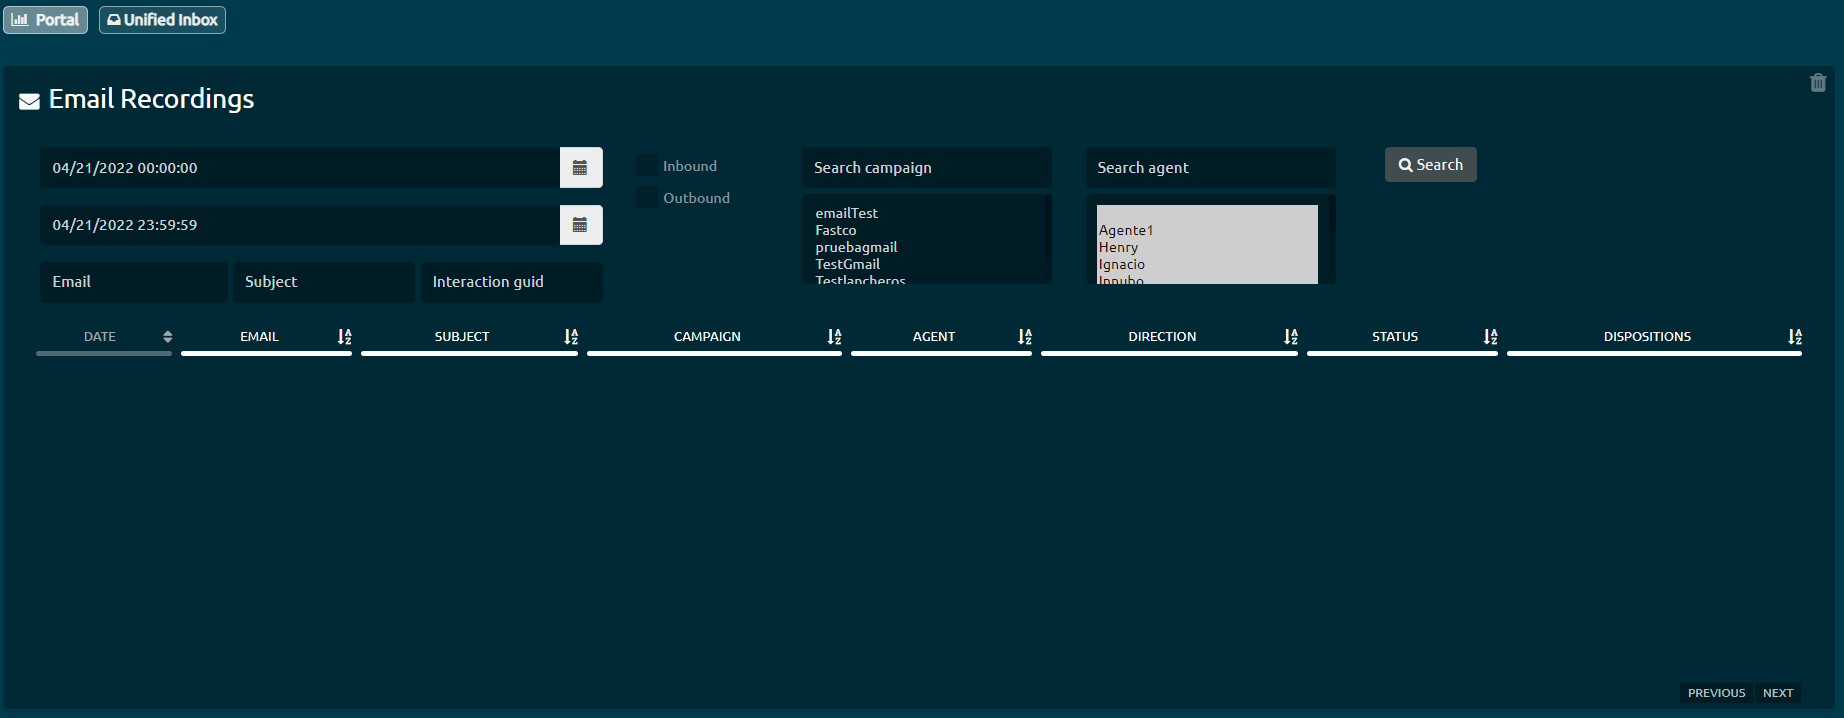
Filter parameters
Start date: Date from which you want to start the search for Email recordings.
End date: Date until which you want to obtain the Email recordings.
Email: Incoming Email address.
Subject: Subject of the incoming Email.
Campaign: Select Email campaigns from those available in the list.
Agent: Select the agents that answered the Email.
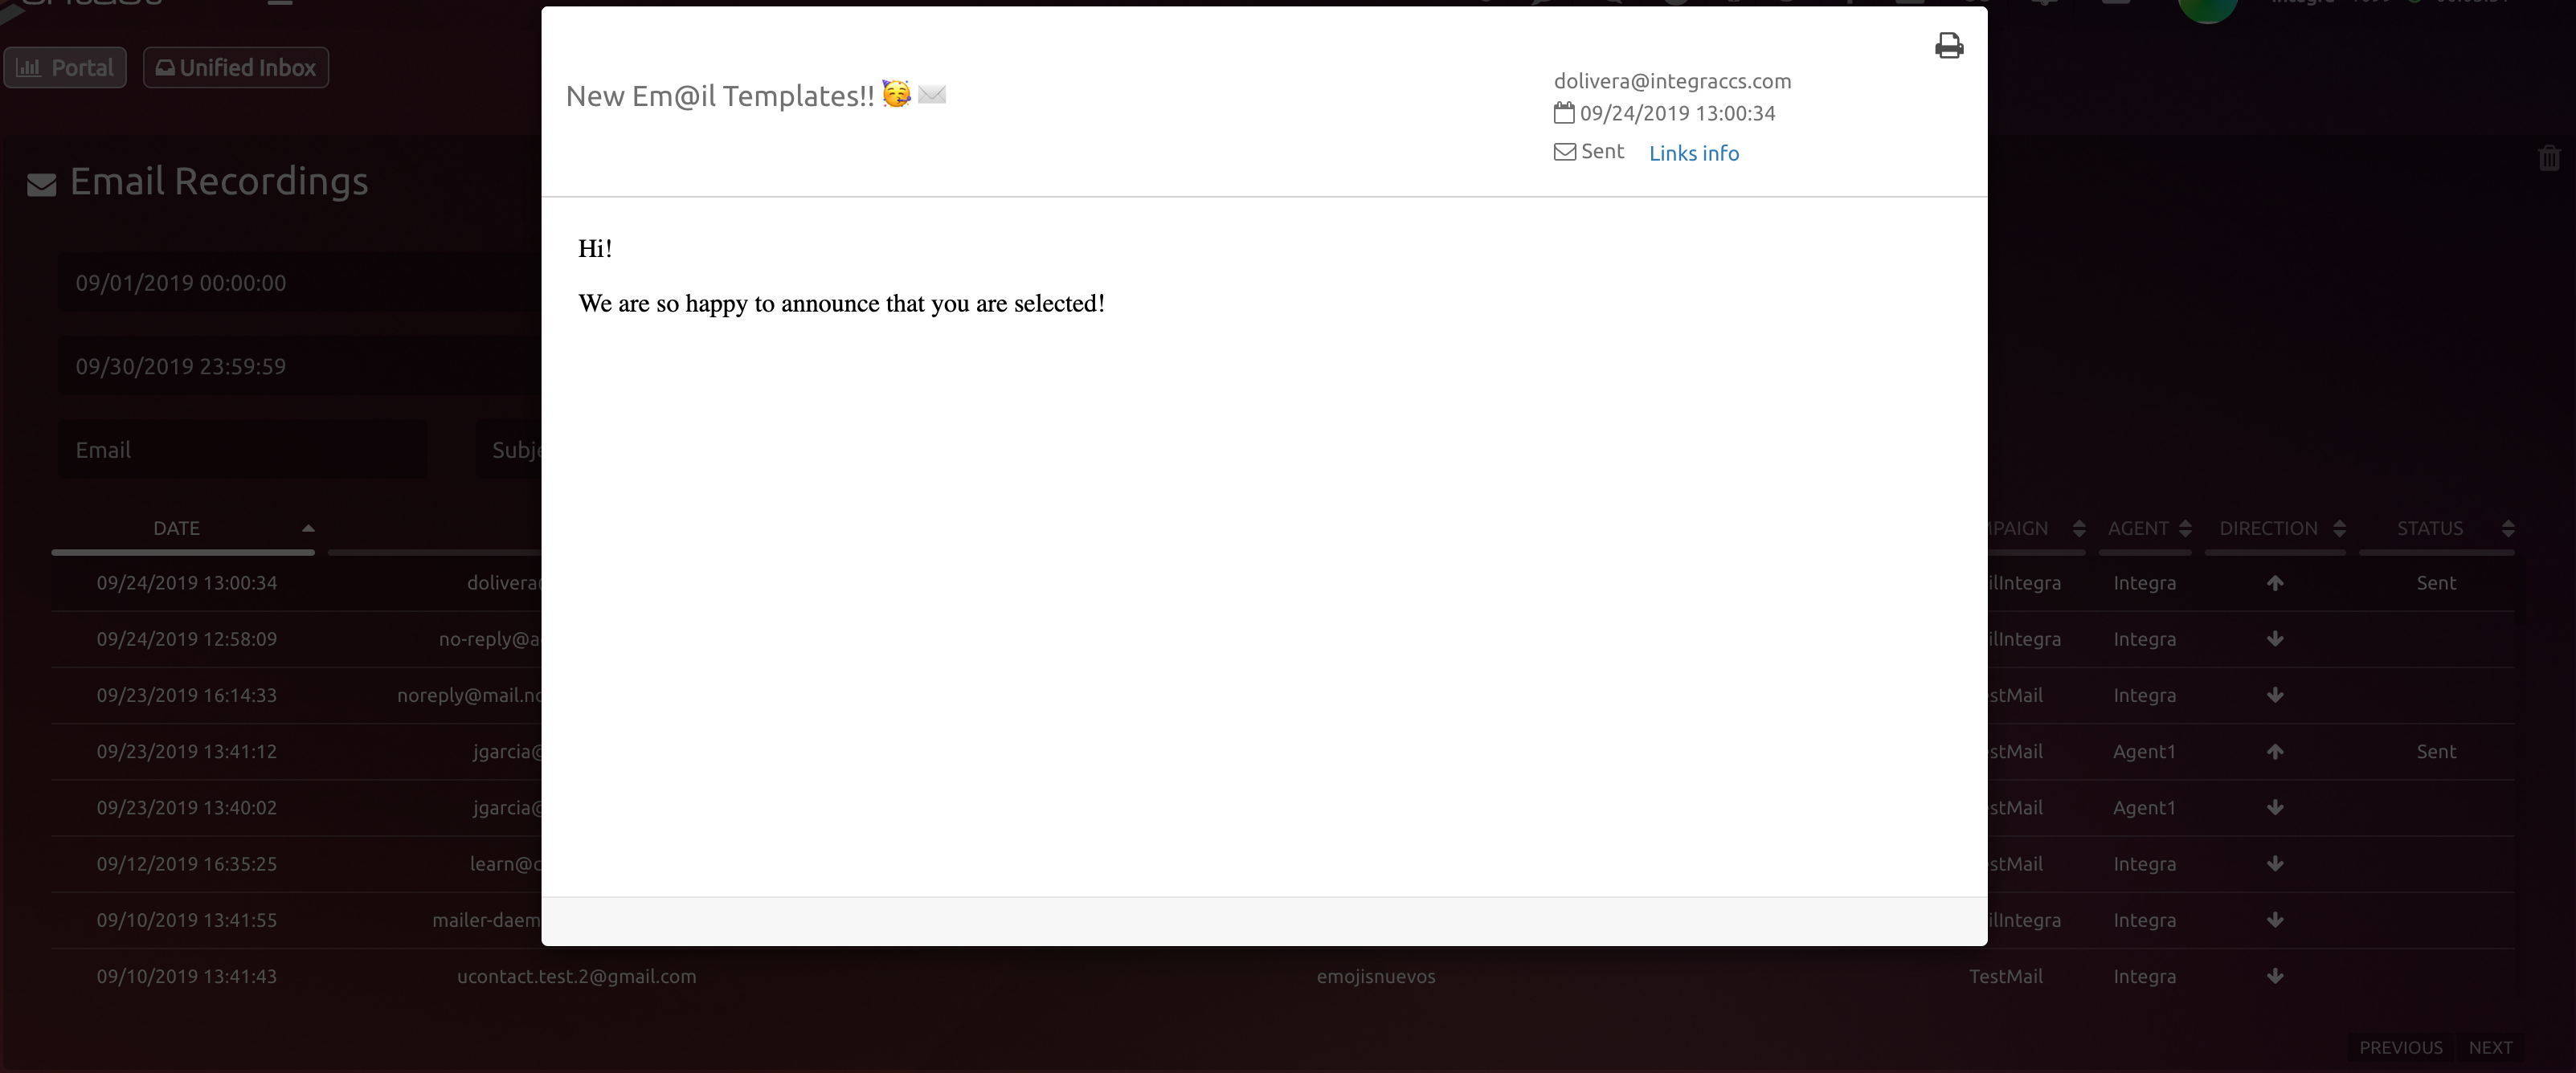
Email recording viewer
When the user clicks on one of the emails, it opens like this:
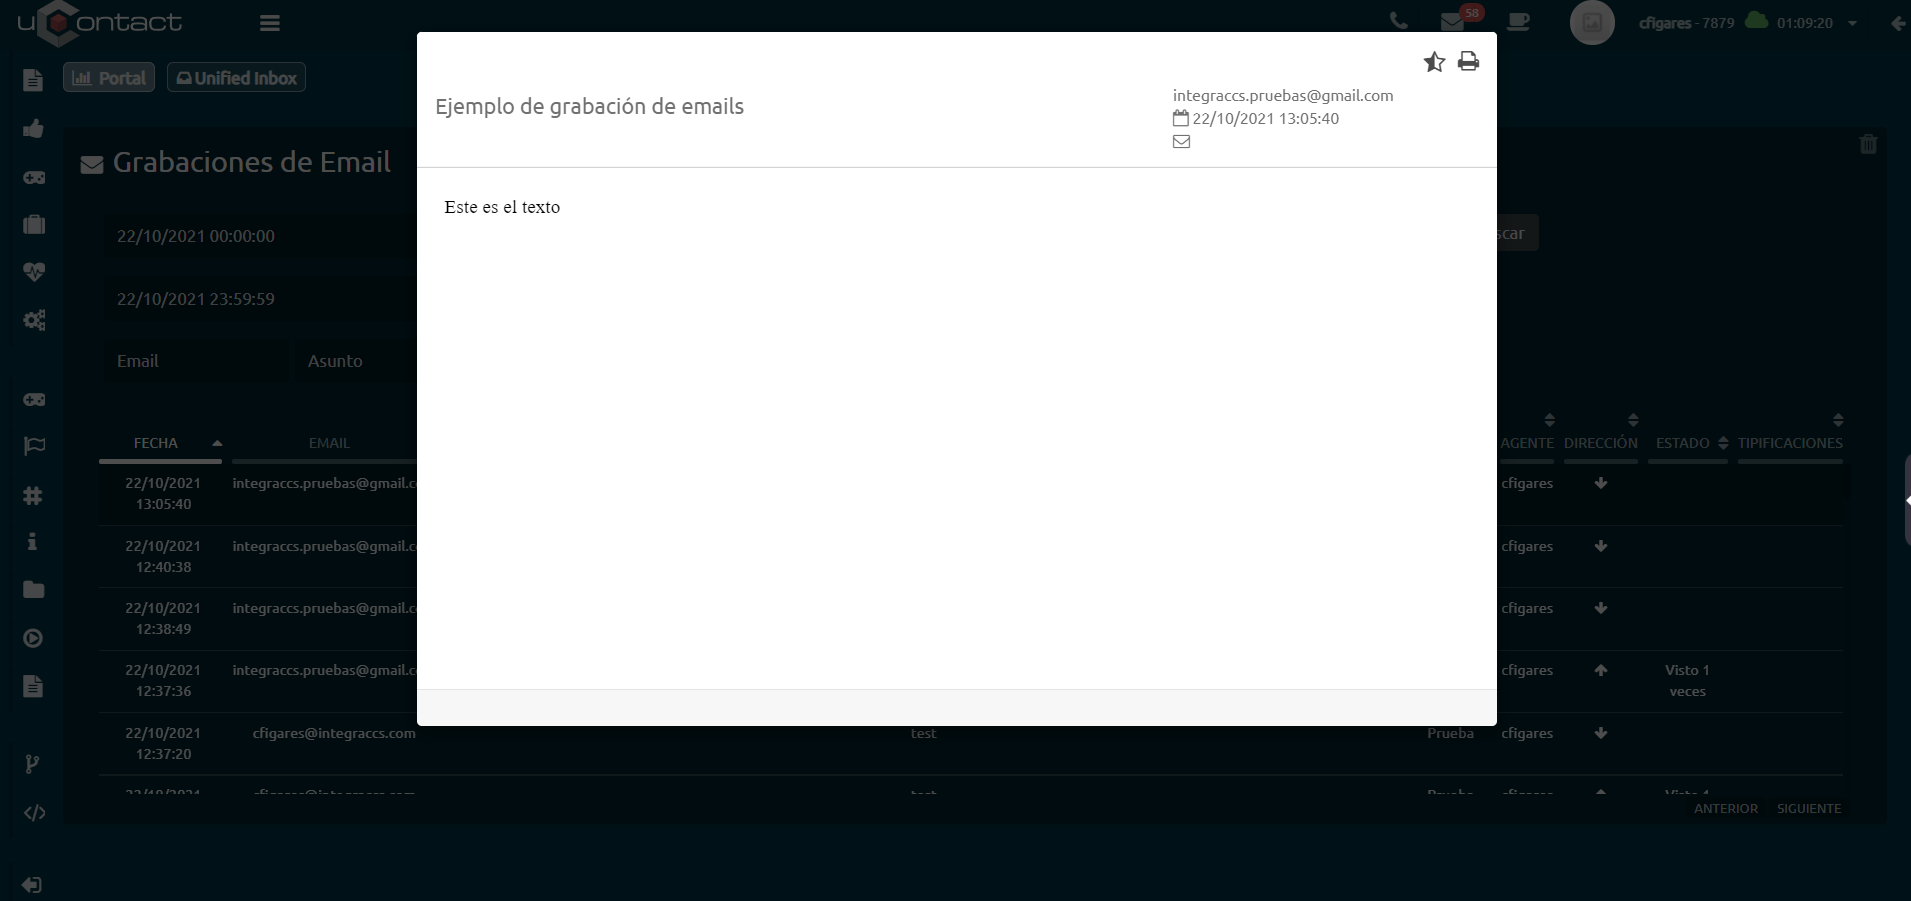
In the upper right corner is the printer icon, with which the mail can be printed.
Email Dialer Monitoring
Menu to monitor the status of email services.
Dashboard
Shows all active email services, allowing you to manage their activity and upload information.

Campaigns
Allows you to select the campaign to monitor.
List name
Detail of the name of the list that is active and its status:
Inactive
Active
Status
It shows the general status of the campaign based on the following status:
Inactive
Active
On schedule
It shows if the campaign is on date according to the definition it has to be executed, with the following status:
Inactive
Active
Processed
The number of emails processed by the campaign.
Not processed
The number of emails remaining to process in the campaign.
Sent
The number of emails that were processed and sent correctly.
Failed
The number of emails that were processed but were not sent correctly.
Seen
The number of emails that were opened by the recipient.
Rejected
The number of emails that were rejected.
Spam
The number of emails that entered spam, they are registered on the blacklist.
Email Agent
Find here how the Agent uses the Emails in the portal.
Start interaction
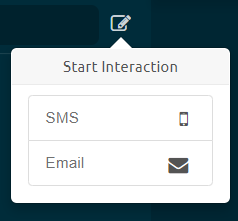
With the icon next to the search section, the user can easily start interactions.
Pressing it will display the following box.

The agent will have the email with which the interaction began in their interaction tray.

When opened, it is displayed on the right side of the screen, showing the history of interactions and customer information at the top such as:
Email campaign name
Client email
Client name
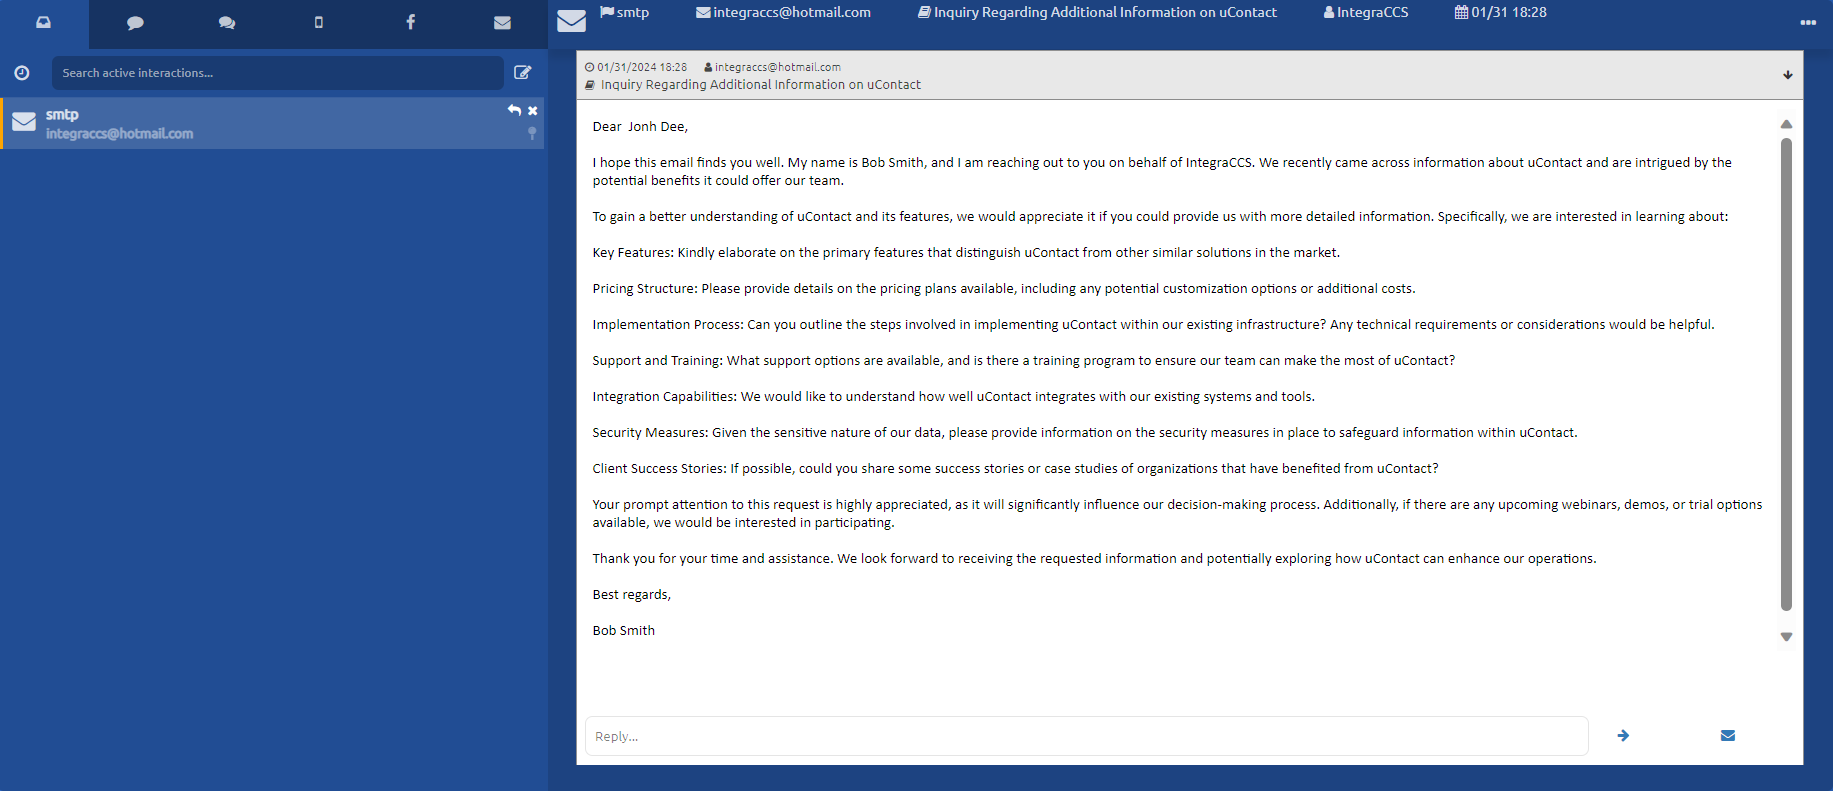
Here we have the following options:
Mail answer
When responding to an email we will have the same options as to when starting it, plus a button that will allow us to respond with the history of emails sent.
Forward
This button will prompt a modal, where the message body is displayed with additional text appended at the beginning. The subject will also feature the prefix "FWD".
Start Interaction
This button will prompt a modal that mirrors the process of beginning a fresh interaction, automatically incorporating the body and subject of the current message.
Interaction search
In the left section, the user is met with an interaction search part.
You can search by campaign name, customer email, subject, and name.
| Tip |
|---|
When the user receives an email, they can reply it by sending it to the same person or forward it to several others by clicking the icon with the arrow.
|
CC/BCC Change.
Within the interaction press the following icon.

Here you can modify the cc/bcc.
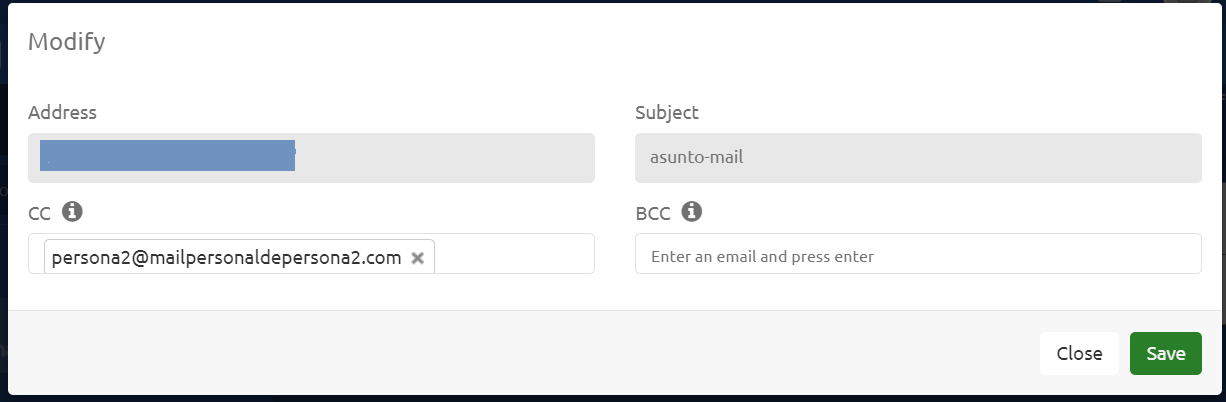
Once you have finished press the save button.
IMPORTANT:
The cc/bcc will be updated as messages arrive to the interaction. Therefore it will ALWAYS TAKE the cc/bcc of the last message received.
When an interaction message that has an associated cc/bcc is answered, it WILL NOT TAKE that one, but it will ALWAYS take the one configured in the "Modify" form.