Create Campaign
| Note |
|---|
|
Configuration
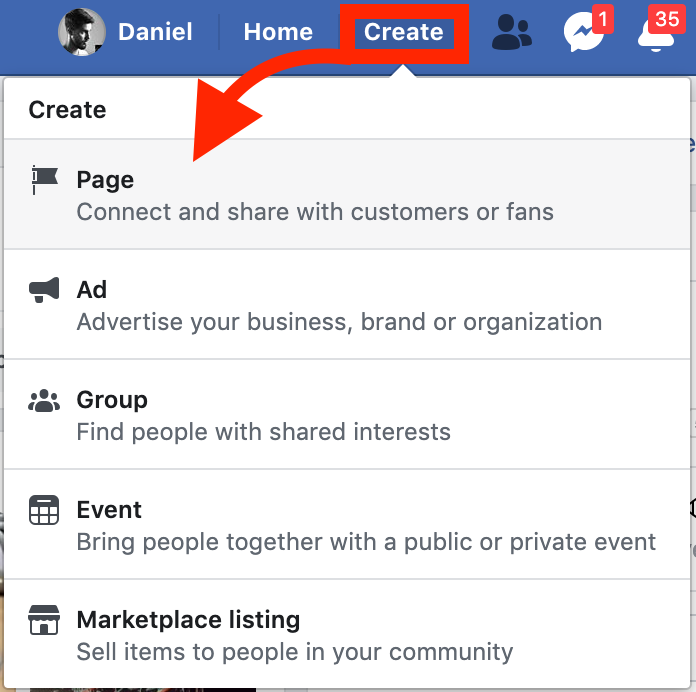
In order to correctly configure the following steps, first of all you must have an existing Facebook account.
| Info |
|---|
If you do not have a Facebook page, go to Create Facebook Page section. |
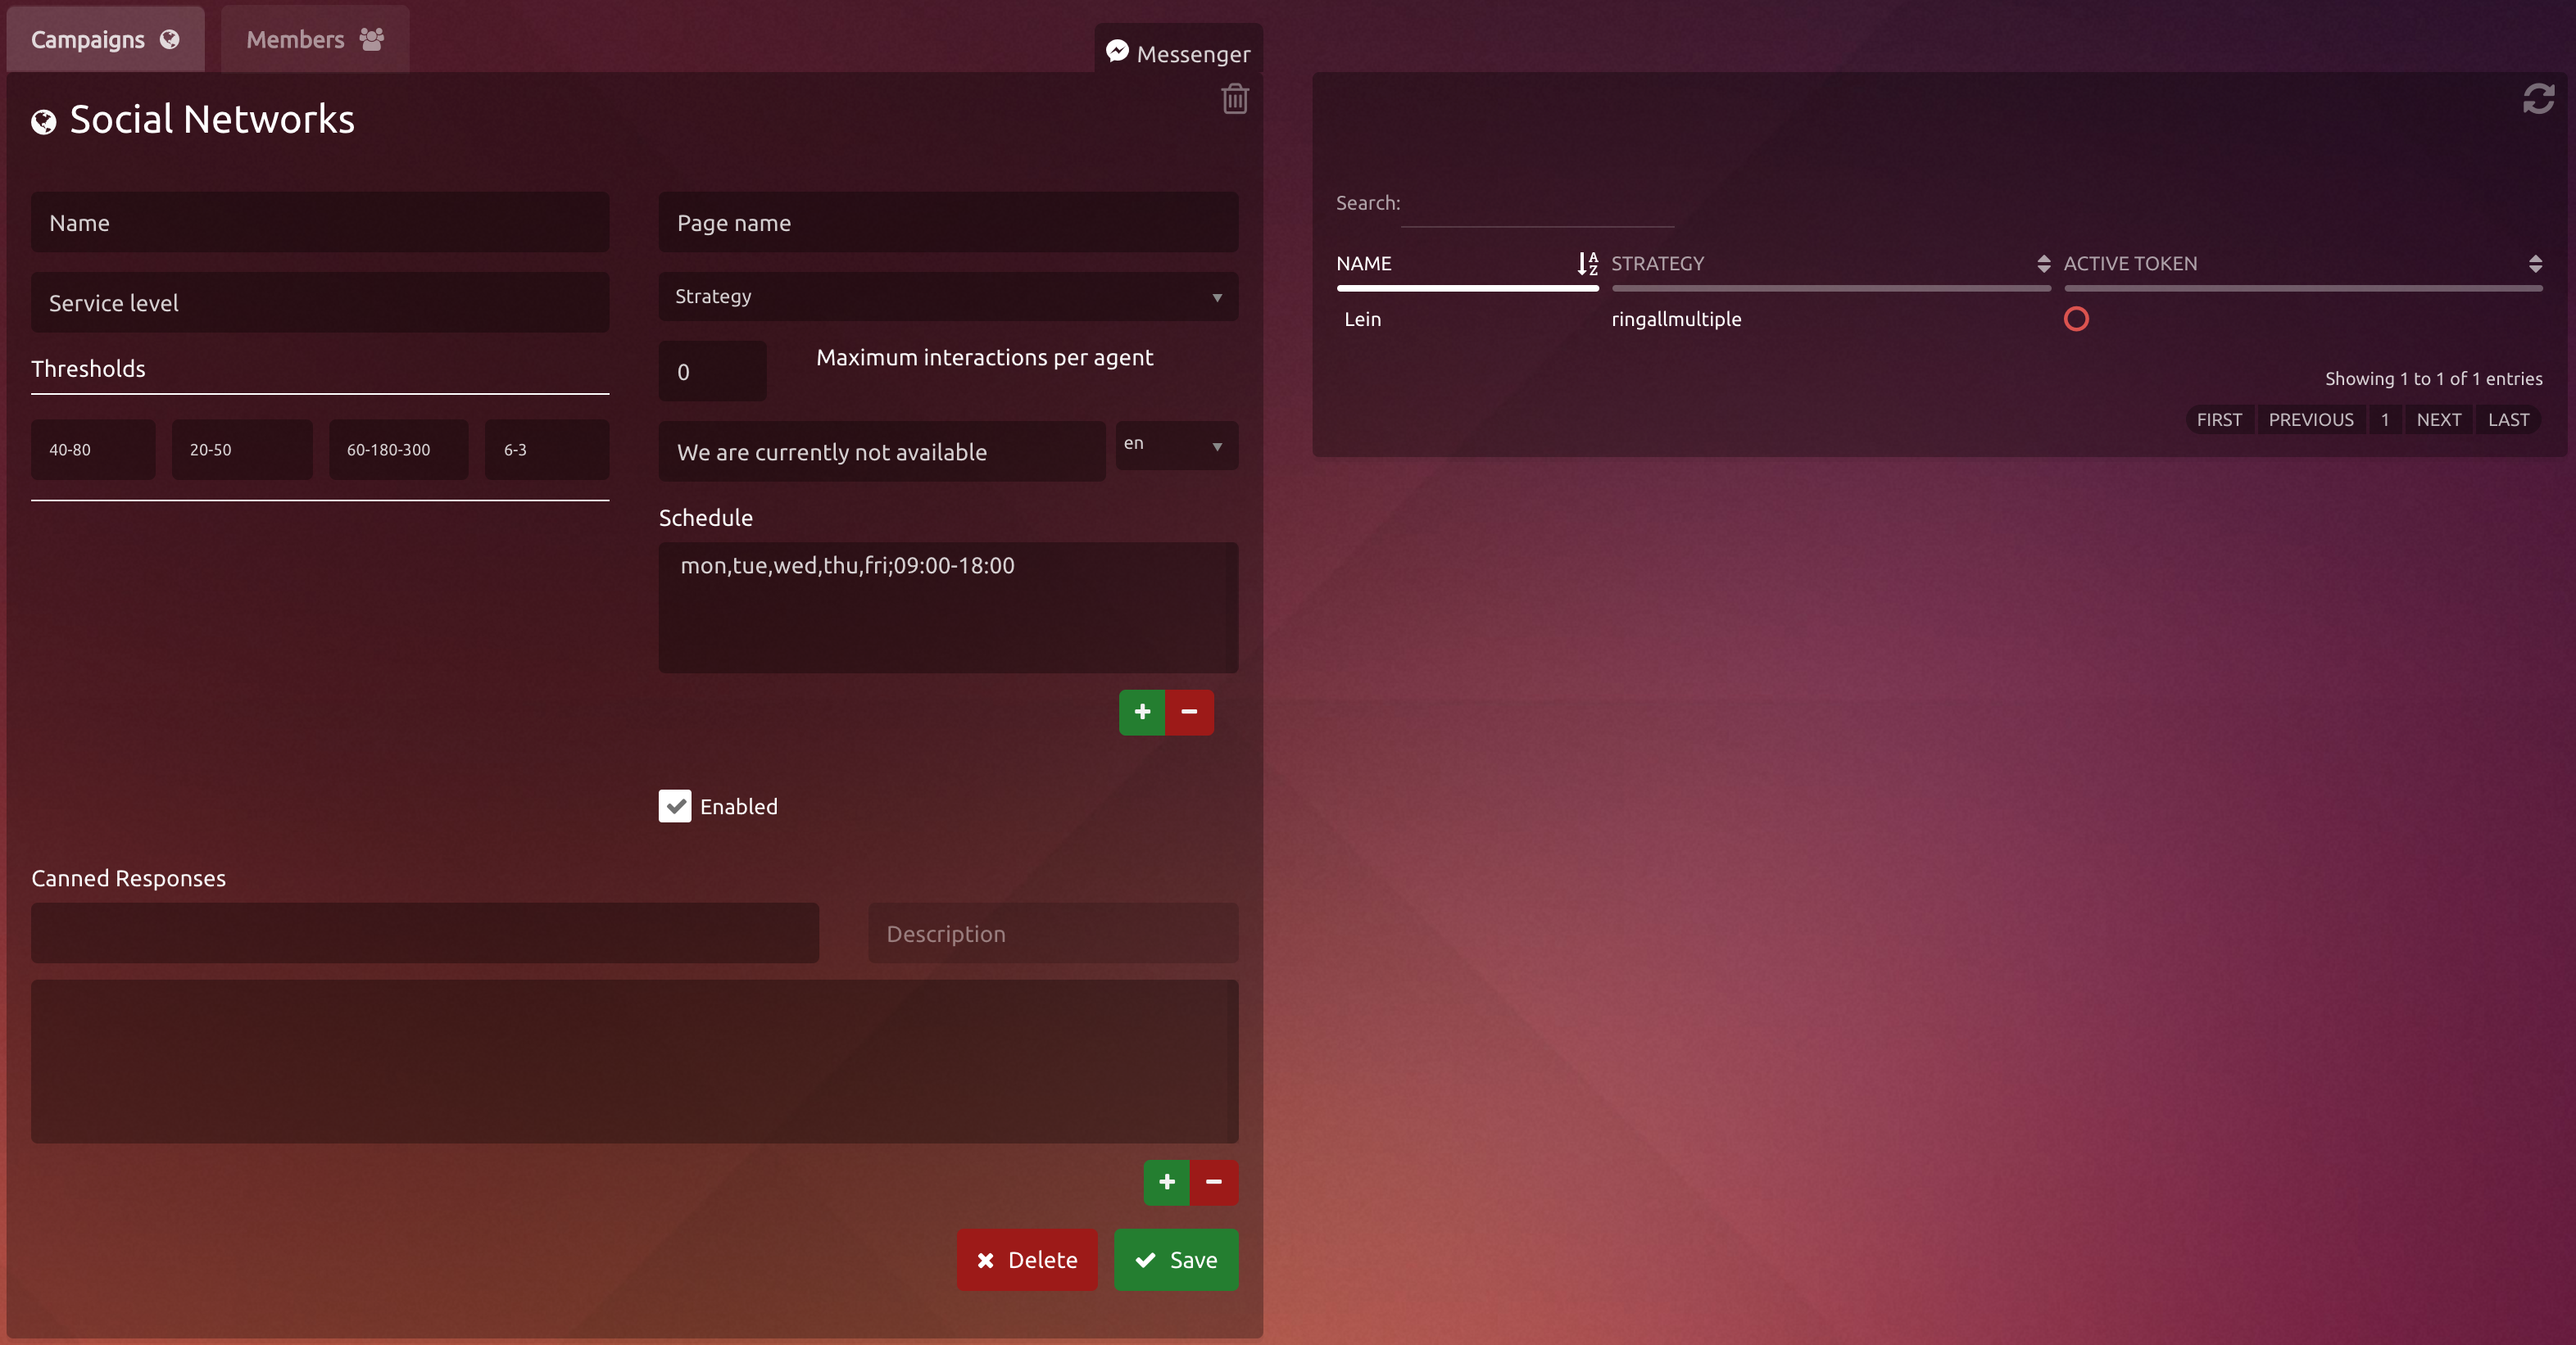
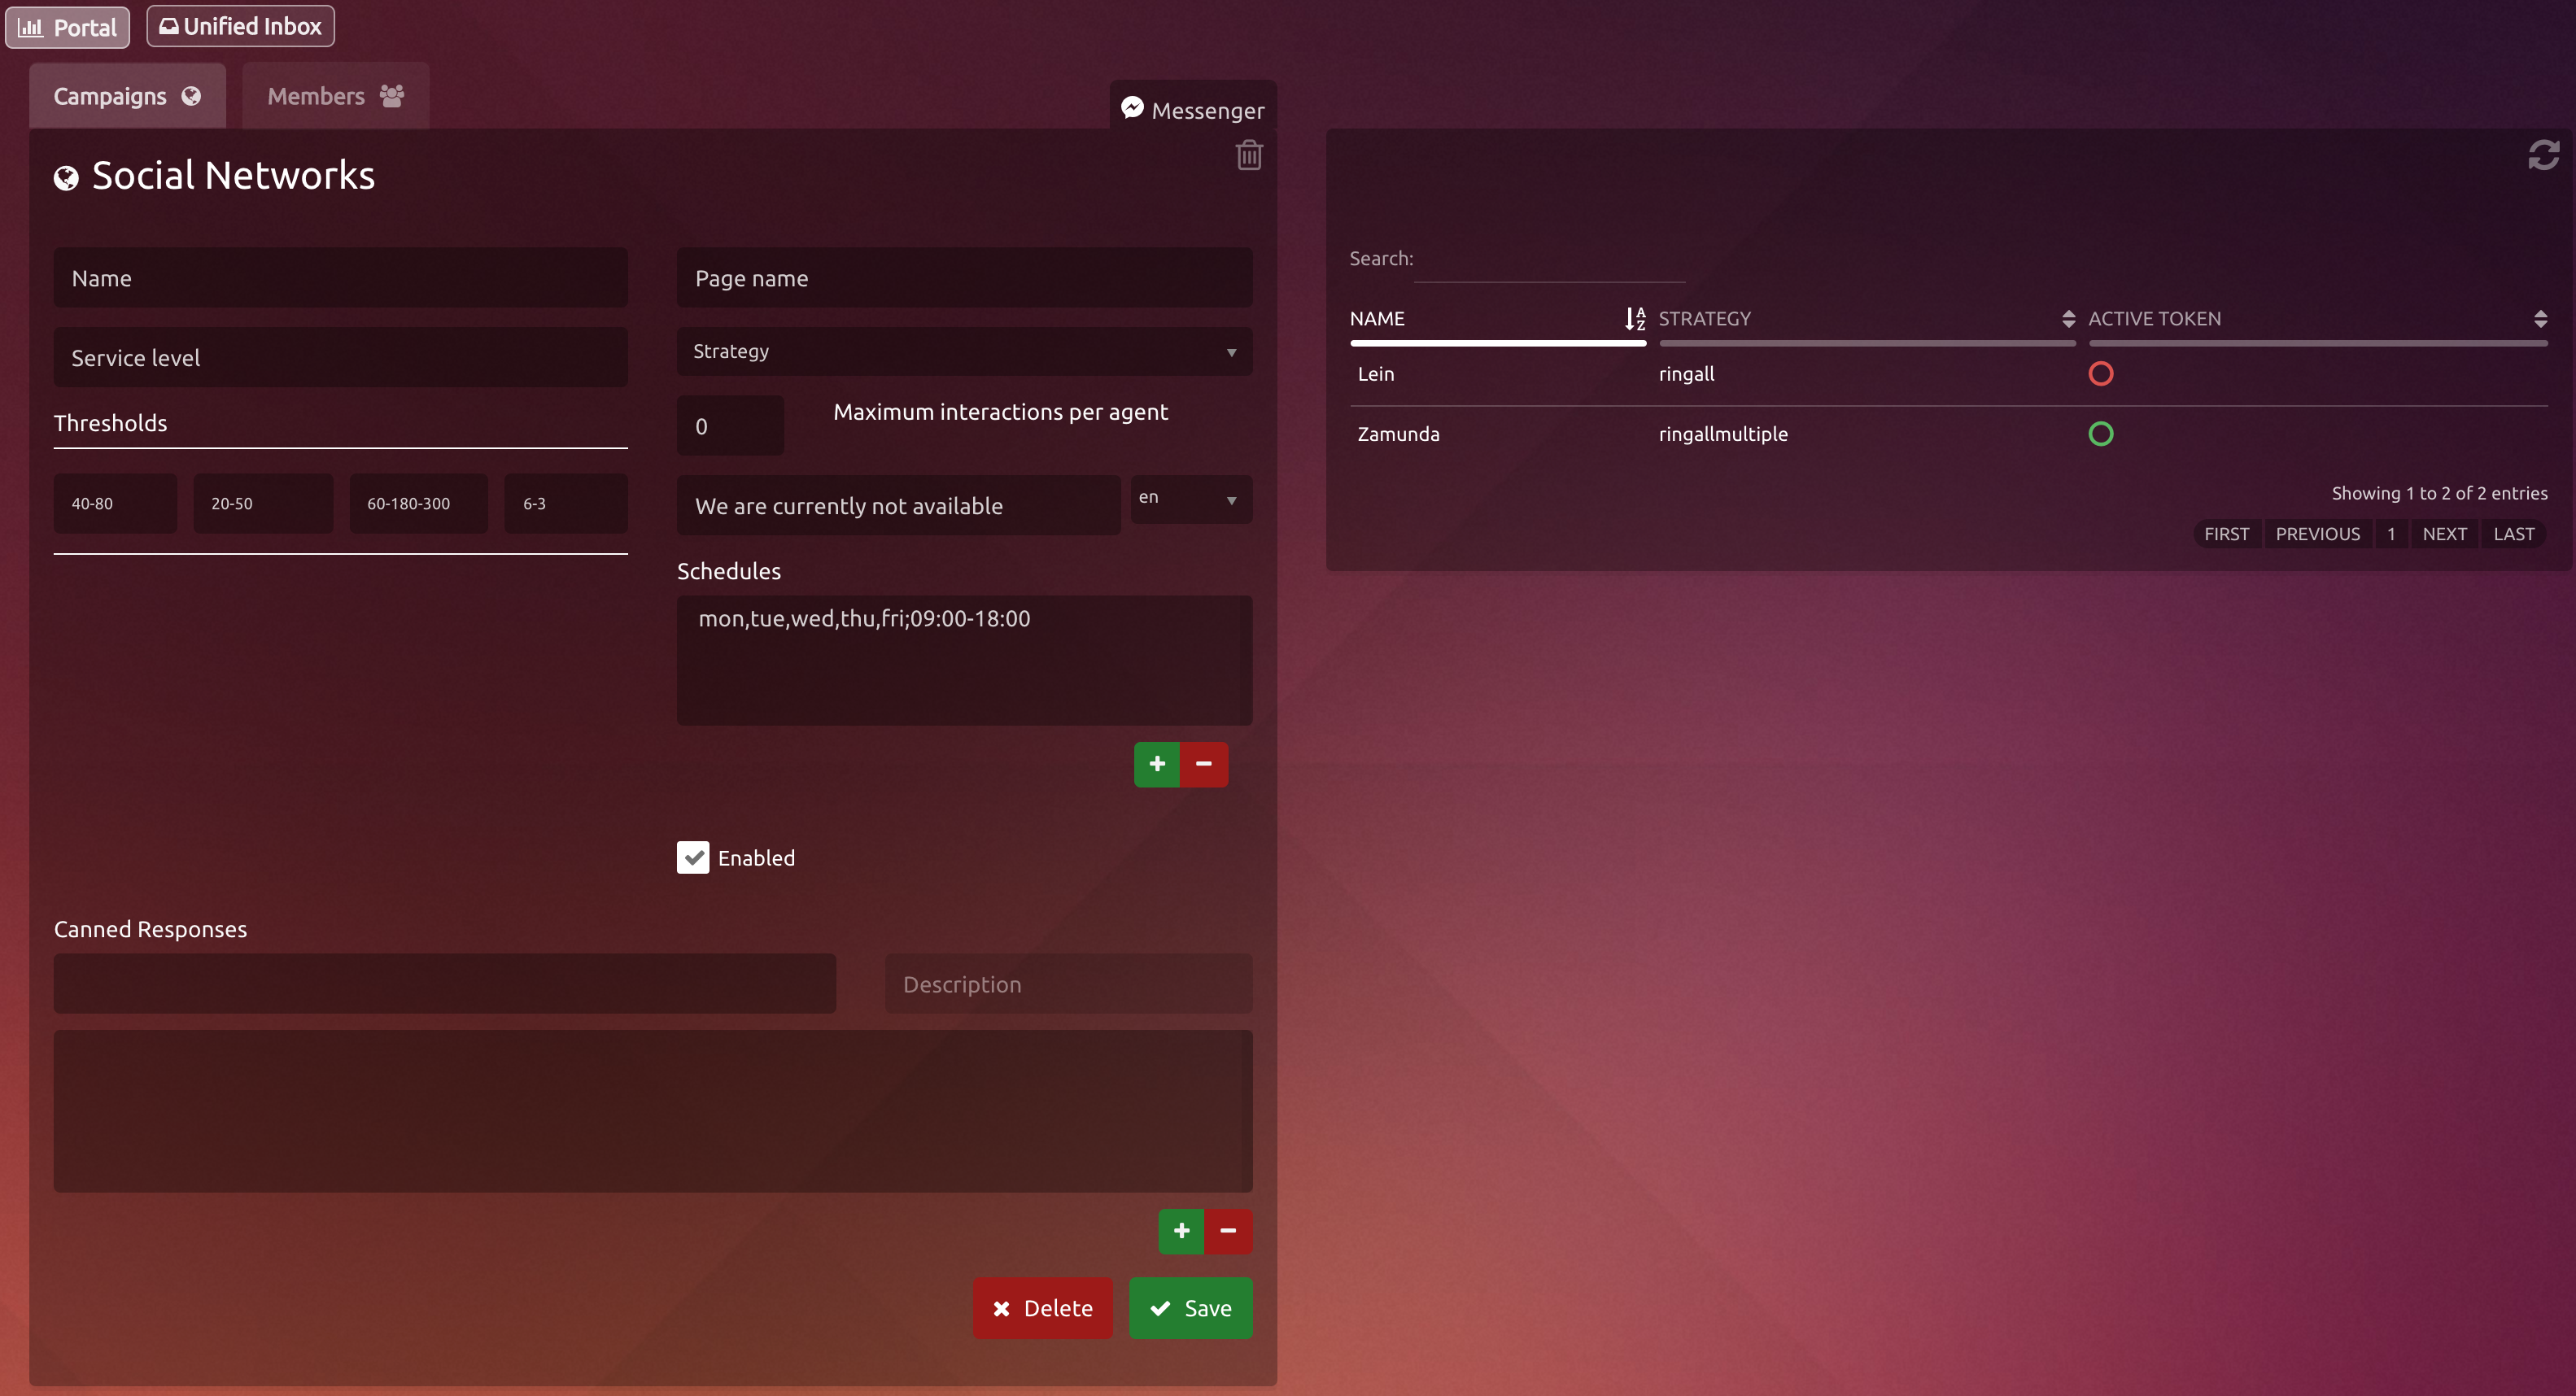
Basic Configuration
Name
Messenger campaign's identification name.Service Level
Is the calls percentage that were attended by the agent before a stipulated time.Page Name
Exactly the same name that have the facebook pageStrategy
Is the behavior that the campaign will have. To know more about each option, please visit StrategiesSchedule
Defines the specific time for the campaign, the default time is M to F from 09:00 to 18:00.To add another schedule you must select the week days and hour time From and To in 24 hours format. After that press the '+' icon, our set is added to the list below and make click in Save button.
To delete a schedule just select it from the list and press the '-' icon and make click in Save button.
| Info |
|---|
Remember that both to activate campaigns and for interactions to reach uContact from messenger, you must have a public IP in the External IP of the Configuration - Telephony section. |
| Expand | ||
|---|---|---|
| ||
Thresholds
Maximum Interactions per Agent After Hours Enable Canned-Responses |
| Expand | ||||||
|---|---|---|---|---|---|---|
| ||||||
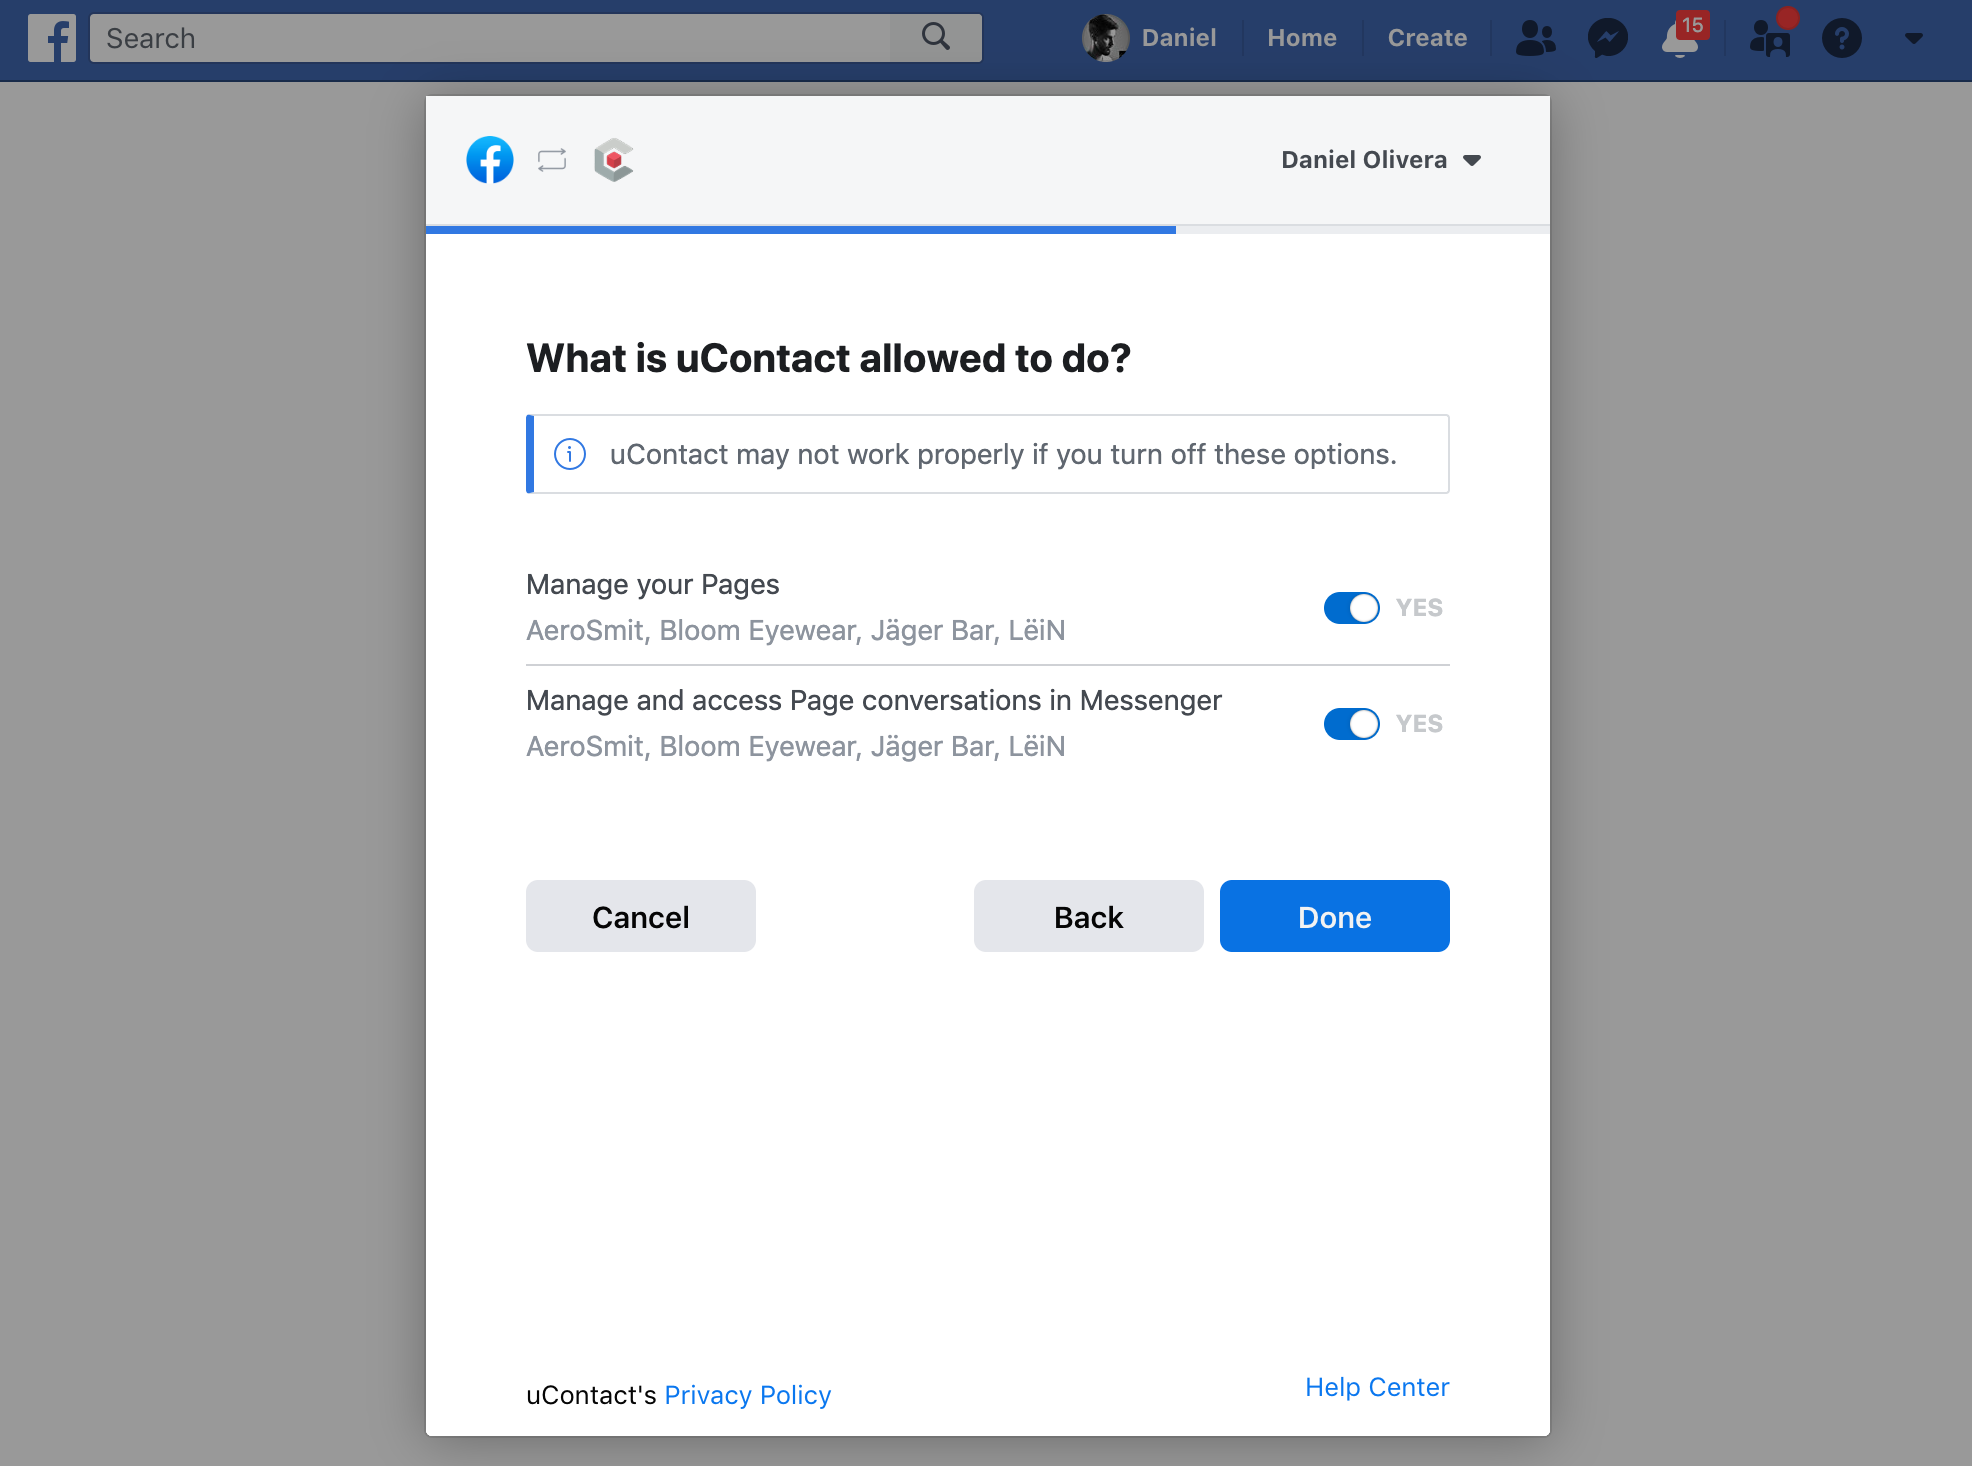
Once the parameters have been entered, clicking on Save displays a window to activate the campaign. 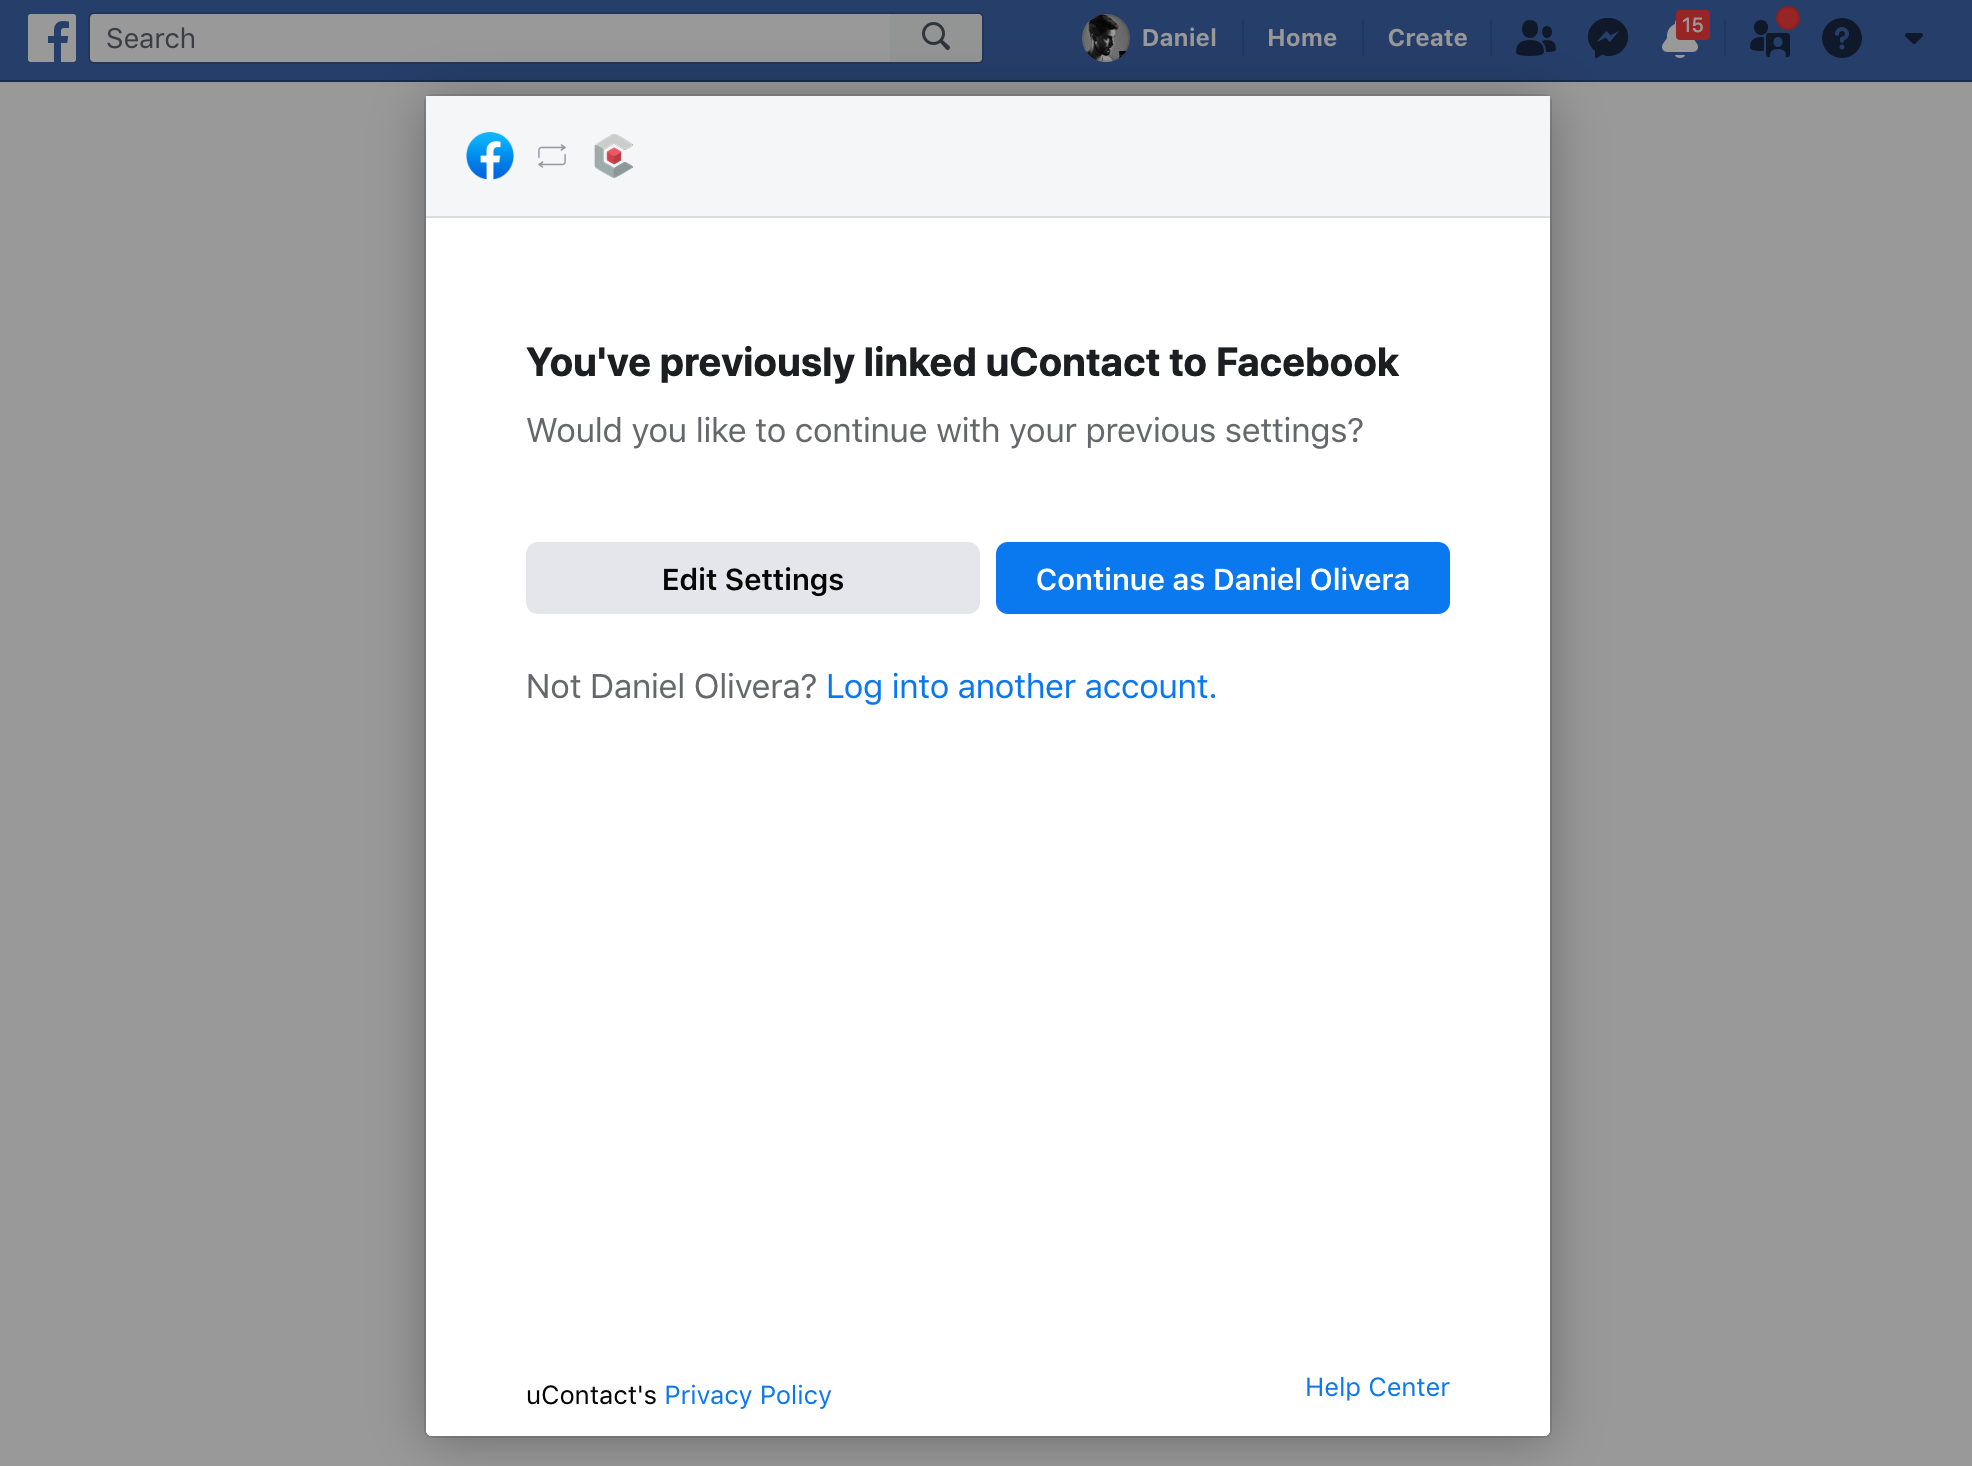 Here we will continue, as long as the account indicated is Administrator of the page you want to associate. As we continue, we will see a new message asking which of our pages we want to associate, and all those that the facebook user has available will be listed. 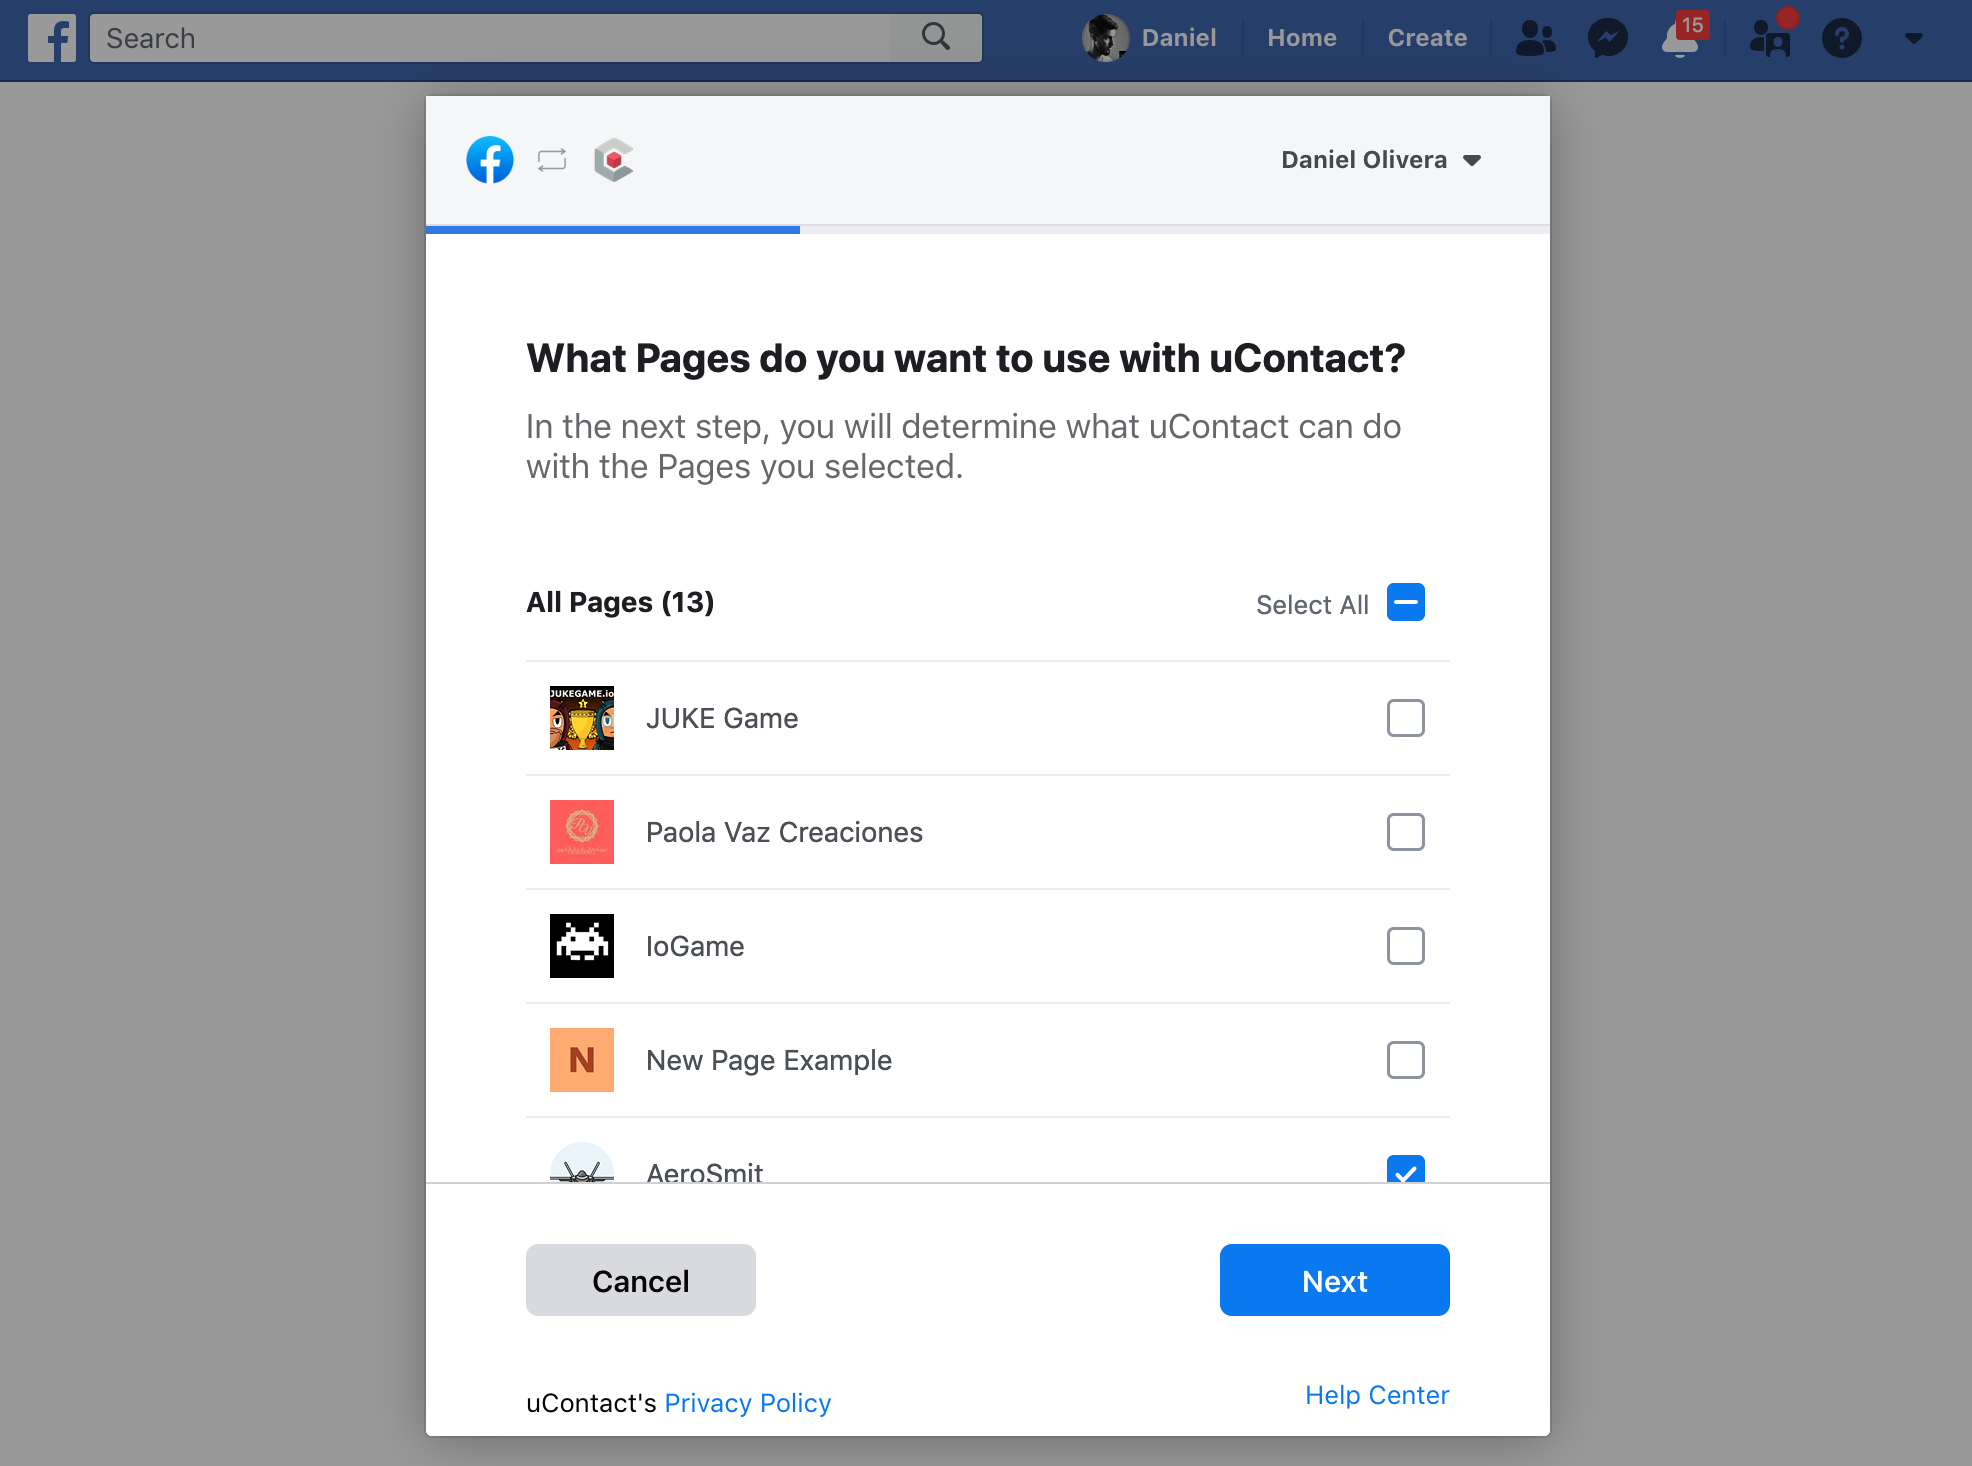 After pressing ‘Next’, we are given the permissions that are being requested to handle messenger.
 After clicking on 'Done', Facebook will notify us in the following message that the connection was made. 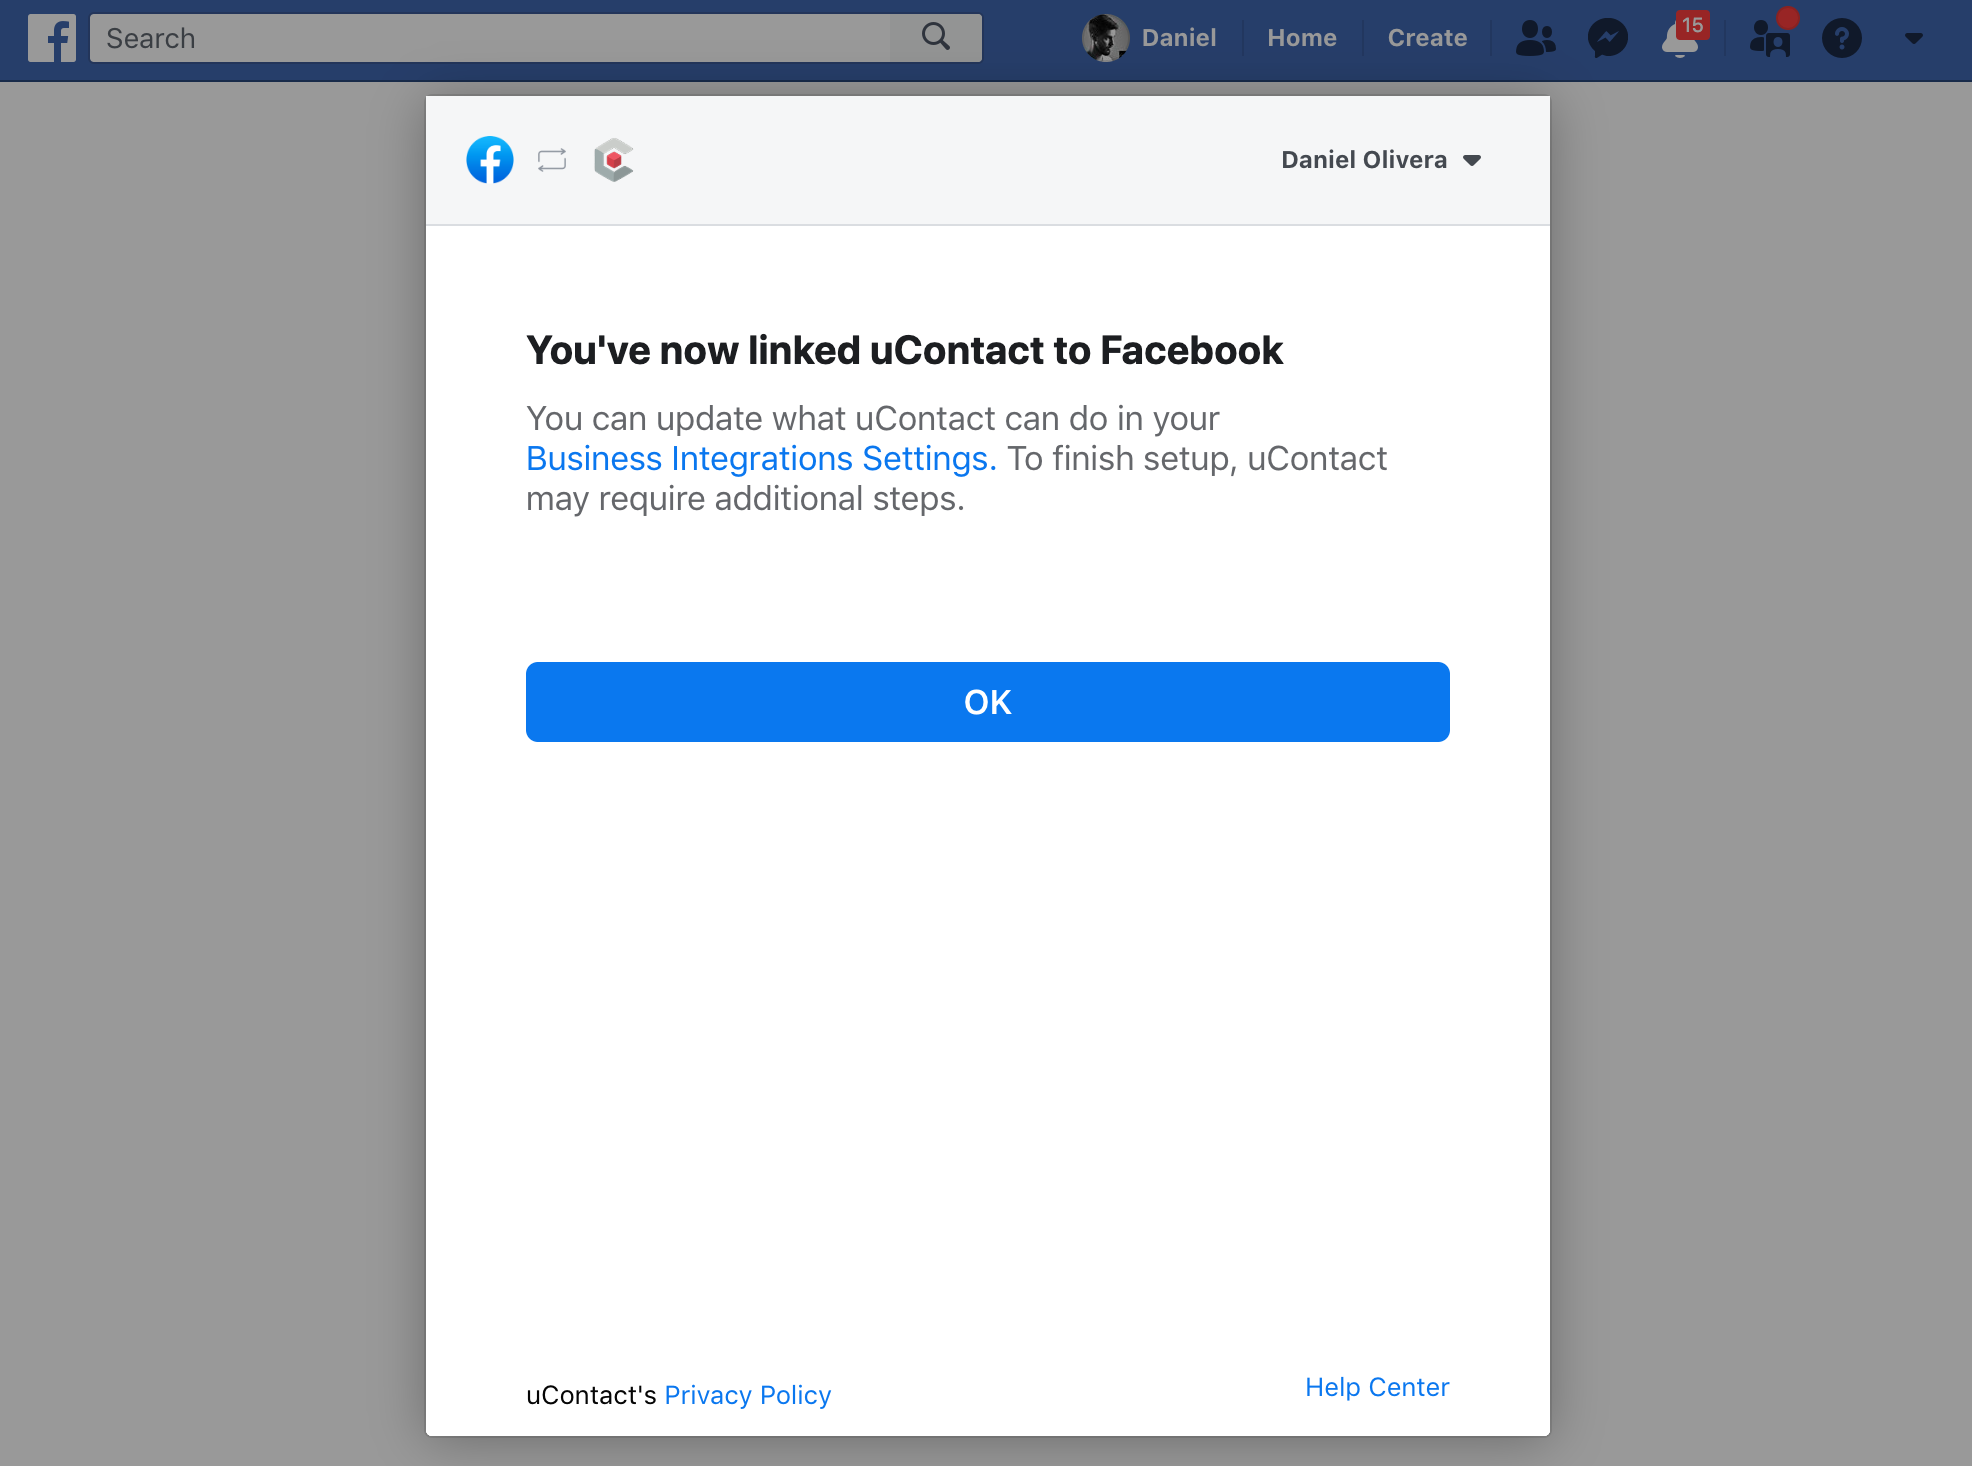 Finally, after pressing 'OK', we will be shown a successful connection message that we can close. 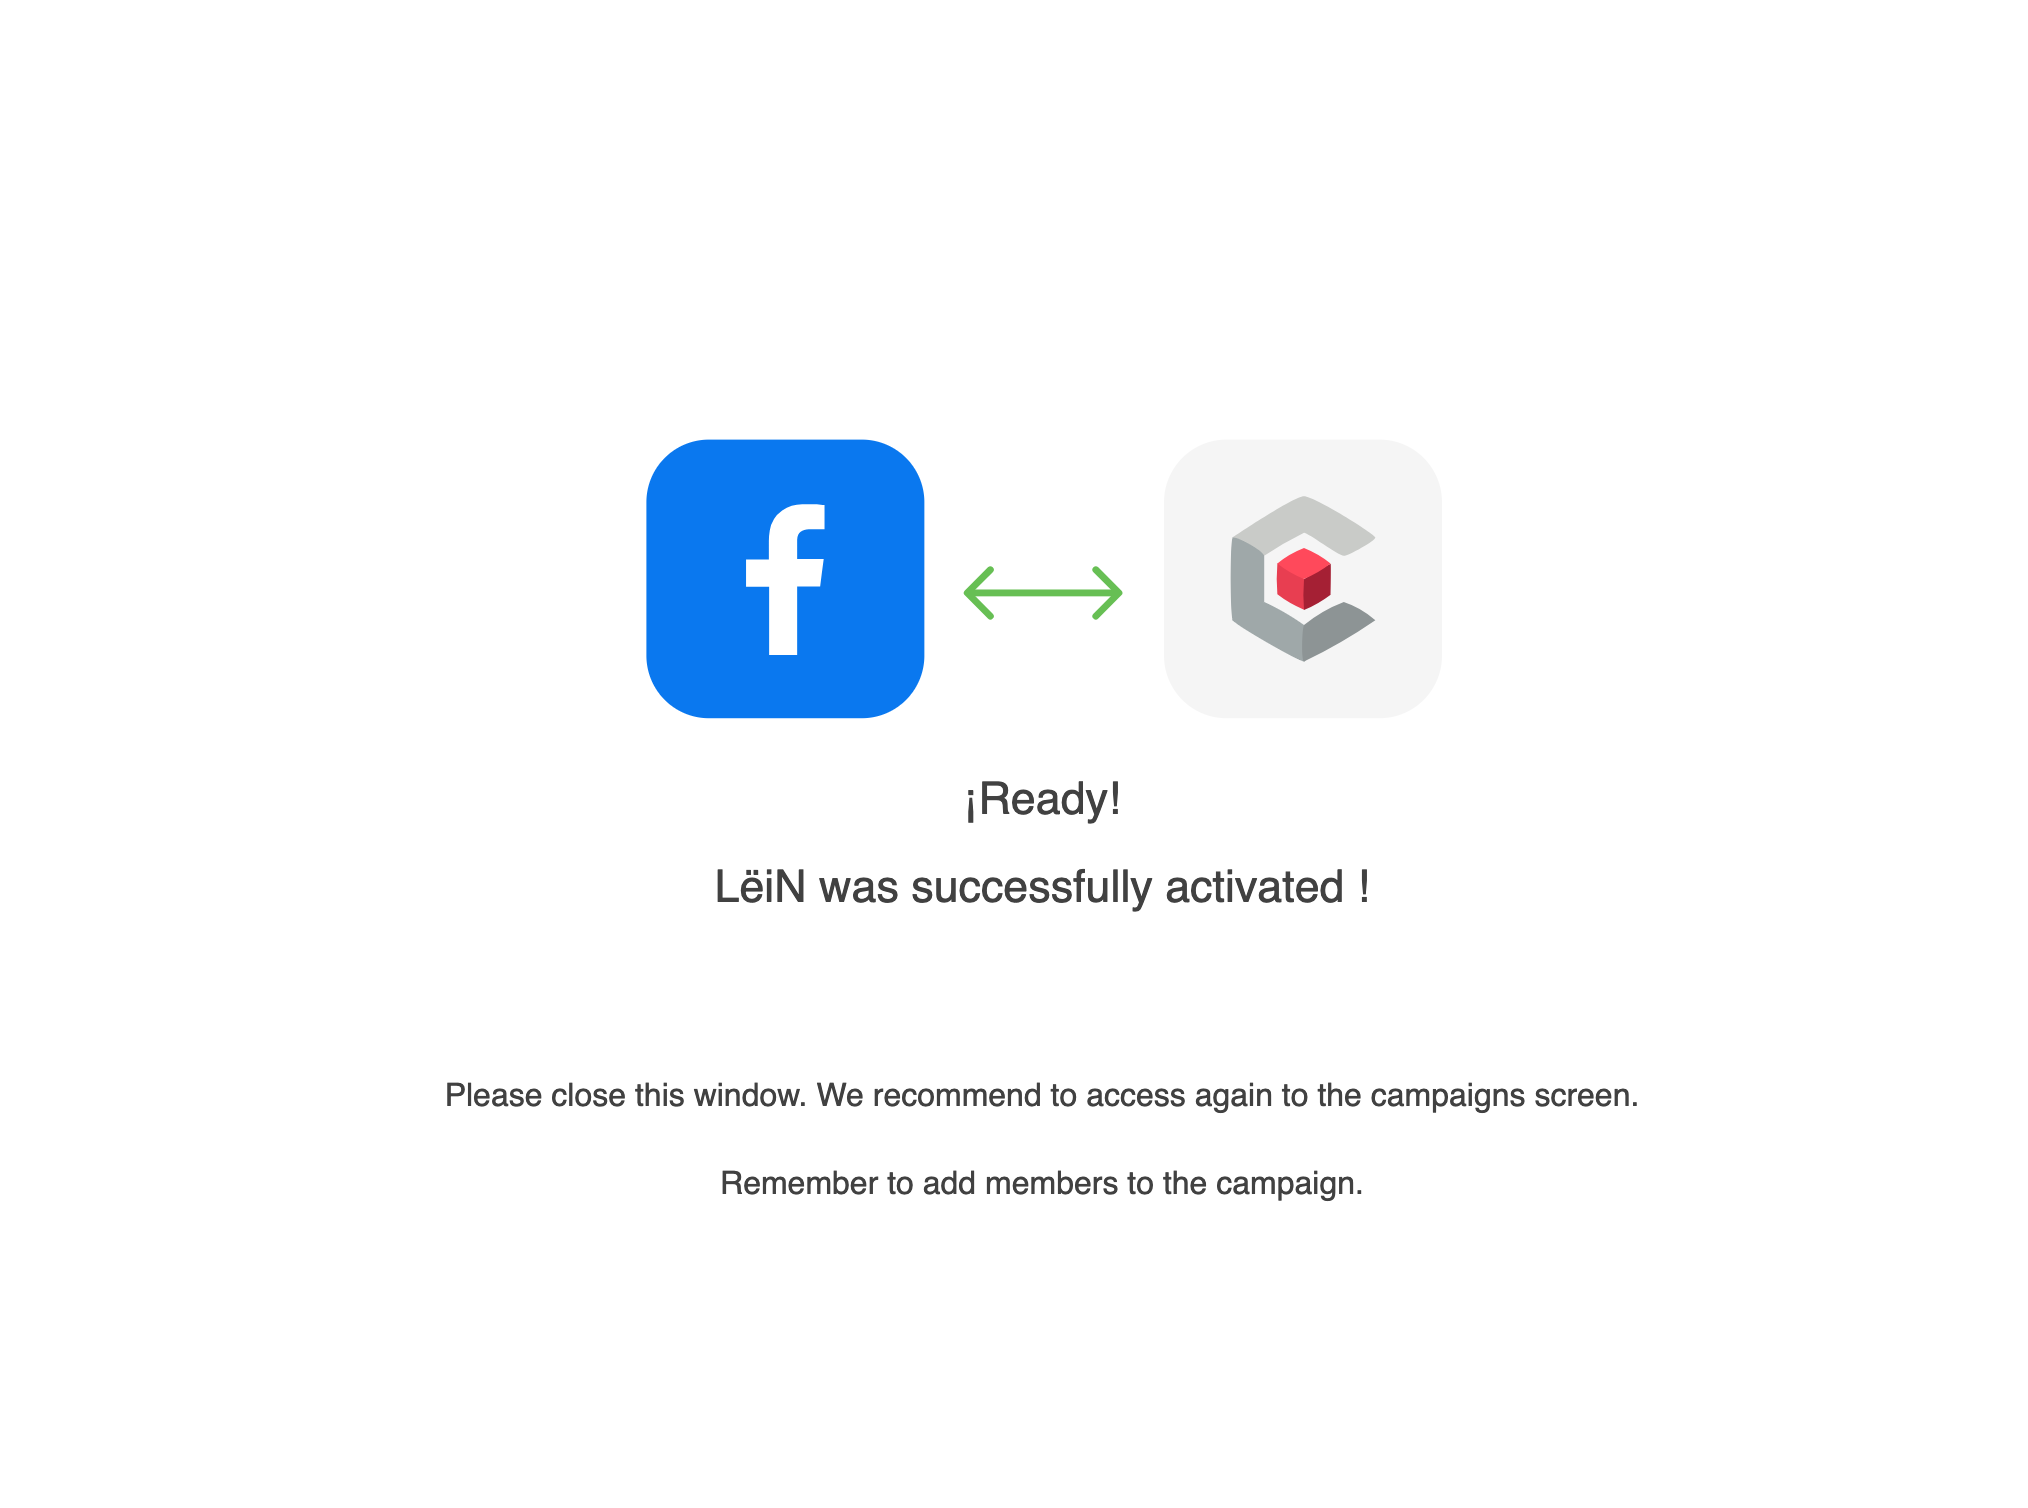 At this time our Messenger campaign will be ready to receive interactions, just add the agents and start interacting!
|
Members
| Info |
|---|
In order to add or delete agents from a campaign, the user must follow the same steps of Add Members. |
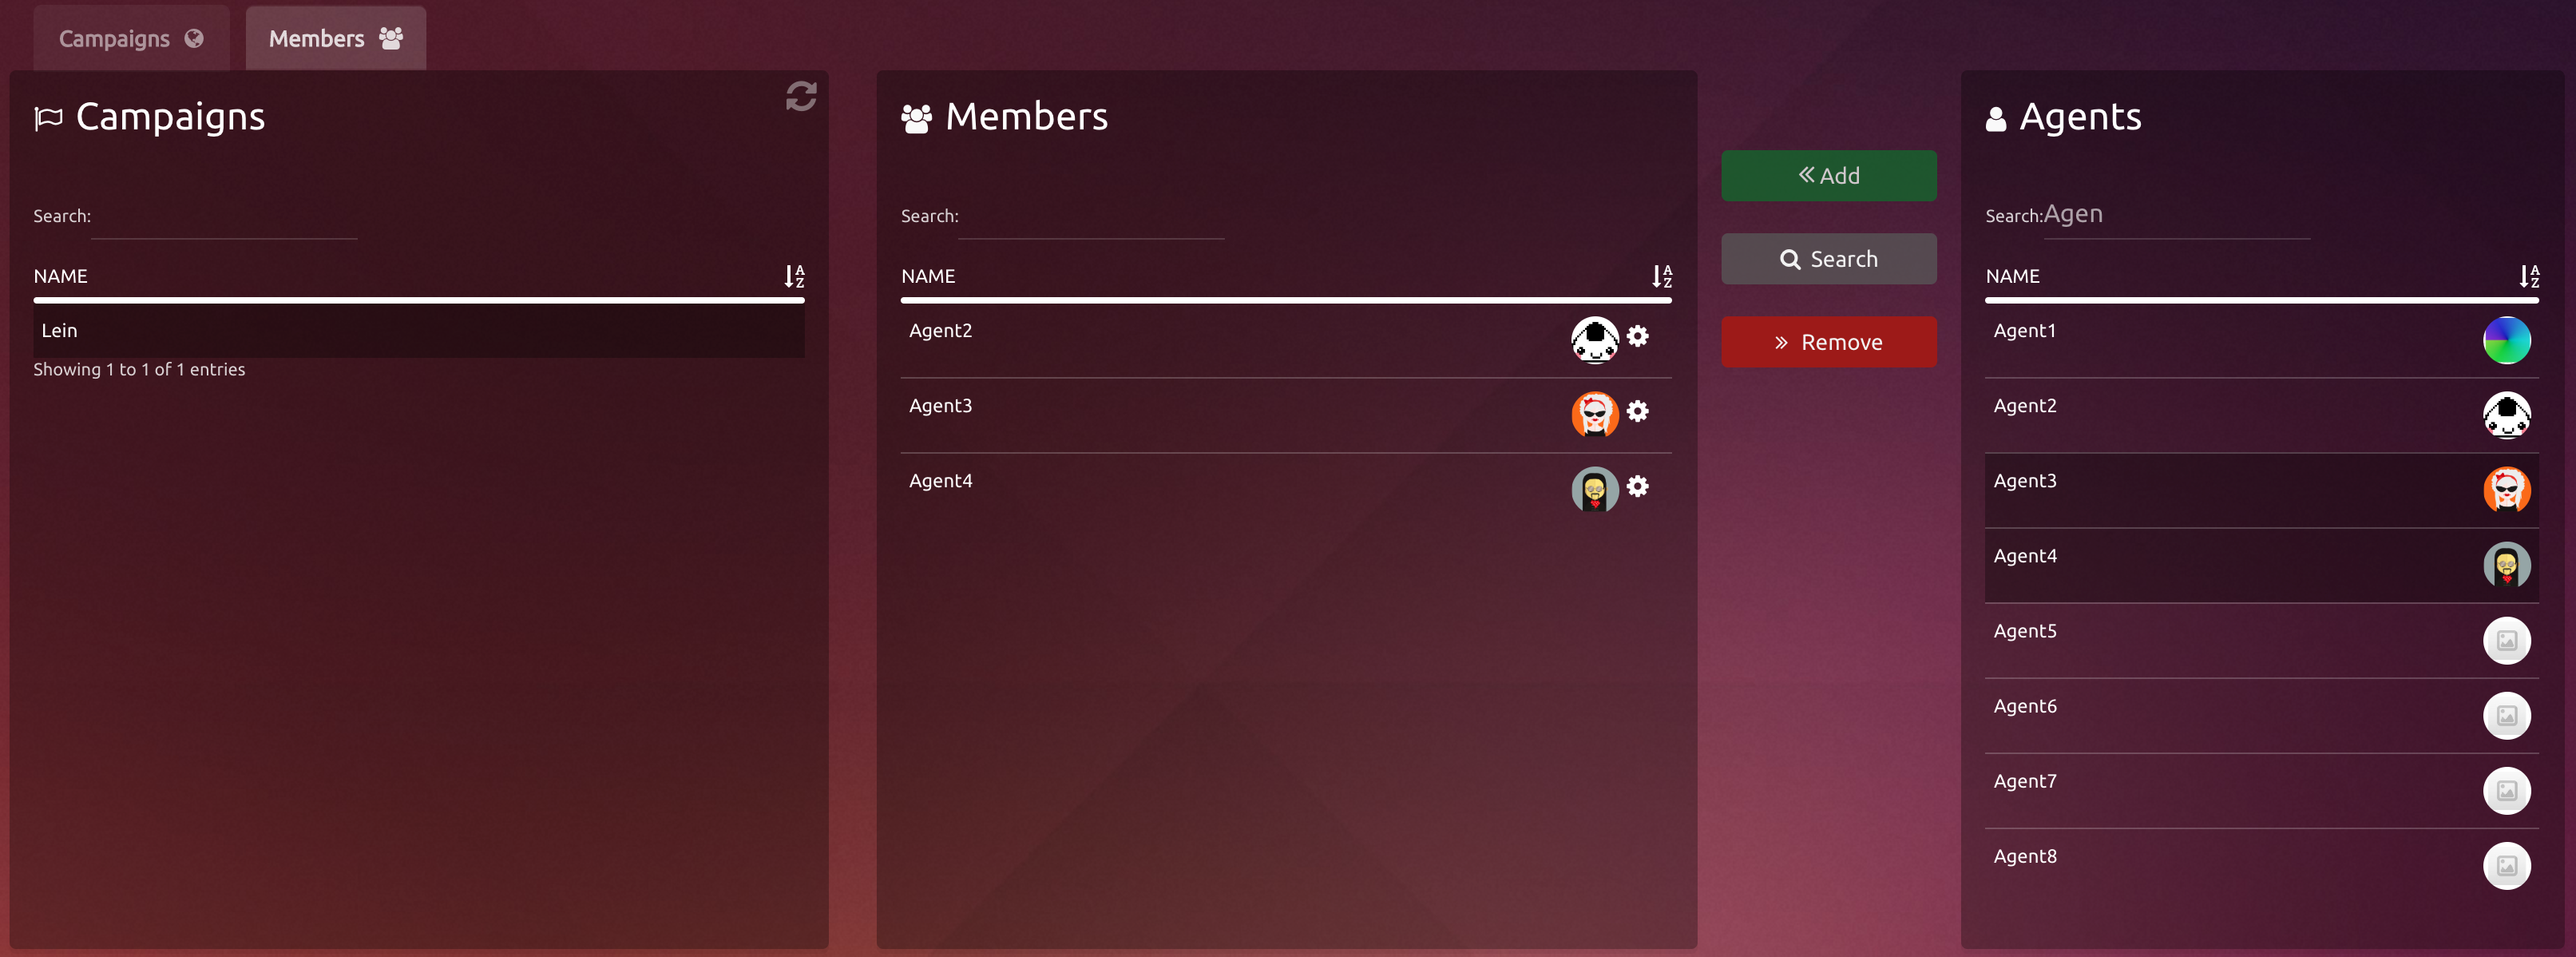
| Tip |
|---|
IMPORTANT Members added to a campaign must be part of a voice campaign, on the contrary, this agents wont get any interactions from this channel. |
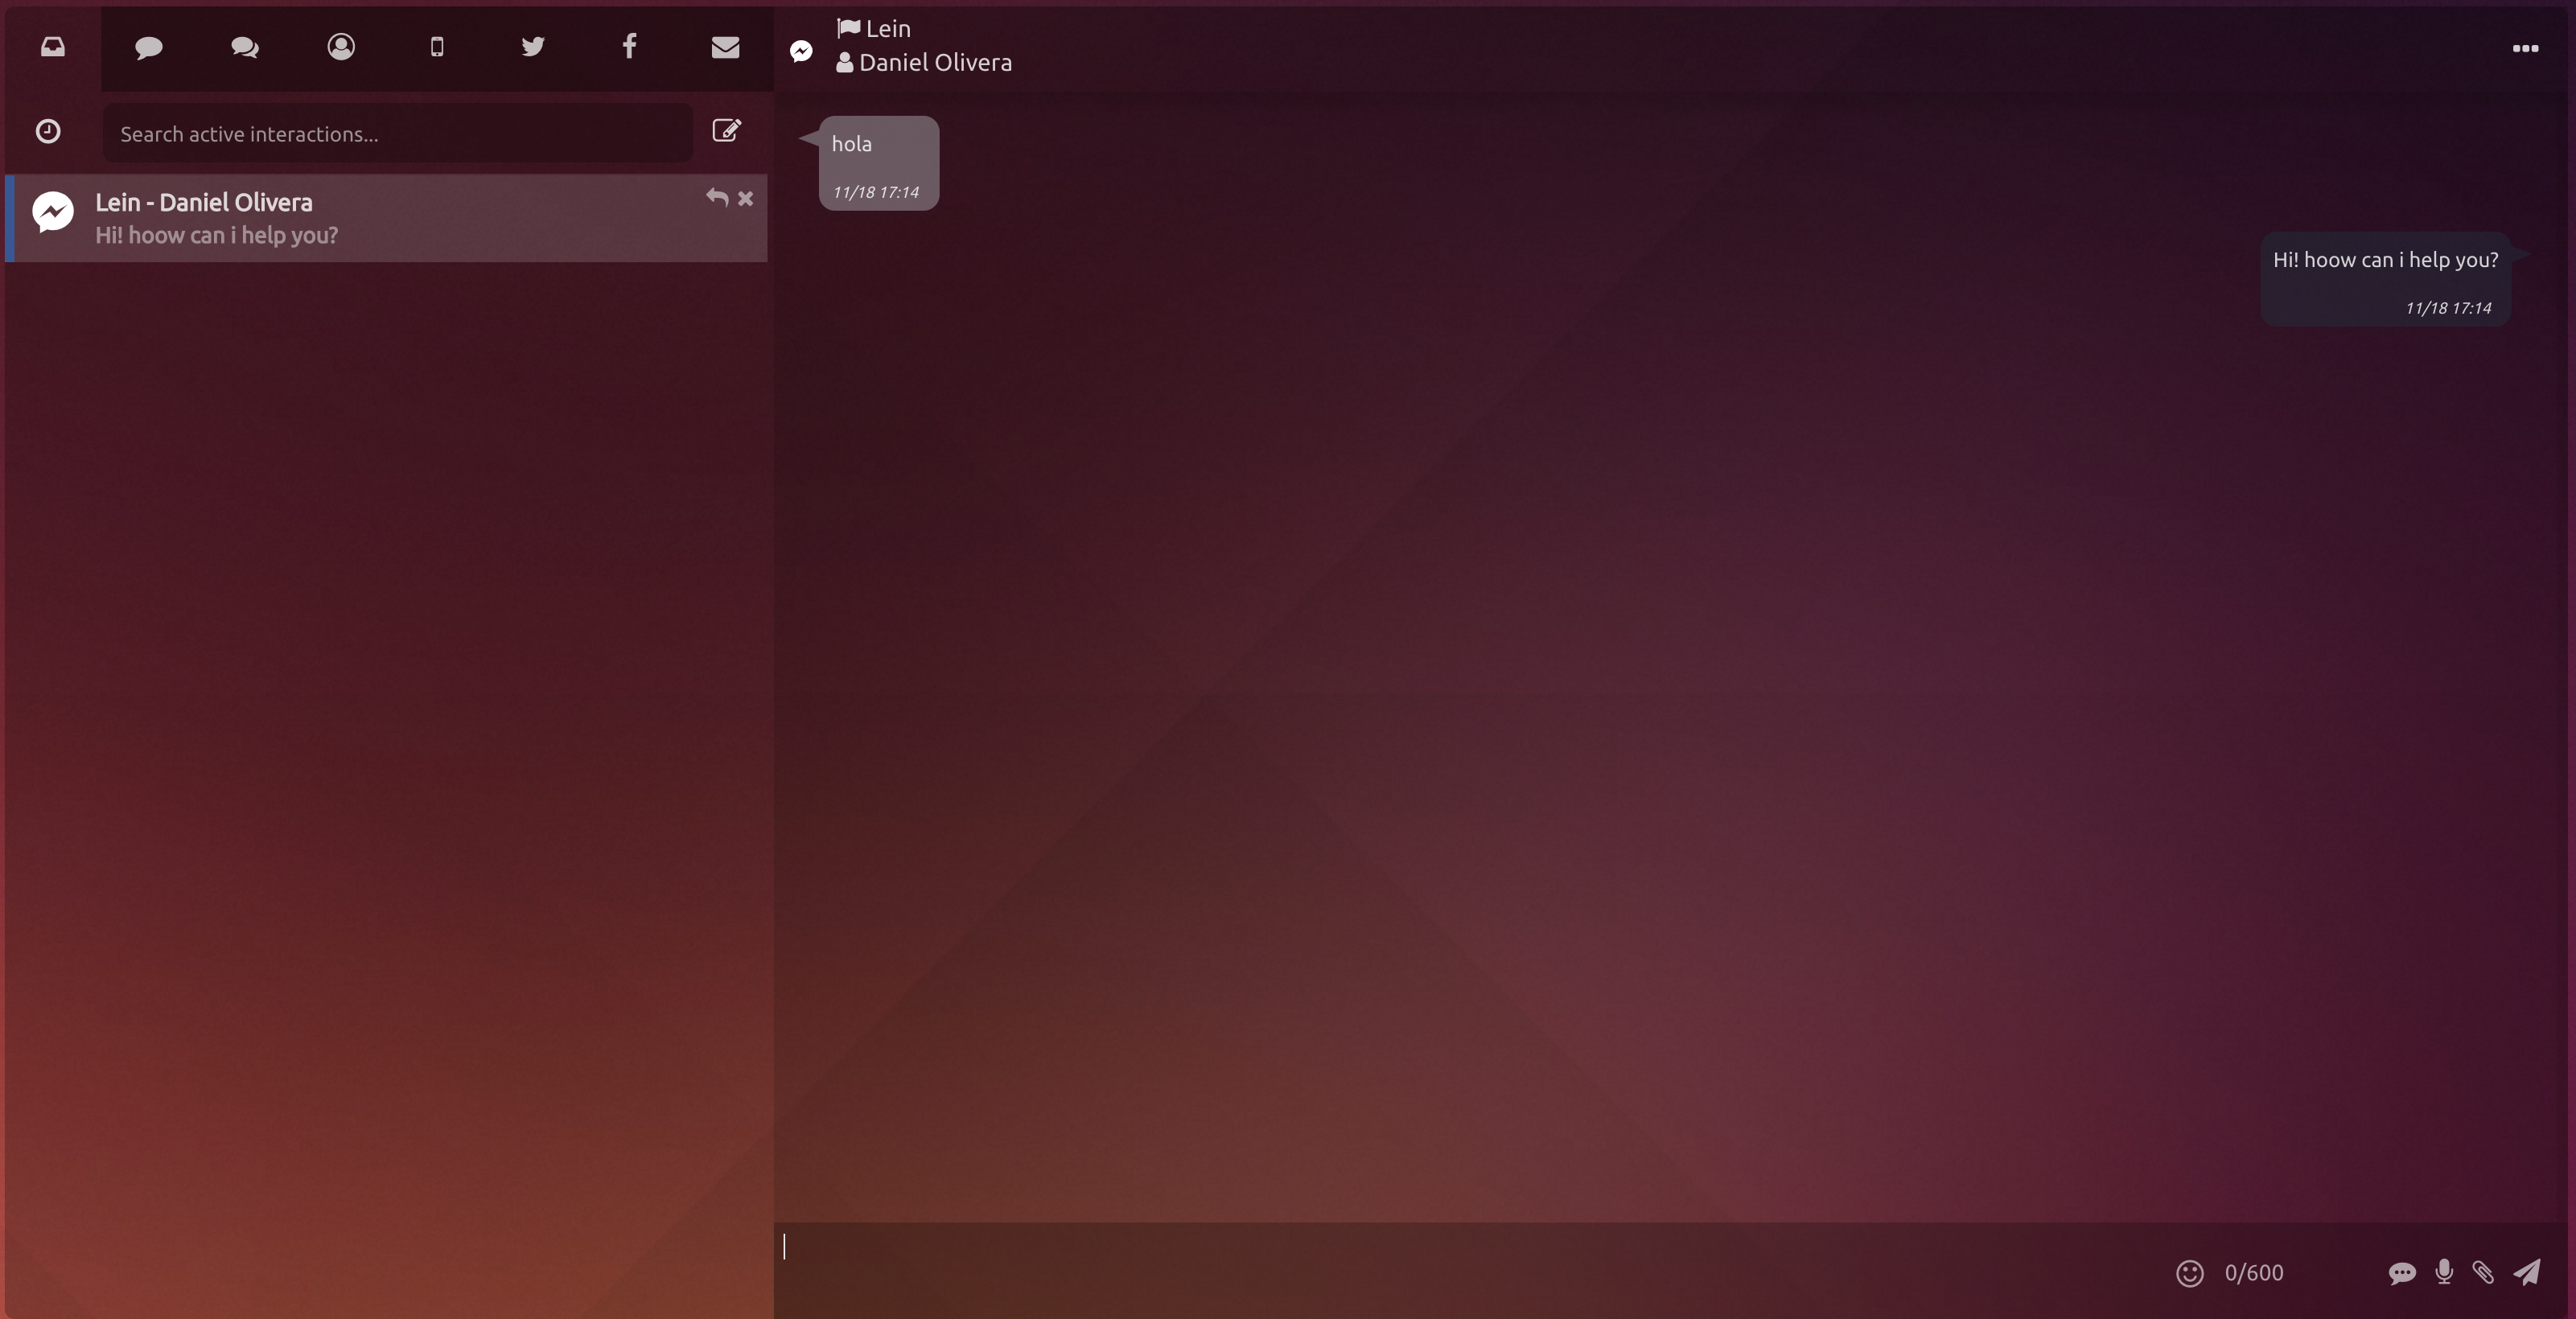
Agent
This is how the agent uses Messenger in the portal.
| Expand | ||
|---|---|---|
| ||
The agent will have on his Inbox the Messenger with which she/he started an interaction. This message will unfold on the right side of this section, showing its history of conversation. This one has as title the campaigns name from which it came and the name of the user that started the interaction. Above it, the beginning of the interaction will appear and the user should open it to be able to see the rest of it. On top of the interaction will be detailed:
Below you can see the box to write and the following buttons:
|
Supervisor
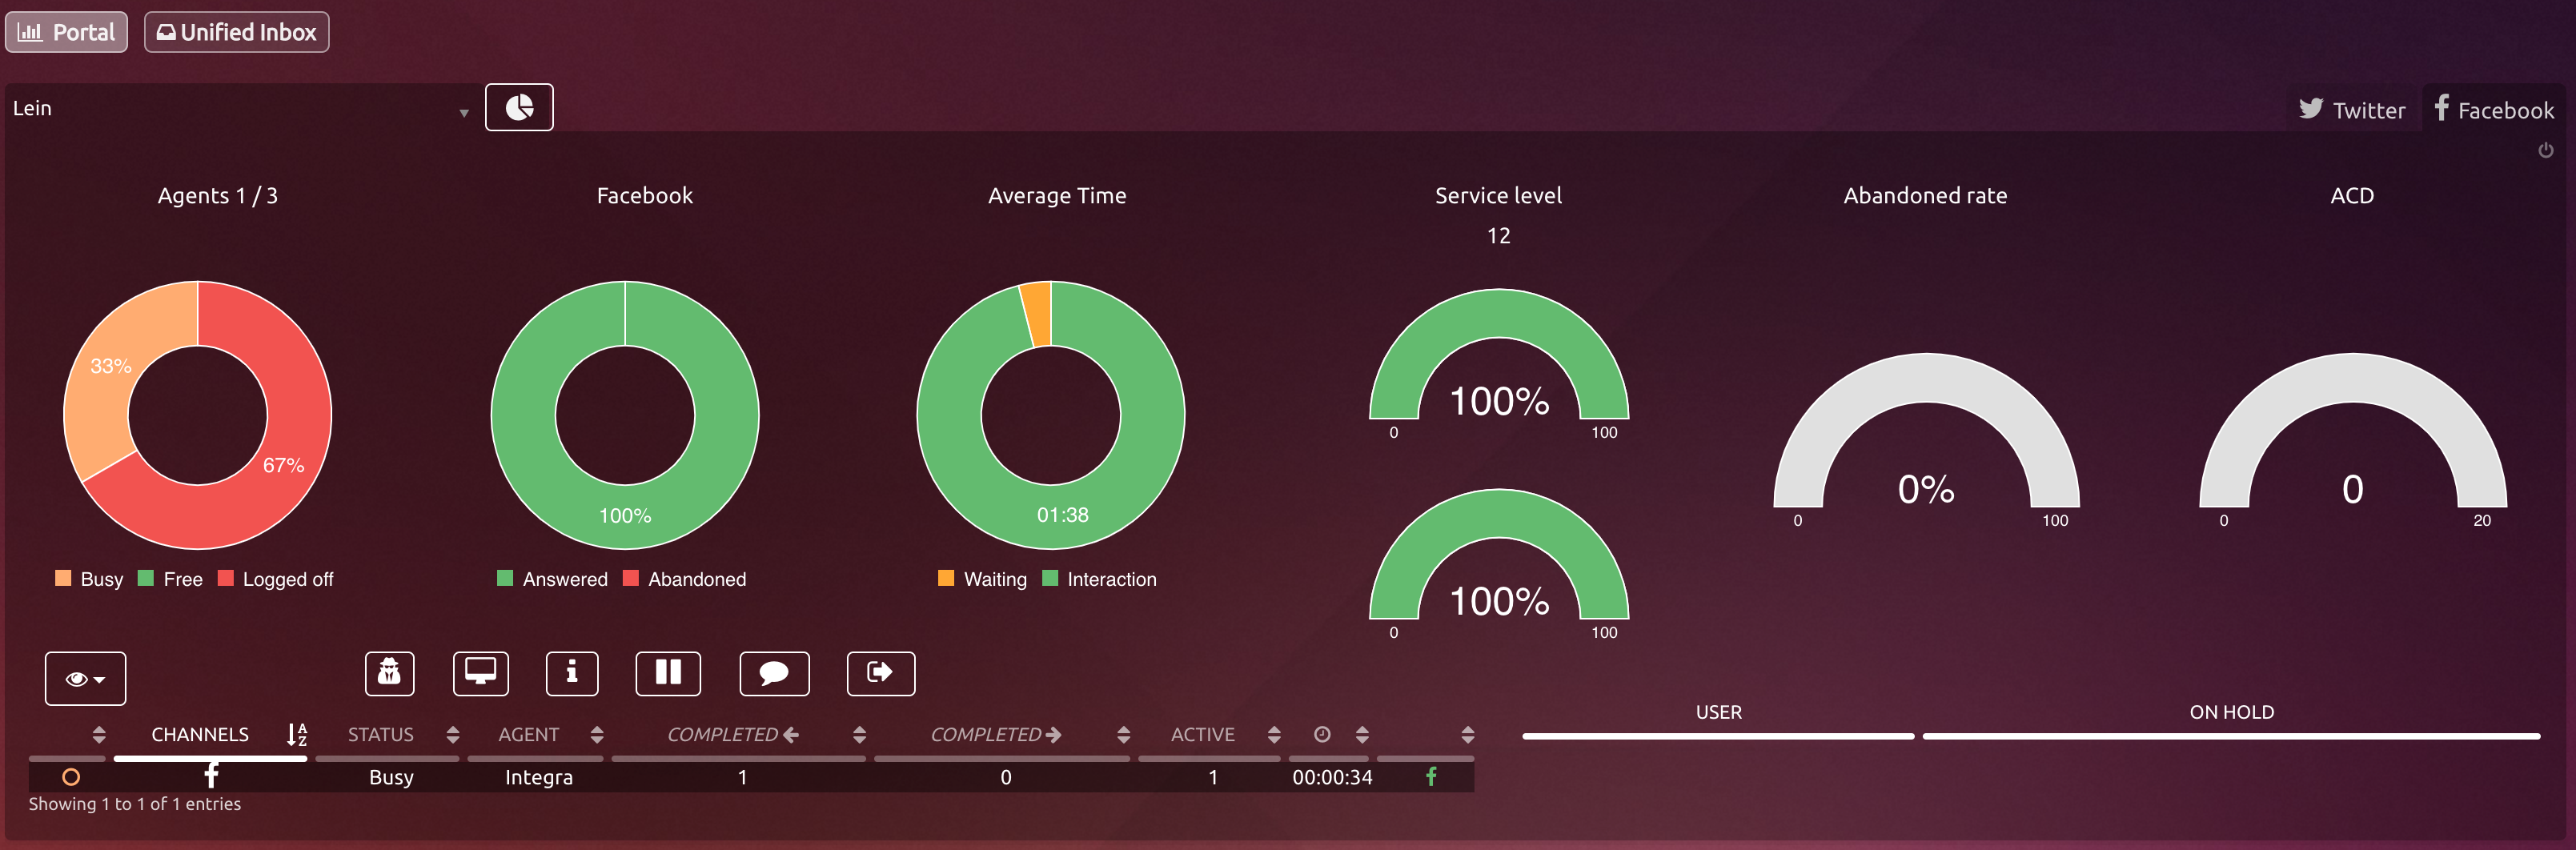
Monitoring
Here the statistics in real time are shown for Messenger campaigns.
| Expand | ||
|---|---|---|
| ||
Status Icon Channel Status Status Agent Completed Active Time |
| Expand | ||
|---|---|---|
| ||
User: Client's username On Hold: Clients waiting time. |
Recordings
Every Messenger interaction gets to be saved in the system, you can see them here filtering by date, campaign and user.
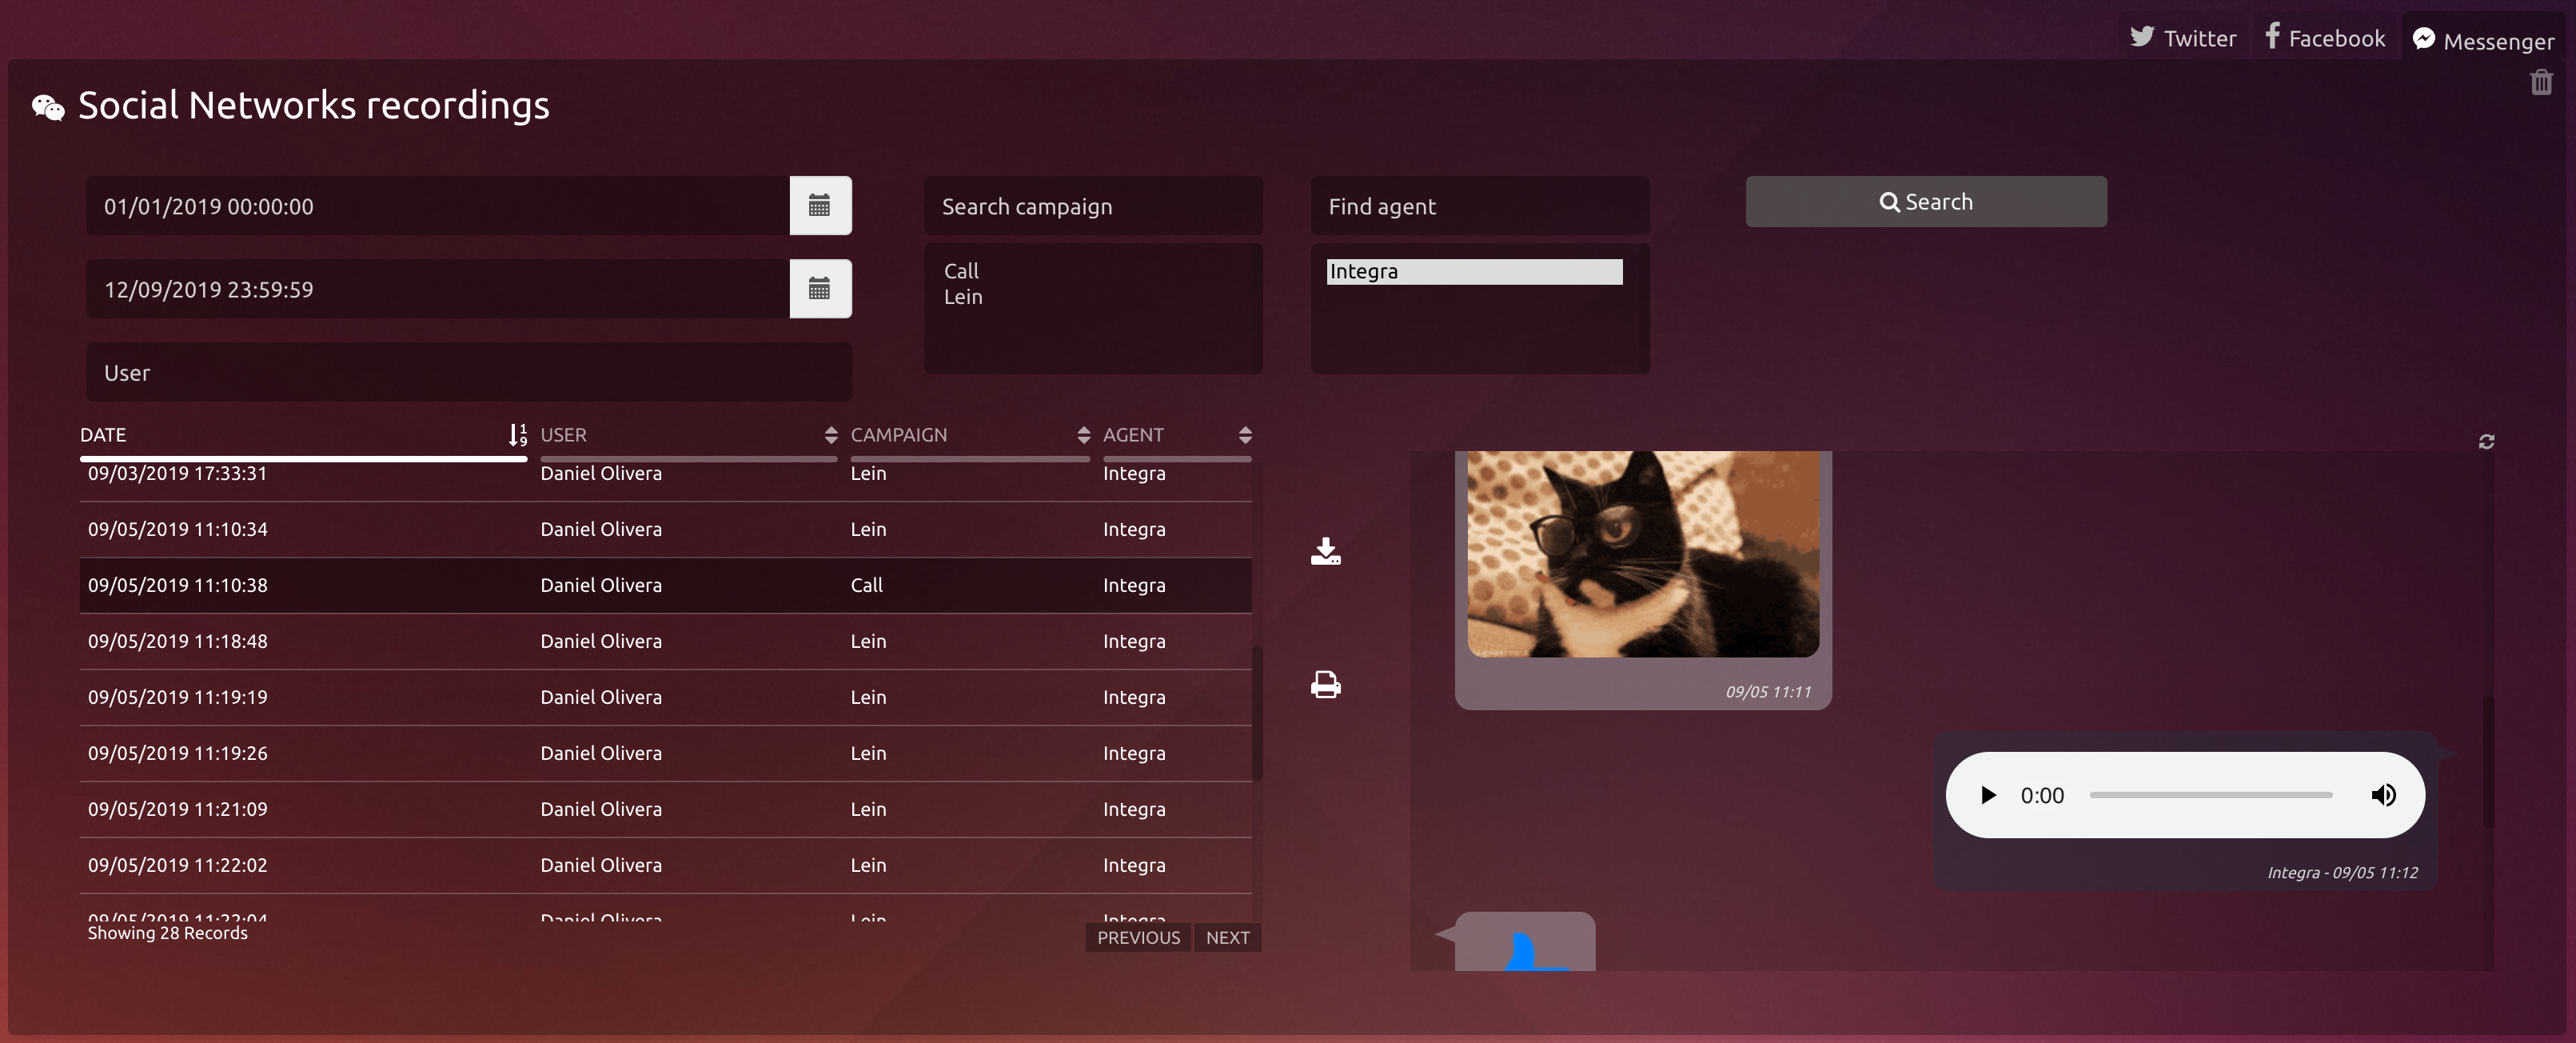
| Tip |
|---|
On the top right corner where the messages unfold, there will be this icon. It works as a refresh, so if the interaction is active, every new message will load here in real time. |
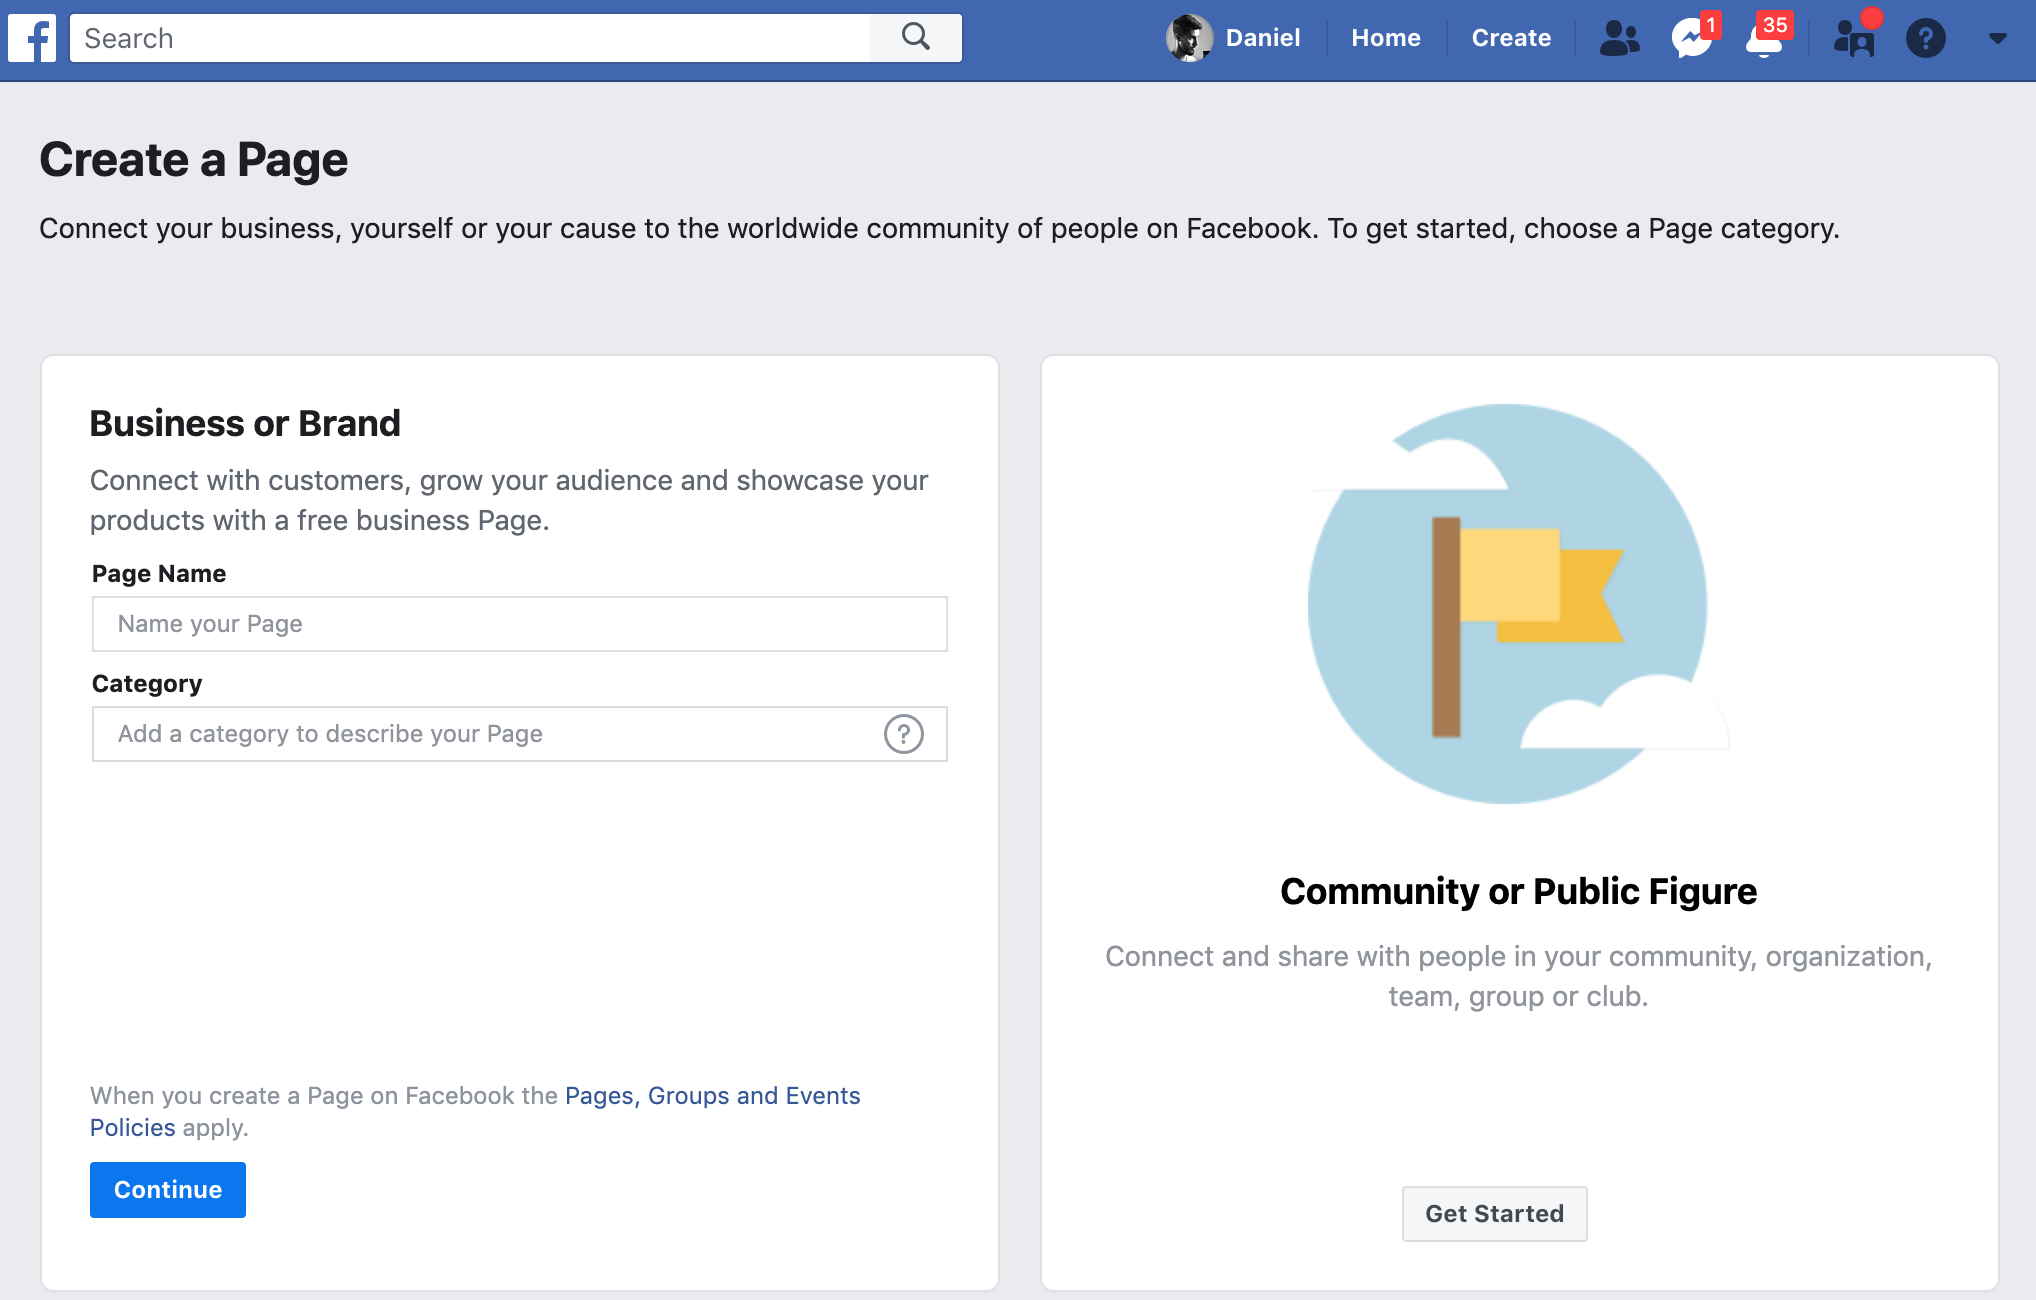
Create Facebook Page
If you do not have a Facebook page, follow these steps to create one
| Expand | ||
|---|---|---|
| ||
|