| Table of Contents | ||
|---|---|---|
|
Administrator
With this tool, uContact users can receive and send Emails using the portal.
Configuration
Allows the user to create Email Campaigns.
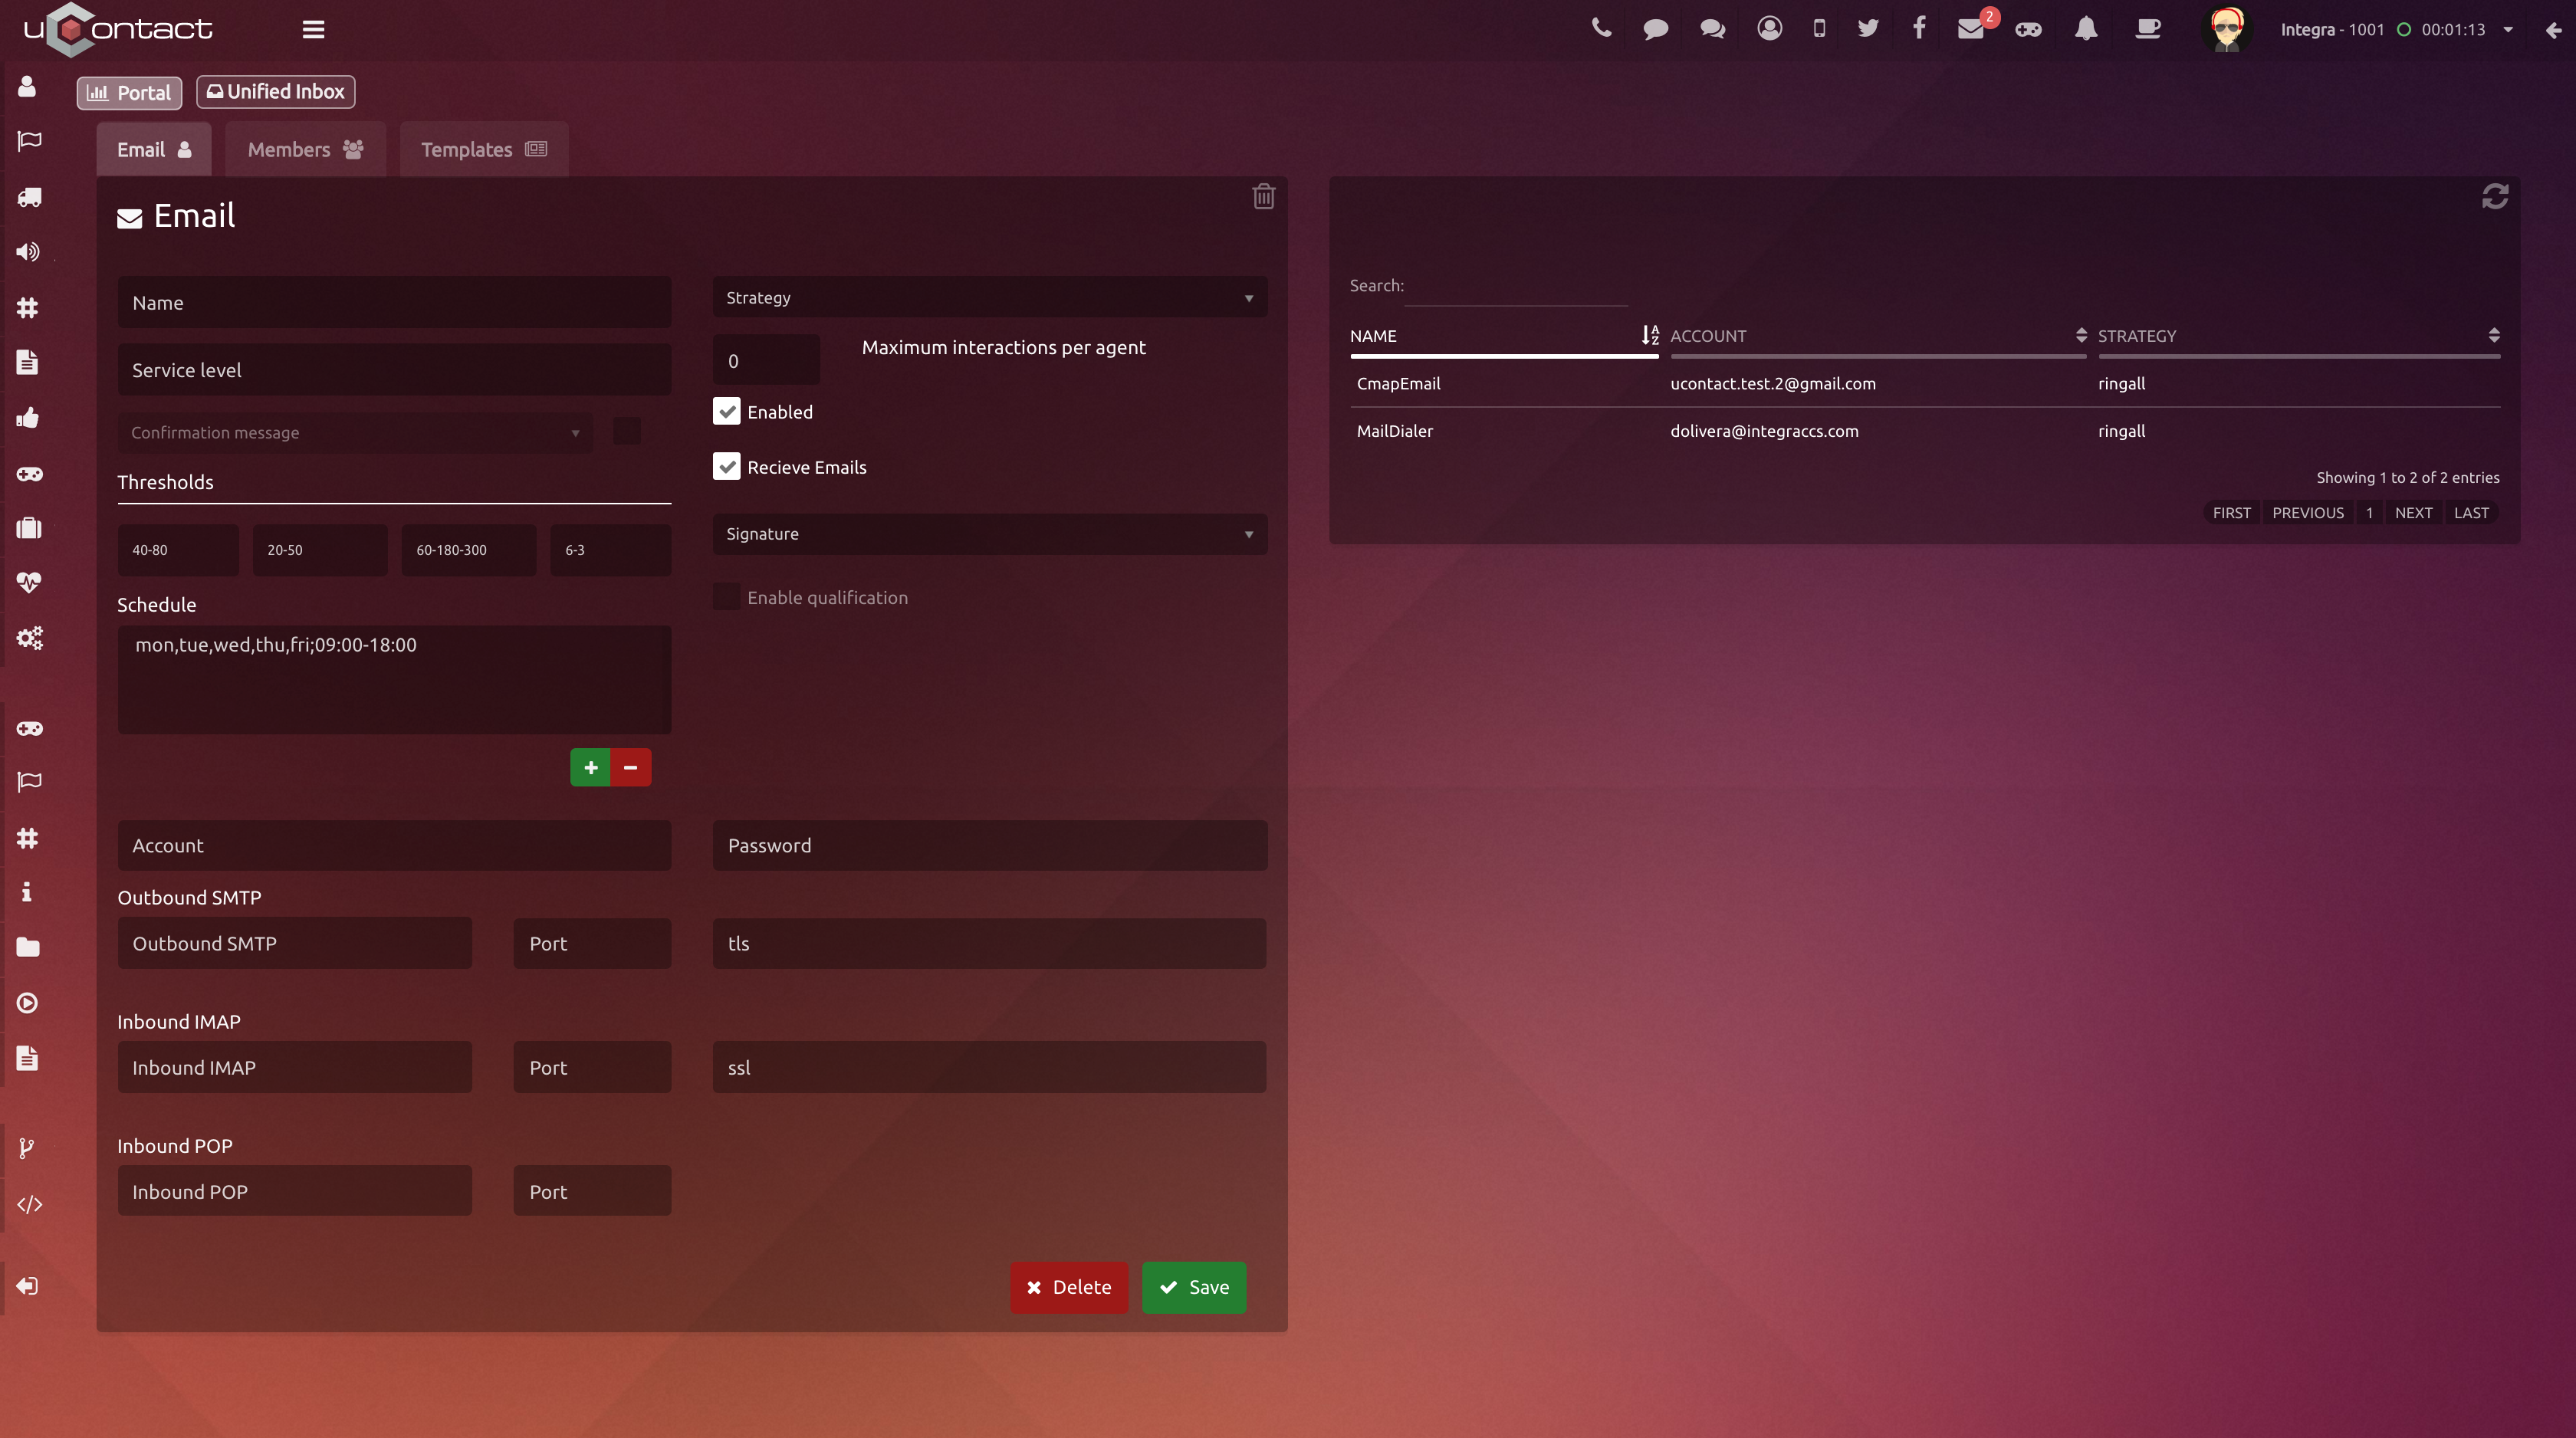
Campaign Data
- Name
Campaign's name for identification purposes. - Service Level
Is the calls percentage that were attended by the agent before a stipulated time. - Strategy
Is the behavior that the campaign will have. To know more about this, please visit Strategies - Schedule
Time in which the campaign will be available, that is, with agents available to handle the interactions.
To add a schedule configuration you must add it with the '+' button and a new window will appear to add the schedule.
To delete a schedule, select it from the list and press the '-' button
Email Data
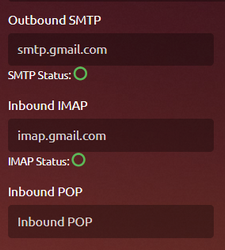
- Account
Email account that is going to receive the emails. - Password
Account password. If this one is wrong written the user will be notified and the campaign can not be created till the password of the account is right. - Outbound SMTP
Protocol for simple assigned email transference. - Inbound IMAP
Protocol for accessing internet messages. - Port
Designated port number
To finish the creation process, the user must click on the "Save" button.
| Expand | |||||
|---|---|---|---|---|---|
| |||||
These parameters already have a default value for the proper functioning of the campaign. To see more about its function visit Important concepts - Omnichannel Maximum Interactions per Agent Enable Receive Emails Signature Enable qualification
Thresholds Confirmation Message Encryption/Security
When the three options are correctly configured, the status of this one will be green, on the contrary will be red, indicating that fields must be checked and corrected. |

To end the process, the user must click on the "Save" button below.
Once the campaign is created, this one will appear in the list on the right side of the screen.
If the user selects a campaign from there, all its data will load in the section of the left, so the user can always modify it.
| Rw ui textbox macro | ||
|---|---|---|
| ||
Apart from that, the campaign can be deleted by selecting it and clicking on the "Delete" button. |
Members
In order to add or delete agents from a campaign, the user must go to Members on the top left corner.
Add Member
- In the Campaigns column, select one or more campaigns to which you want to add or remove members.
- Select one or more agents from the Agents column and press Add
- In the Members column we will see the agents added to the campaign.
| Rw ui textbox macro | ||
|---|---|---|
| ||
To see more about this screen go to Members - Omnichannell |
| Rw ui textbox macro | ||
|---|---|---|
| ||
Members added to a campaign must be part of a voice campaign, on the contrary, this agents wont get any interactions from this channel. |
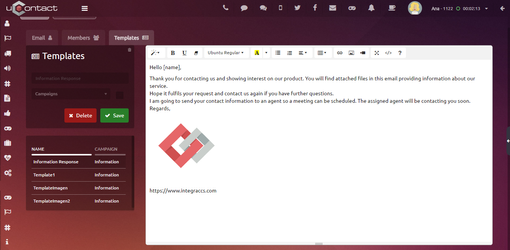
Templates
Easily design your own Templates.
Each one of this is assigned to a specific campaign.
| Expand | ||
|---|---|---|
| ||
To create a new Template, the user must specify its name on the top box and the campaign assigned to this one on the bottom box, which is optional by checking the box next to it.
In case there is no campaign adjudicated to the template, this one will appear for every campaign in the system. If the user wants to edit an existing Template, first of all select this one from the table below and the template will appear ready to be modified. |
Agent
This is how the agent uses Email in the portal.
| Expand | ||
|---|---|---|
| ||
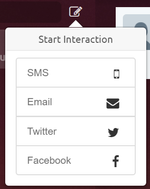 Next to this searching box, there is an icon where the user can easily start interactions. The following box will unfold: 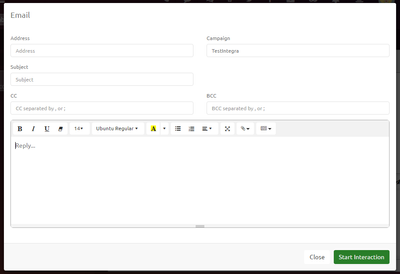 And inside the Email option: The agent will have on his Inbox the Email with which she/he started an interaction.
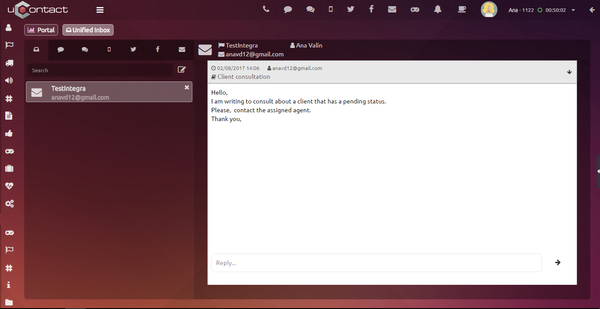
This Email will unfold on the right side of this section, showing its history of conversation and the client's information:
When the user opens up the email, this one can be answered to the same user that sent it, or Forward it to as many other users as the person wants. |

| Expand | ||
|---|---|---|
| ||
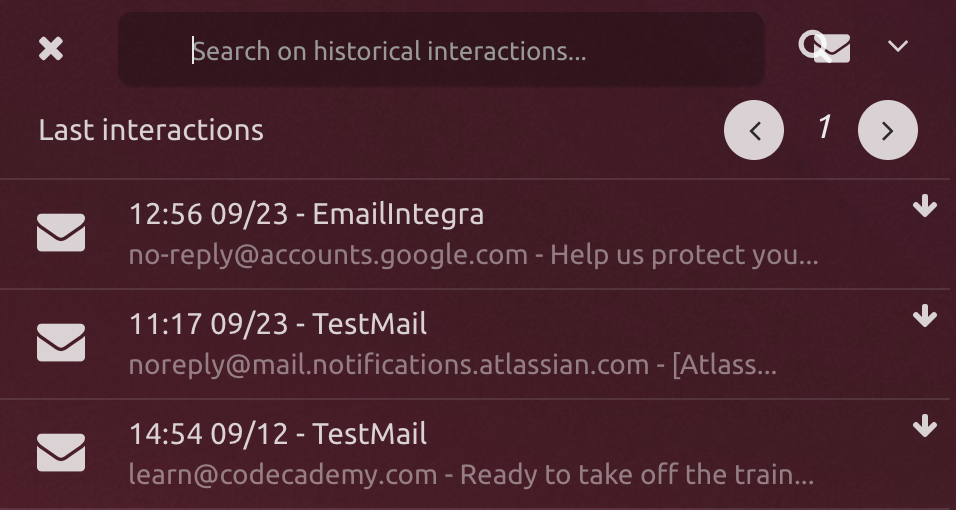
In section on the left, the user has an interaction searching box.
Can search by campaigns name, client's email, subject and client's name.
|
| Rw ui textbox macro | ||
|---|---|---|
| ||
An email can be forward, by clicking on the arrow icon next to the answering box.
|
Supervisor
Monitoring
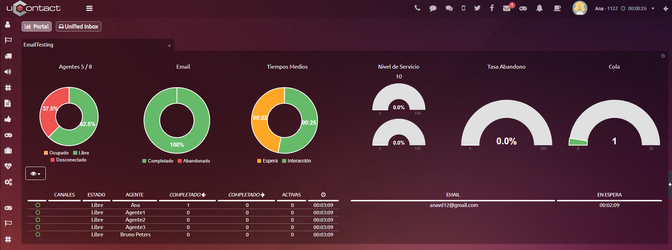
Here the statistics in real time are shown.
| Expand | ||
|---|---|---|
| ||
Left down table
Right down table
|
| Expand | ||
|---|---|---|
| ||
When an agent has an active interaction, the supervisor can click on it an the following options will appear:
|

Recording
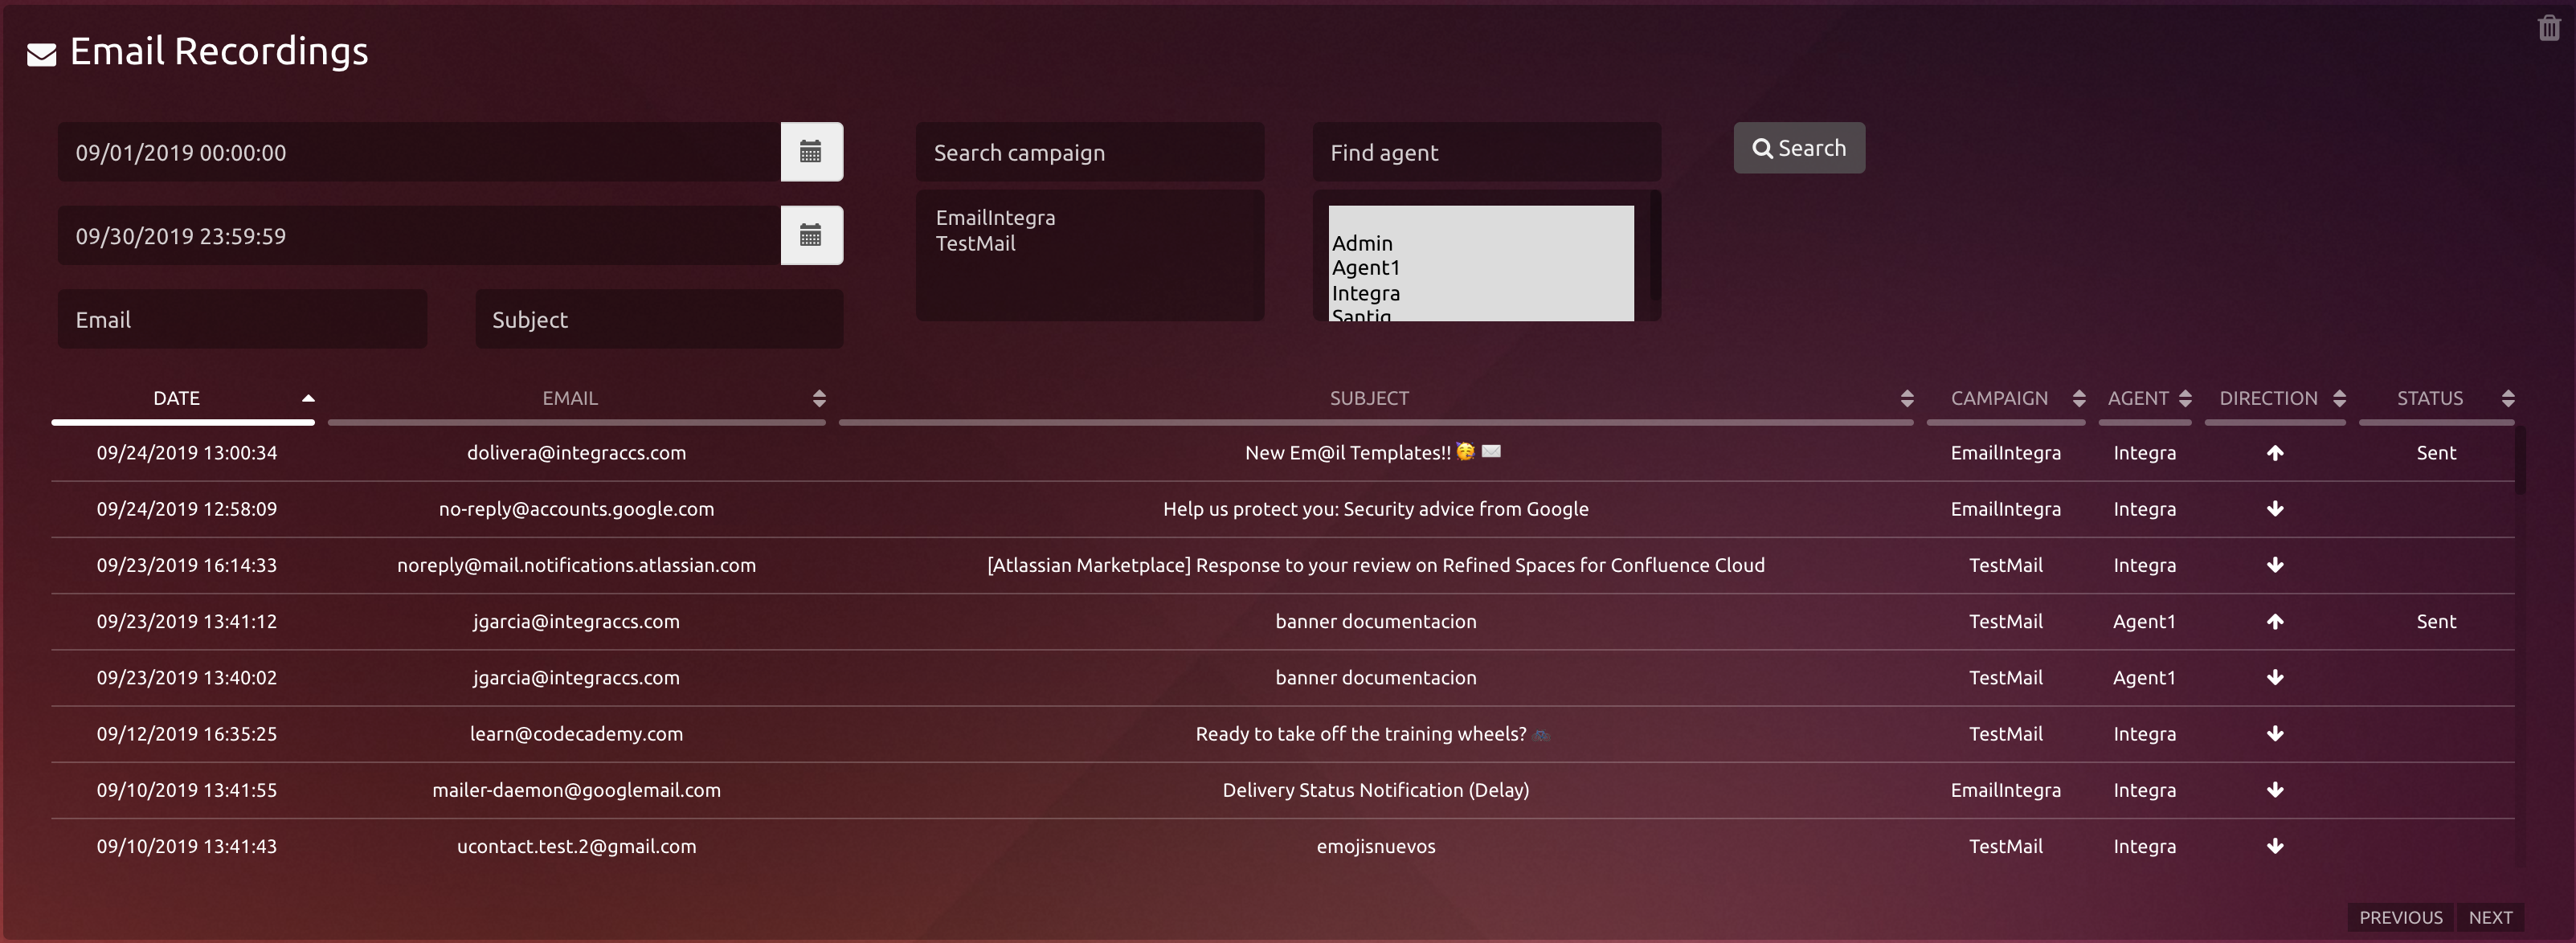
In this section, the supervisor will see every Email chat interaction.
| Expand | |||||
|---|---|---|---|---|---|
| |||||
Parameters for filtering
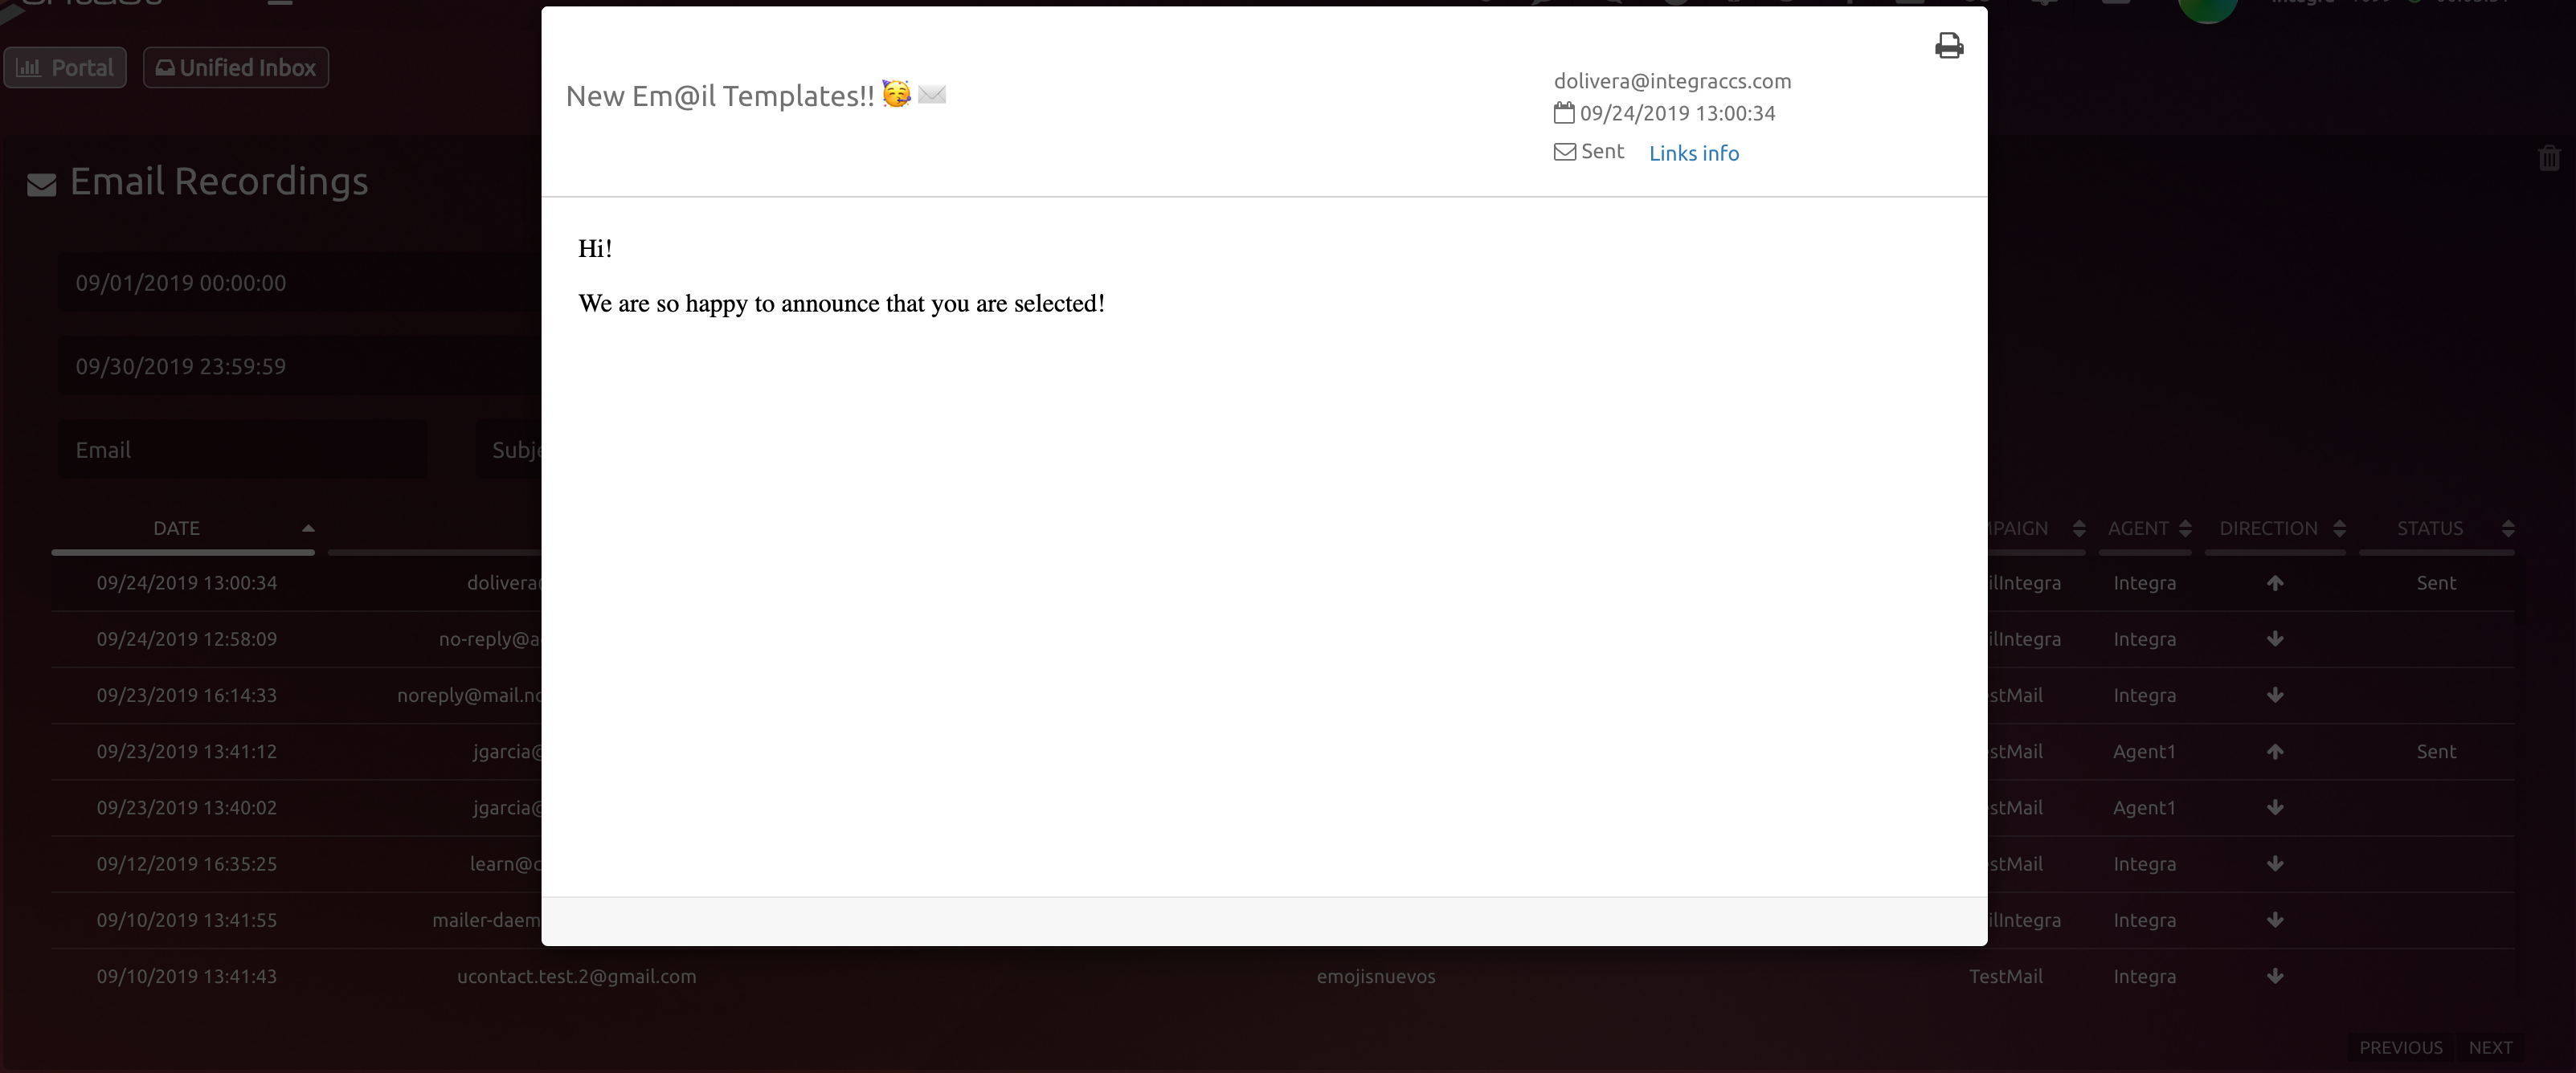
Email ViewerWhen the user clicks on one of the mails, the following opens up:
|