uContact Bots
The bots allow the execution of flows that use a Javascript engine allowing you to perform almost any action if you have the necessary programming knowledge.
From simple answers to transfers, queries to the database or execution of web services are just some of the programmable activities for bots.
To get started with bots you will need to log into uContact with a Supervisor type user with permissions to use the Workflow Designer.

Bot development
This is the core, here its behavior is defined and that it is well created is essential for its implementation.
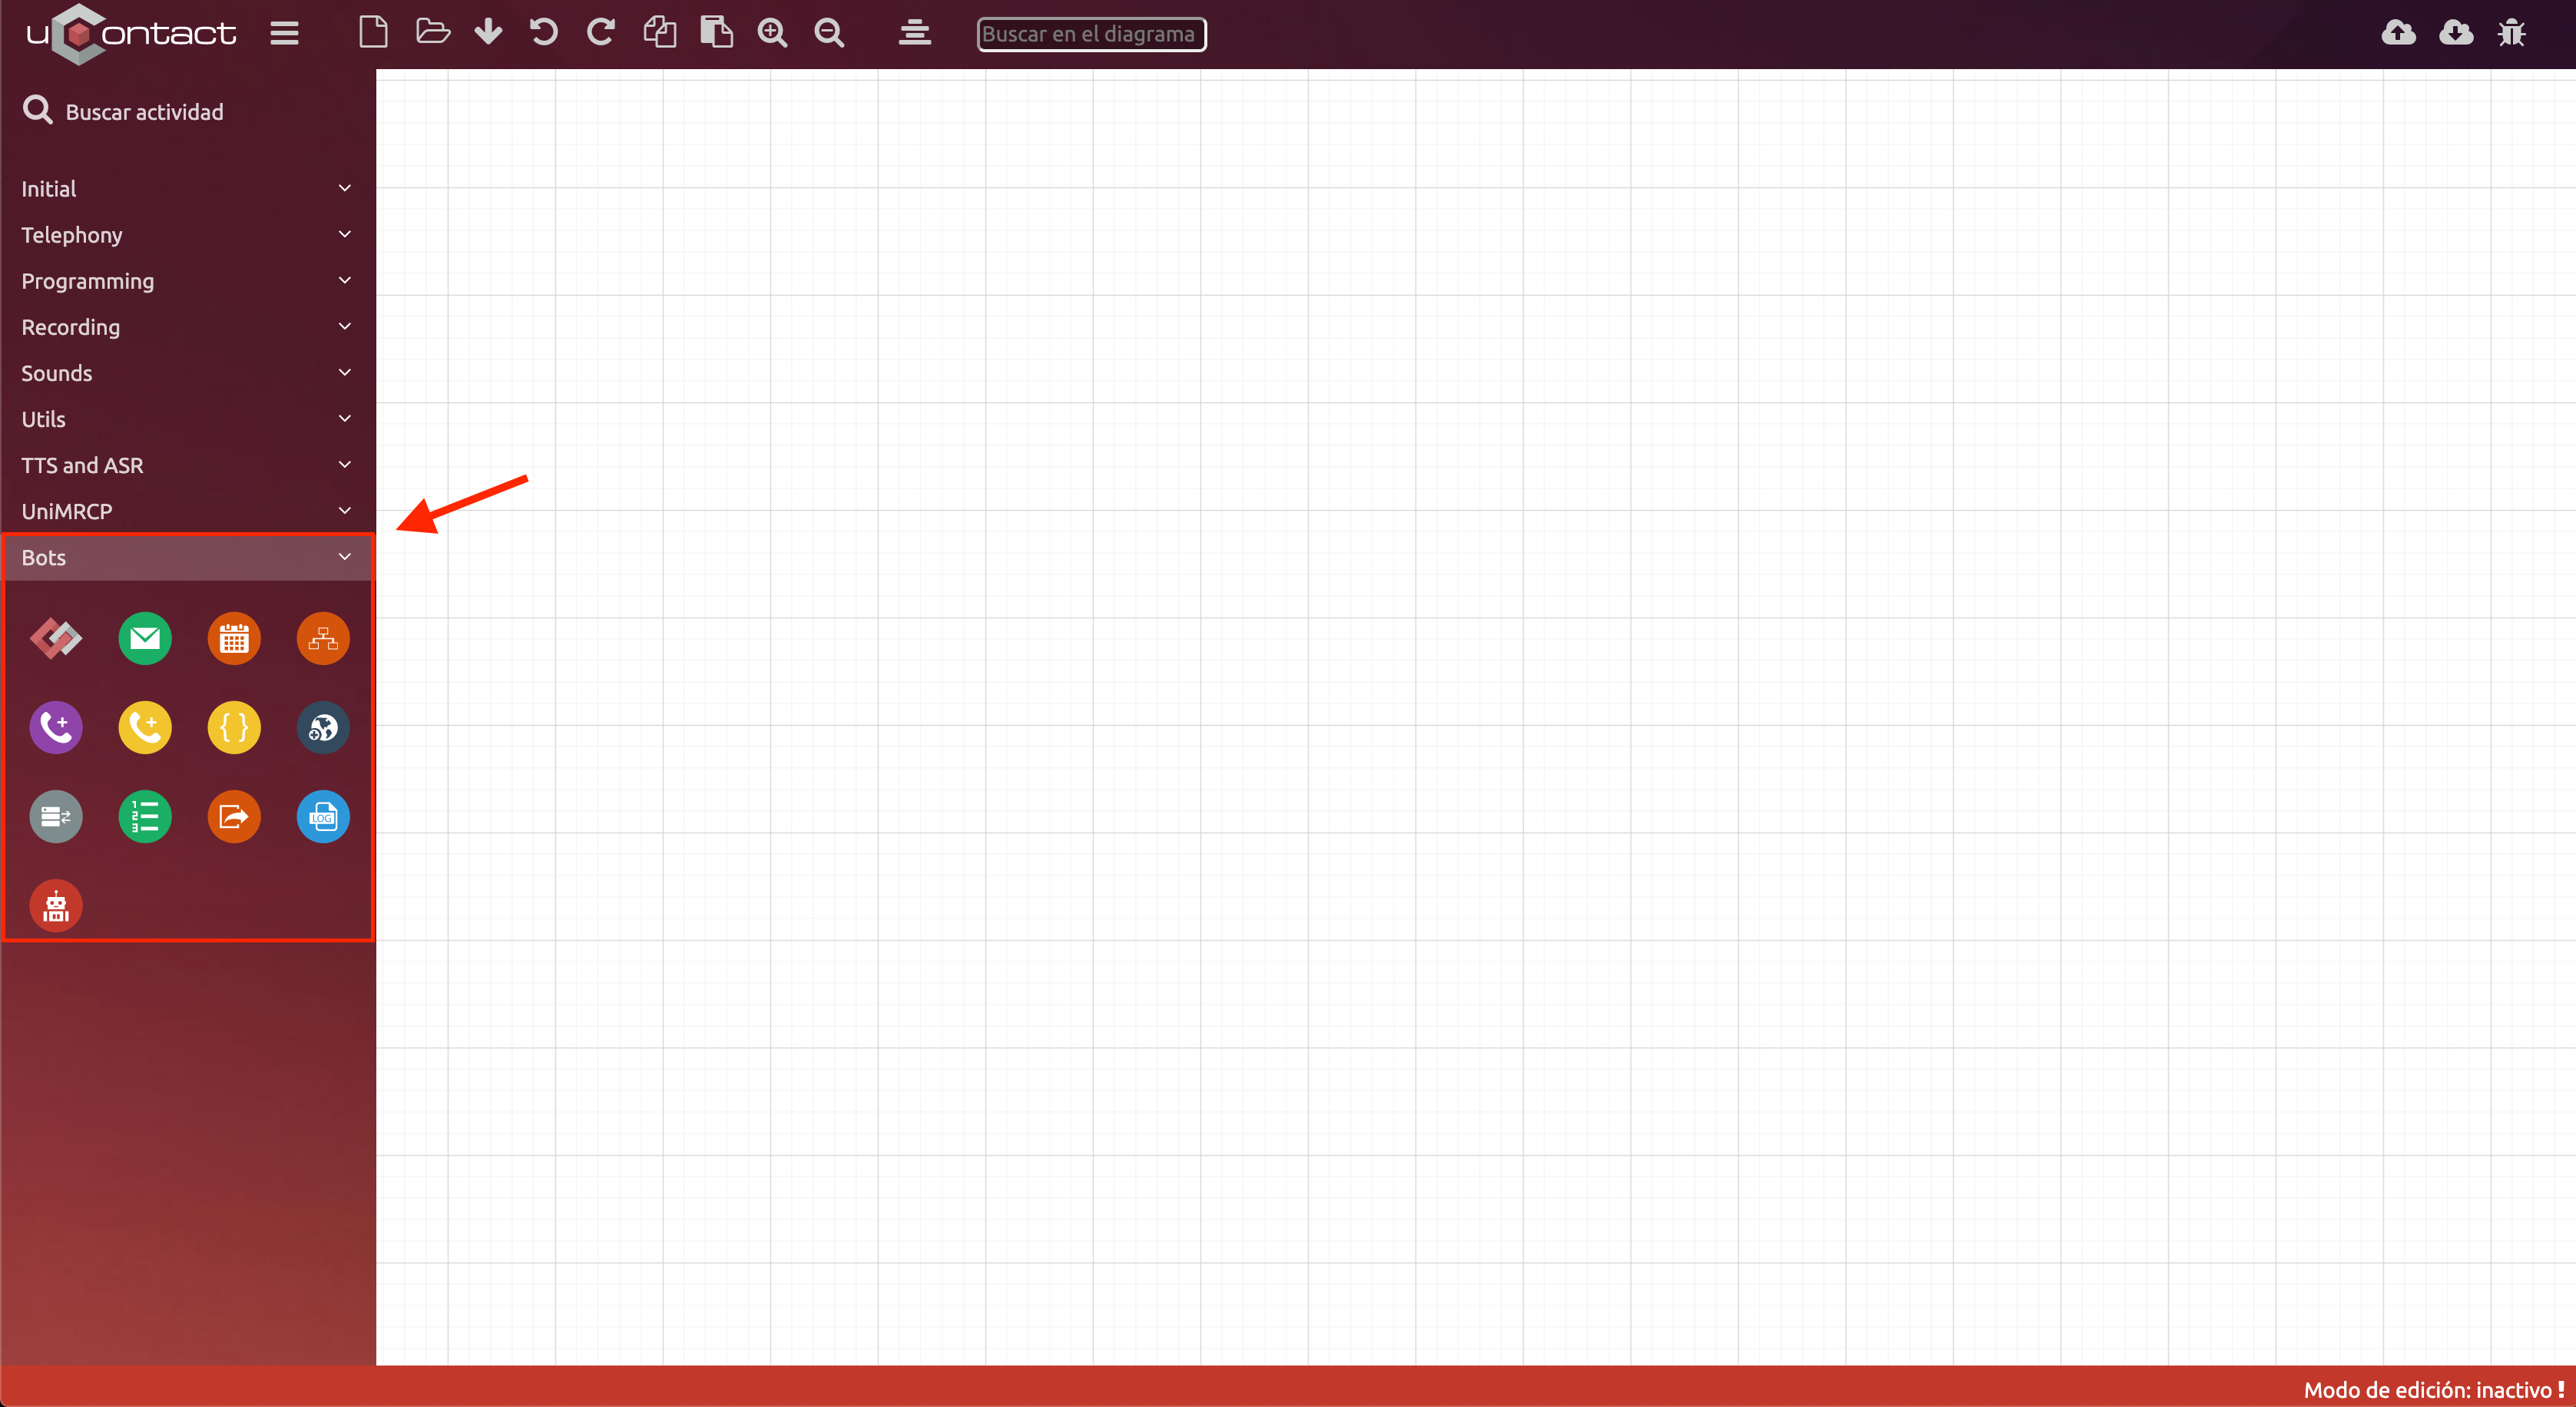
For this we go to the Workflow Designer, there a blank page will open and on the left, in the activities menu, we will see a dropdown called Bots located at the end of the list.
From here all the activities to be carried out by the bot will be taken.
To consider:
You should always start a bot with the BotStartActivity activity
You should always end a bot with the FinishInteraction activity
FinishInteraction should not be included after a TransferBot activity
Bot Activities
The activities allow to control the operation of the bot.
Here we will describe the function of each activity
BotStartActivity
This activity is the first of the flow, it must always be included in all the created flows, it indicates to the bot where the activities begin.
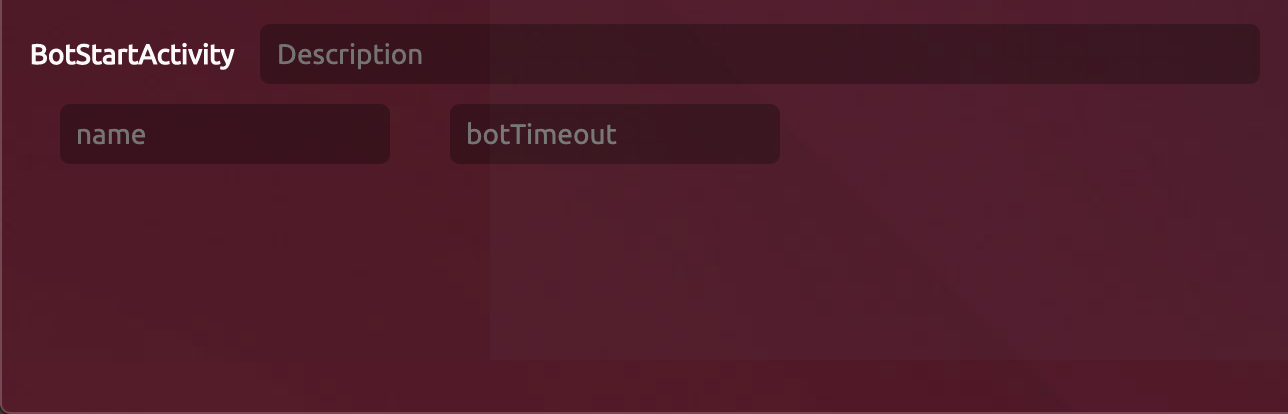
In the name field, it will include the name under which the bot will be seen and botTimeout is the time in minutes the bot waits without receiving a response to finish the interaction.
SendMessage
With this activity we will interact with the client, it allows to send a message after each time the client writes. This field can work in 3 ways
Send a simple message
To do this we simply write the message you want to send in the message field.
Send options
After introducing yourself, you may want to give the client options and thus make decisions based on their response. To do this, you must write the options in the message field, indicating the option number and separating them with Enter.
The customer receives the options to select.
Send Message with results
Other activities allow you to create and store data in variables, such data can then be used to show the customer.
For example:
In case your Flow queries the Database to return a customer number, you can store that number with a variable, then use SendMessage and in the body of the message you can write:
"Your client number is ${variable}"
To which the client will receive the result of the query instead of the variable.
This action allows evaluating a response and activating a route or another depending on the time that is entered.
Example: The client writes to the bot and selects to speak to an agent. After reading the response, you can decide to send it to one campaign or another depending on the time the interaction is.

The format must be:
mon,tue,wed,thu,fri,sat,sun;09:00-18:00
And you can add more schedules with “&“
mon,tue,wed,thu,fri;09:00-18:00&sat,sun;10:00-13:00
Evaluate
Evaluate an answer and based on it decide one way or the other, evaluate can be chained one after the other in case we have multiple options and each one performs different actions.
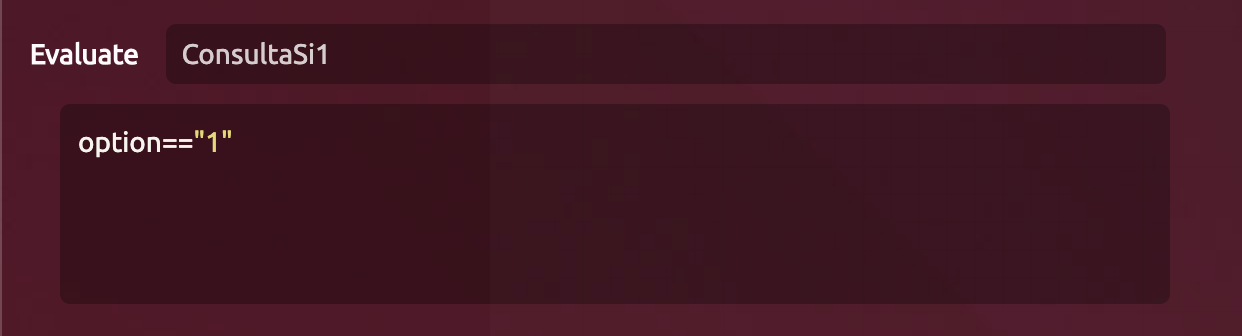
If the variable is met it will go through the green path that comes out of the evaluate, if the variable is not met it will go through the red one.
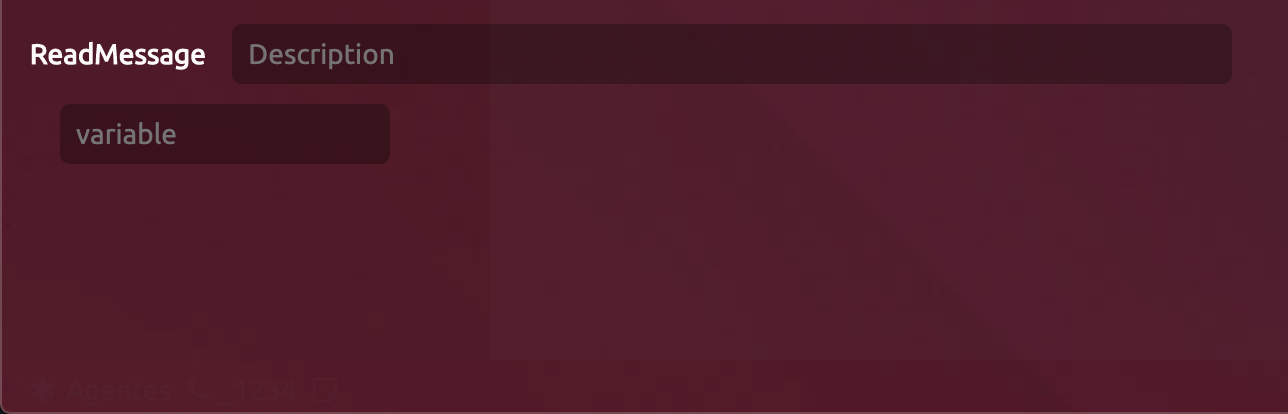
ReadMessage
With this option the bot will read the response sent by the client and then be able to evaluate it or save it in a variable.
ReadFileMessage
This option is similar to the previous one except that it is used to save an image after requesting it and thus it will successfully reach the agent
Procedure
This activity allows you to execute JavaScript code. For example, if you want to parse a response from a web service or increase the value of a variable, you can do it here.
ExecWebService
Allows to execute a Web Service

In this activity, both external web services and those of uContact can be used, for example, to make calls.
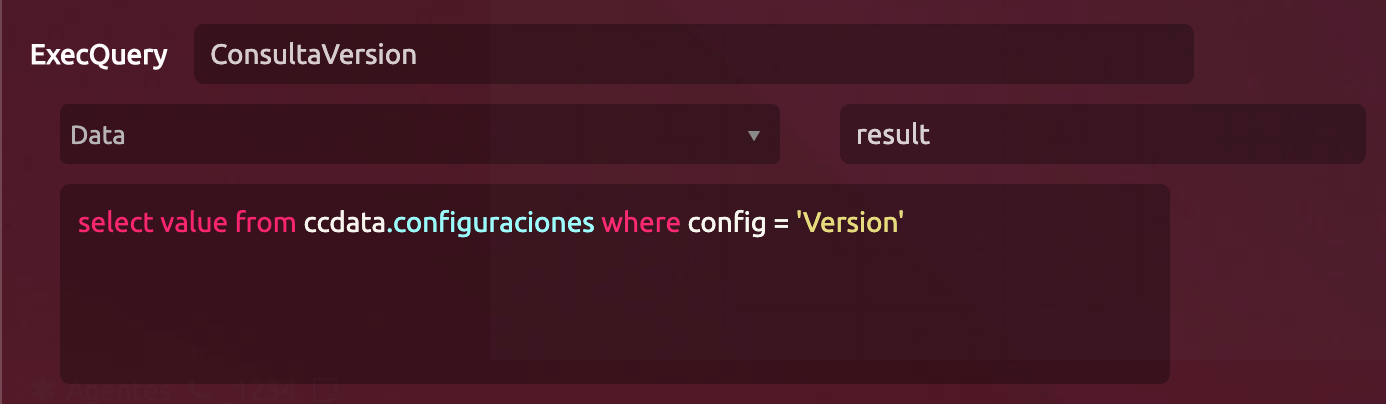
ExecQuery
Here you can query the database.
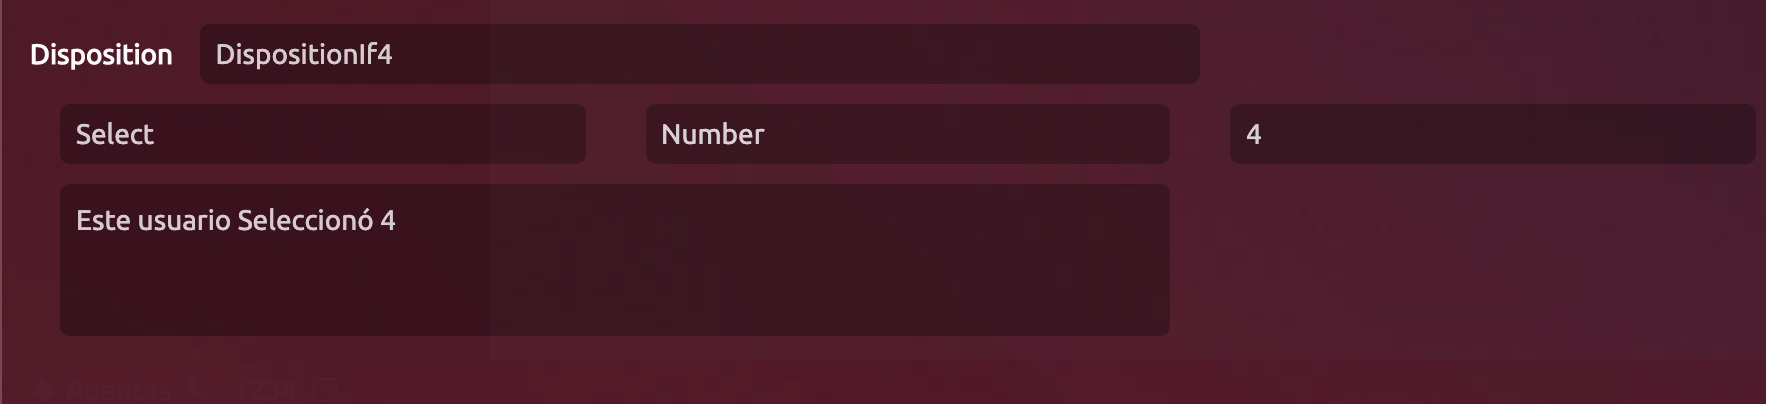
Disposition
It allows to create dispositions to the interaction with the bot, in this way you can track the interactions.
The dispositions are inserted directly in the DB, therefore they do not necessarily need to be created in the system, even if they are created in uContact they will not execute actions such as schedule or respool.
TransferBot
With this option you can transfer the interaction from a bot to a campaign on the same channel that is being used.
For it to run correctly, we must indicate the exact name of the campaign to which you want to transfer.
If you use this function it is recommended not to use the same bot for 2 campaigns on different channels since the bot will not be able to transfer to another channel.

When the interaction arrives, the agent will see the conversation between the client and the bot
LogOp
Allows you to print a variable in the IntegraServer log.
Commonly used for creating or debugging workflows.
formato:
${log}

FinishInteraction
This action must be at the end of each flow, it indicates to the bot that its flow has ended and closes the interaction with the client.
After a FinishInteraction, the webchat client will see a message to leave the chat or stay in it and see the conversation, but the calls and the text area are disabled.
When you create the first flow for bots, the
botscontext will also be created, it will list all the flows created for bots.Before creating the first flow, the bots context will not exist.
See how to create your first bot flow or download an example flow and start working with them!

Bot Administration
Since update 6.275 in the configuration of SMS, WebChat and Messenger campaigns we will see a drop-down menu called Bot Name, when it is displayed all the created bot flows will be listed.
After selecting the desired bot for the campaign, simply press the Save button and your campaign will start working with bots!
The interactions that are open at the time of the change will not be affected by it, the same as those that are in the queue.
A campaign with bots does not need to include agents, the bot will take the interactions and distribute them to other more specific campaigns.
The interactions that are generated after making the change will start using the bot.
The chats with the bots are recorded and can be consulted in the recordings of their respective channel
The bots fulfill the function of an agent, this allows us to even make reports obtaining the bot's data.
In the message tables of each channel, the agent parameter is the name of the bot.
Create the first Bot
In this section we will see how to create a basic flow, as an example and practice, that contains the following actions:
Presentation - SendMessage
Options - SendMessage
Get reply - ReadMessage
Evaluate the answer - Evaluate
End interaction and make disposition - Disposition
Insert a user into a table - ExecQuery
Transfer to a campaign - TransferBot
Check the system version and save the variable - LogOp
Use the variable in a response and end the interaction - SendMessage
We will start by adding the BotStartActivity action and giving the bot a name.
This name is the same name that will be shown in the settings drop-down menu.
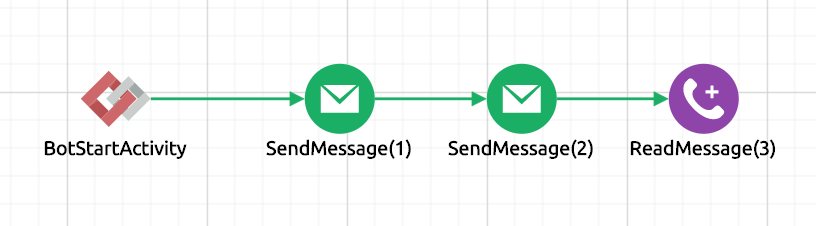
Then we will add two SendMessages that will be sent in a row.
The first will be our presentation, in it we will warn the user to select one of the options that we will give him below.
In the second we will give the options, making one per line and starting with number and hyphen.
In this instance the bot waits for the client's response, for this we must add the ReadMessage activity and our flow will look like the following:
Now we will add the Evaluate to analyze the response obtained. We put 4 options so we will use 4 Evaluates.
In each one we will indicate the condition that the variable must have for it to be valid
For each option we will add its destination, that is, in the second and fourth Evaluate we will use ExecQuery and in the third a TransferBot.
In the first ExecQuery we will write an insert, in the dropdown we select the database in which it is performed and in the variable we will put a name to use later in the response, in this case it is result.
In the second, it will make a query for the version of the system, in the drop-down we select the database in which it is performed and in the variable we will put the same name to use later in the response, in this case it is result.
In the TransferBot we will simply put the name of the campaign to which the client will be transferred.
So far it only remains to add a SendMessage returning the response and followed by a FinishInteraction.
Now it only remains to join our flows or adjust it to our needs by adding dispositions, logs or WS and they would have something similar to the following:
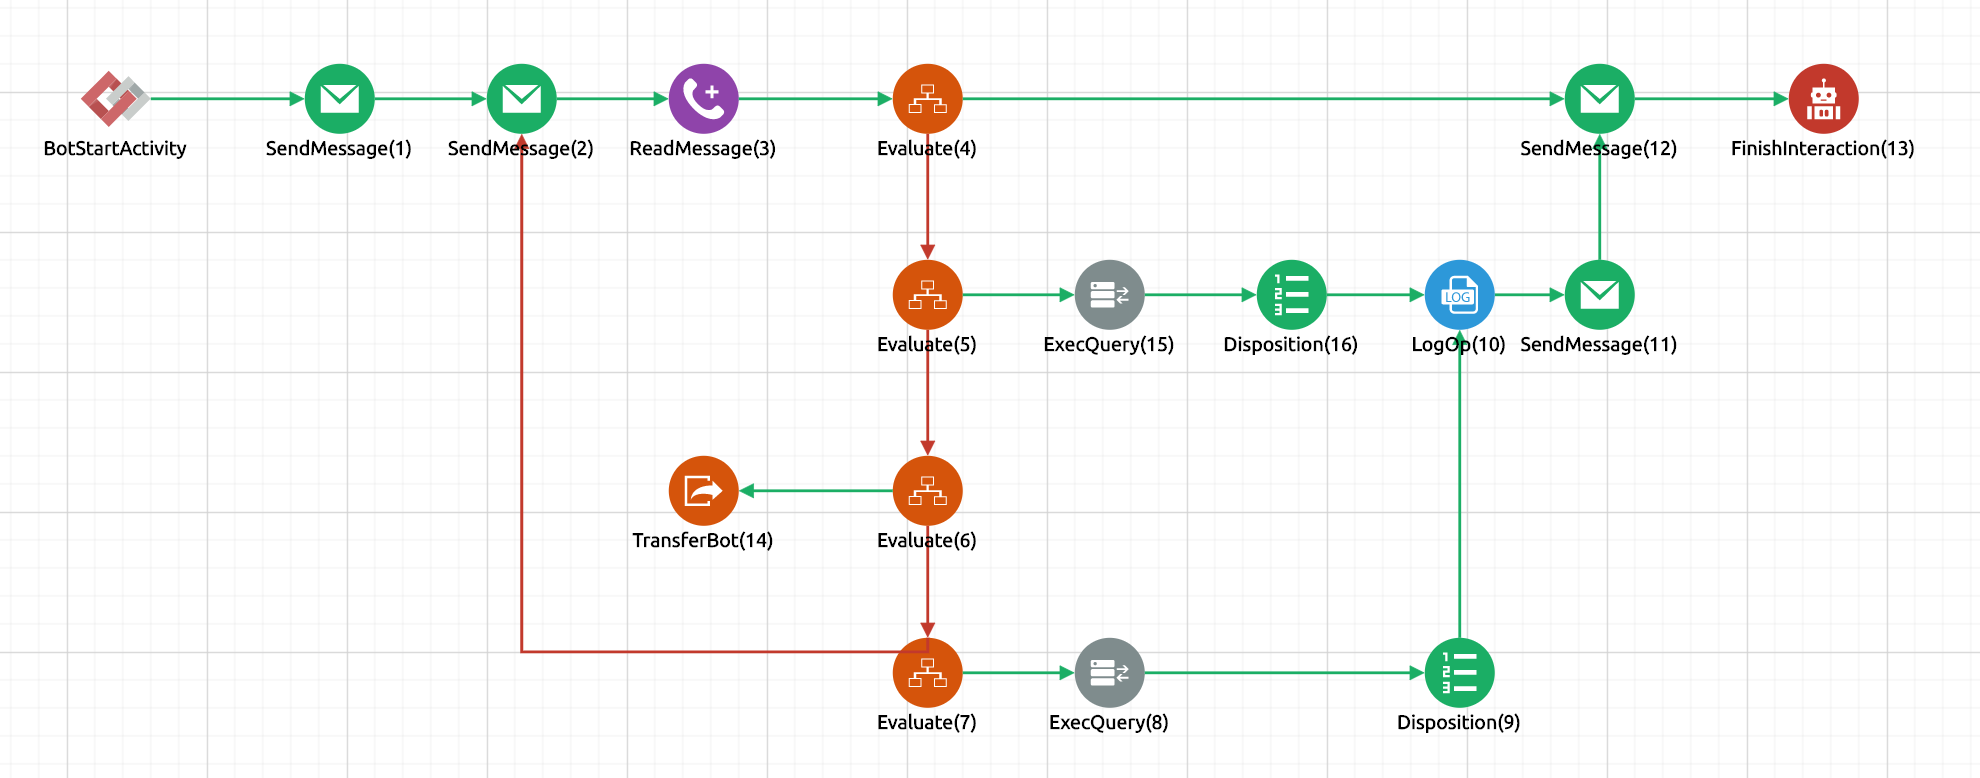
After finished we just activate it, add to the campaign and your bots will start to work!
Simple bot example
This is the introduction to Bots.
Soon we will add posts and videos about it.