...
...
...
...
...
...
| Table of Contents |
|---|
...
Agent
Info
This tab shows all the information from the clients that are registered on the system, new clients can be added and the information from existing ones can be edited.
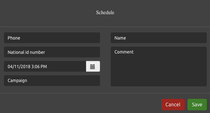
When the agent has a connected call (being outcoming manually, through dialer or incoming), if the client is registered in the CRM system database, the following form pops up with the information of the client that is interacting with the agent.
This method simplifies the interaction between agent-client, the agent can modify or add information faster, giving a more efficient service.
If the client is not registered in the system, the form will appear empty so the agent can start completing it and register him/her.
...
| Expand | ||
|---|---|---|
| ||
Apart from the clients information, in this tab is where the classification of the call that is being managed, is made.
|
The panel list below, contains all the managements done to this client with its information.
On the right, all the existing schedules for the agent are shown. The option of taking out each notification is available, just press the Delete column on each line.
The client can be easily called with the phone button.
The agent can choose the outgoing campaign to make the call.
...
Search
...
| type | info |
|---|
The agent can find the clients using different filters (Document, Name, Phone) and manage them by clicking on the Manage button that takes the agent to the Info tab with the selected client information.
By default on the list will appear the clients that are already assigned to the agent. The different filters will run for those assigned clients or for all clients, depending on the checkbox.
...
| Expand | ||
|---|---|---|
| ||
By defect, will appear clients assigned to the agent. If activated, the filters detailed will be applied on the assigned clients, if not, for every client on the system. |
...
Starts the search with the filters detailed. |
...
Cleans all the filters detailed. Info from the selected client will appear o the Info section, which will be automatically opened. |

...
Schedule
...
Inside the Schedule tab, the agent can visualize his/her own events in the calendar, add more events and manage them.
...
| Expand | ||
|---|---|---|
|
...
Deselects events. |

The Agent is able to delete or create new events. By clicking on the create an event button +, located on the upper right corner, the following will unfold: |
...
 Having an event selected, its information can be checked out and manage it, if hasn't been managed already. |
...
Having an event selected, if the client is registered on the system, all its information will appear on the Info tab. |
...
Having an event selected, if the client is registered on the system, all its information will appear on the Info tab and the agent will be able to manage it. |
...
Statistics
...
In this tab, the clients management statistics made by the agent are shown.
The first graphic represents the percentages of the results from the CRM managements.
The other one, represents the percentages of the clients that were managed and not managed on the CRM.
...
...
| type | note |
|---|
The button located on the top right corner updates the graphics, which do not update in real time.
...
Supervisor
Assignments
...
| type | info |
|---|
The Assignments option inside the Supervisor user allows us to assign agents to clients.
...
| Expand | ||
|---|---|---|
| ||
To make the assignation the user must search for the clients that are going to be assigned to an agent. This search can be made by applying different filters In order to complete the search process, the user must select a filter from the combo and a condition (equal, contains, different), write the value in the "Filter's Text" and then press the As many filters as the user wants can be added, each of them connected with an "and", meaning the search will throw a result according all the filters are met. When the user finishes adding filters, press on the magnifying glass to make the search. Used when the user wants to delete all the filters detailed on the list. If the user wants to delete just one filter, select this one from the list and then press this button. Apart from the custom filters, the user can search by Type of Registries (Total, Not Assigned, Assigned), as well as bringing a maximum quantity of registries. |
| Expand | ||
|---|---|---|
|
...
|
...
|
...
|
...
Schedule
...
| type | info |
|---|
This section, logged in as a Supervisor user, displays the events scheduled by all the agents.
The supervisor can modify the event by selecting the date in the calendar and clicking the event on the right section, a modal will appear.
Its information can be edited, which can be useful if an agent is unavailable the date when the event is being active.
...
When an event is selected, the next window will appear:
...
Any client data changed on the event information will not be changed on the official client data. If the telephone number on the event is modified, and this one is not registered on the system, the agent won't be able to manage this client.
Parameters
...
The supervisor can create, delete or modify the scripts and results, modify the notification period, modify the location labels and load clients information from a csv file.
| Expand | ||
|---|---|---|
| ||
Text that is used as a help for the agent. It must be assigned to a campaign. |
...
 In order to create a new speech, the supervisor must select the campaign to which it's going to belong. Then click on the Edit Script button to write and edit the speech. Once the speech is ready, click on Save button, and the new speech will be added to the table on the bottom. To delete a speech, select this one from the table on the bottom and click on Delete button. If theres a speech selected and want to clean the editing area, click on the Clean button. |
| Expand | ||
|---|---|---|
| ||
Uploads a database with clients. |
...
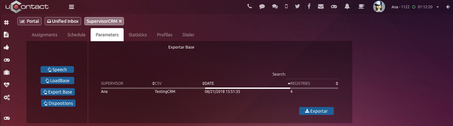
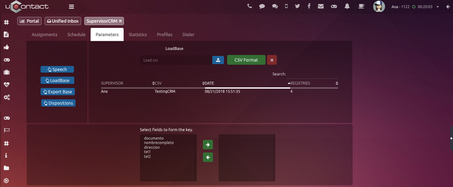 If you want to update clients info on a massive way by uploading a .csv file, you must select from the bottom part which of the parameters you want to update and then upload the new base. A warning will appear to make sure the user really wants to update those clients. IMAGE In order to know the format of the database, an example of it can be downloaded. |
...
To delete a database, select this one from the list an click on the red cross button. The supervisor will be asked for confirmation to proceed deleting: |
...
 |
| Expand | ||
|---|---|---|
| ||
This ones are going to be seen by the agent in the CRM to typify the management/call with the client. |
...
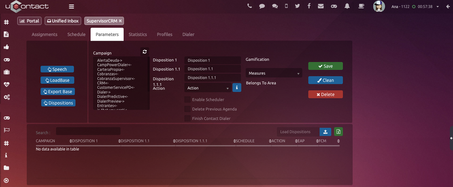 For each result, having 1, 2 or 3 levels, an action can be selected to be made in case of being picked by the agent, and in case it contains a dialer:
The user can schedule calls, meaning, the agent will have the possibility to select a date/time to call the client again, in case of containing a dialer. If the Enable Scheduler is checked then action can not be selected and vice versa. |
...
The user can as well delete events scheduled prior disposition. |
...
 When activated, if the user typifies with this action, the system will check if one of the clients numbers, principal or alternative, appears in a uploaded dialer list, if its there, this one will be deleted. |
...
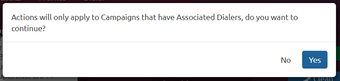
 For the results of the agents that are assigned to a game in Gamification, a measure must be associated to every possible result. You can upload a .csv file with multiple dispositions, which facilitates the registration of this ones if the user has a lot to register. To get the format of this .csv, you can download a .csv file with the format and a example on the second line as a guide, just click on the upload button. If multiple campaigns are selected and between these ones both dialer campaign and voice campaigns ones, If an action is selected, this one will only be applied to the dialer campaigns selected. The superisor will be notified of this event with the following: |
...
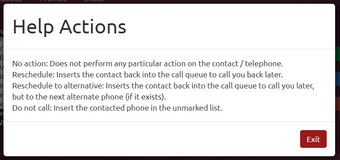
 There is an info button, that explains the uses for each action availale: |
...
 |
| Expand | ||
|---|---|---|
| ||
The user can download each data base uploaded and check the content. |
...
 |
Statistics
...
| type | info |
|---|
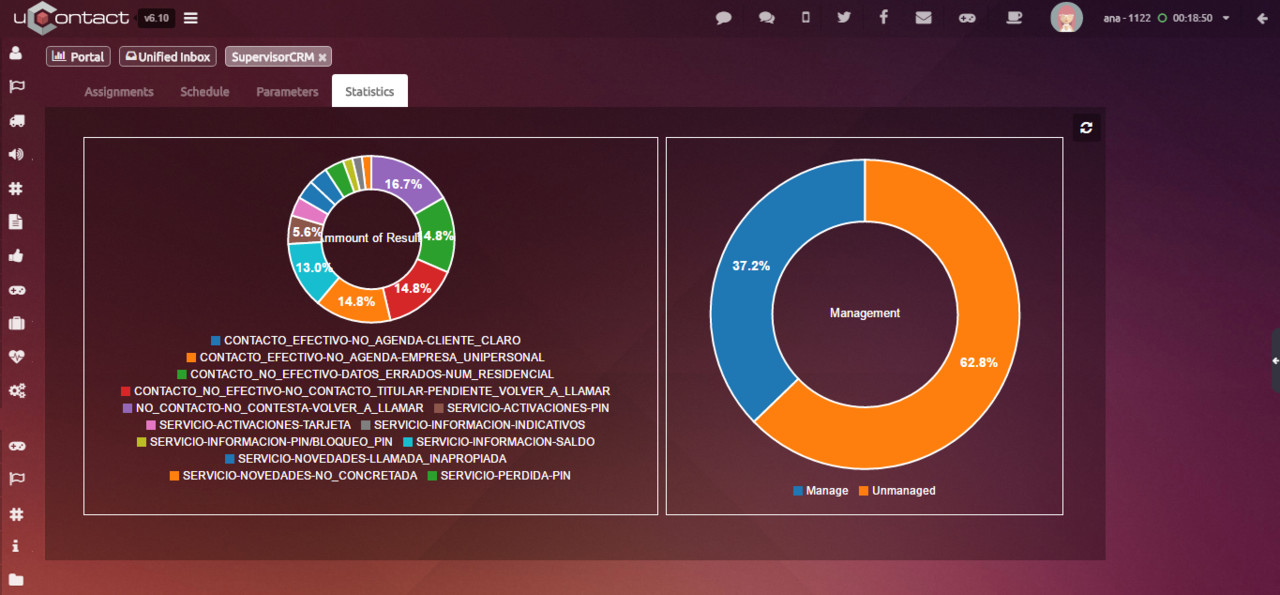
In this tab, the clients management statistics are shown from all the agents.
The first graphic represents the percentages of the results from the CRM managements.
The other one, represents the percentages of the clients that were managed and not managed on the CRM.
...
| type | note |
|---|
...
The button located on the top right corner updates the graphics, which do not update in real time.
...
Profile
...
| type | info |
|---|
The Supervisor can create different filters, to which ones campaigns will get assigned. This campaigns will have specific fields to fill in the Agent's Information section.
...
In order to add a new profile
write its name on the Profile Name box.
Then press the " + " green button.
This new campaign will appear in the list on the left side.
To add campaigns to each profile
Select as many campaigns as wanted from the campaigns list on the right side.
Then write on the Fields the additional clients information the Agent must complete for this profile. For example, client's email or second address.
Finally, to apply the changes, click on the Save Profile blue button.
If a profile or campaign needs to be deleted
Select as many campaigns or profile as wanted from the list
Click on its respective " - " red button, next to each list.
They will be removed from the list.
Dialer
...
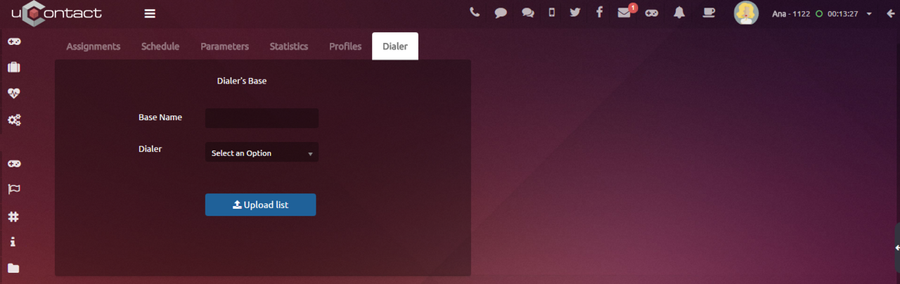
From this section, the Supervisor can create a Dialer and add it to a certain Dialer Campaign.
This dialer, will contain the different clients that resulted from the Assignment section.
...
Write a name for your dialer and select the Dialer Campaign to where it wants to be added.
Finally, click on the Upload button to finish the process. Now the dialer will appear on the selected Dialer Campaign List section.
In order for this dialer to start, don't forget to activate it and set a priority greater than 0%.
...