
Administration
First of all we will create a Provider that we will use to connect the calls
Then we will create our Campaign or Dialer
We add agents and ready for work
Providers
The providers are the ones that allow us to connect the calls between clients and agents in uContact.
We can create different types of suppliers depending on our need / infrastructure.
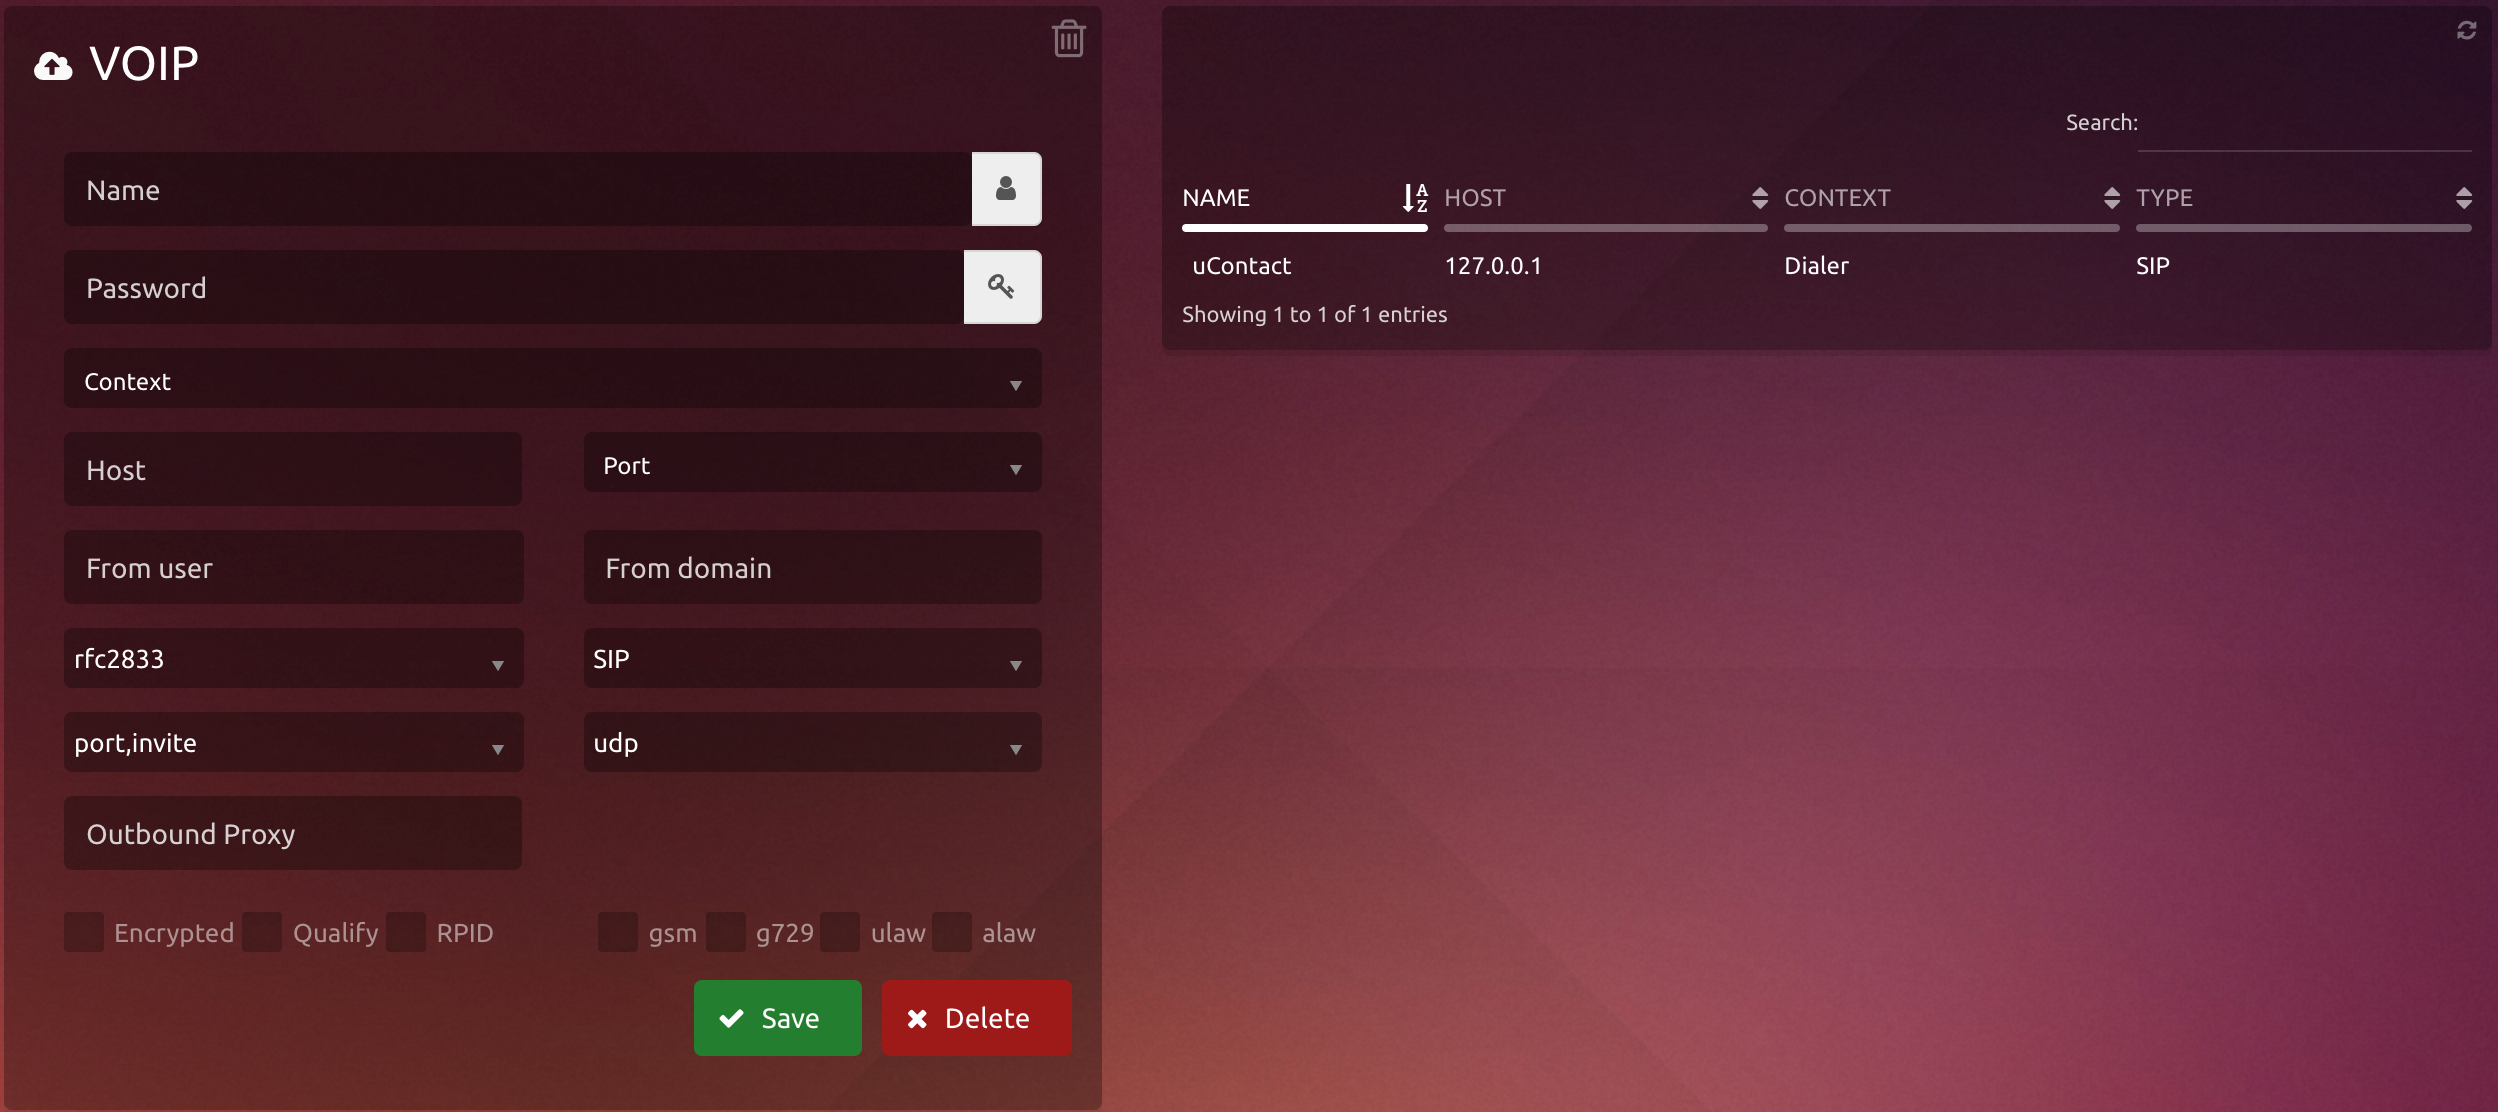
The most used provider is VOIP.
| Expand | ||
|---|---|---|
| ||
Name: Name of Provider (Carrier). Password: Assigned by the Carrier. Context: Grouping where direct call attempts made by the carrier, this depends of the dialplan. Host: Provider IP. From User: Depends if required by the carrier. From Domain: Depends if required by the carrier. Port: Port used by the connection. DTMF: DTMFs sending mode. Qualify: If monitors connectivity with the provider. Insecure: Specifies how to handle connections to the provider, not authenticate all connections. Transport: Allows the user to select the protocol to be used (UDP,TCP, TLS). Encryption: Indicates if the connection is encrypted or not (used when TLS transport protocol is present), when using voice Type : If the provider is SIP o IAX. Codecs: Codecs used by the supplier (related to audio). |
| Expand | ||
|---|---|---|
| ||
Campaigns
(Image)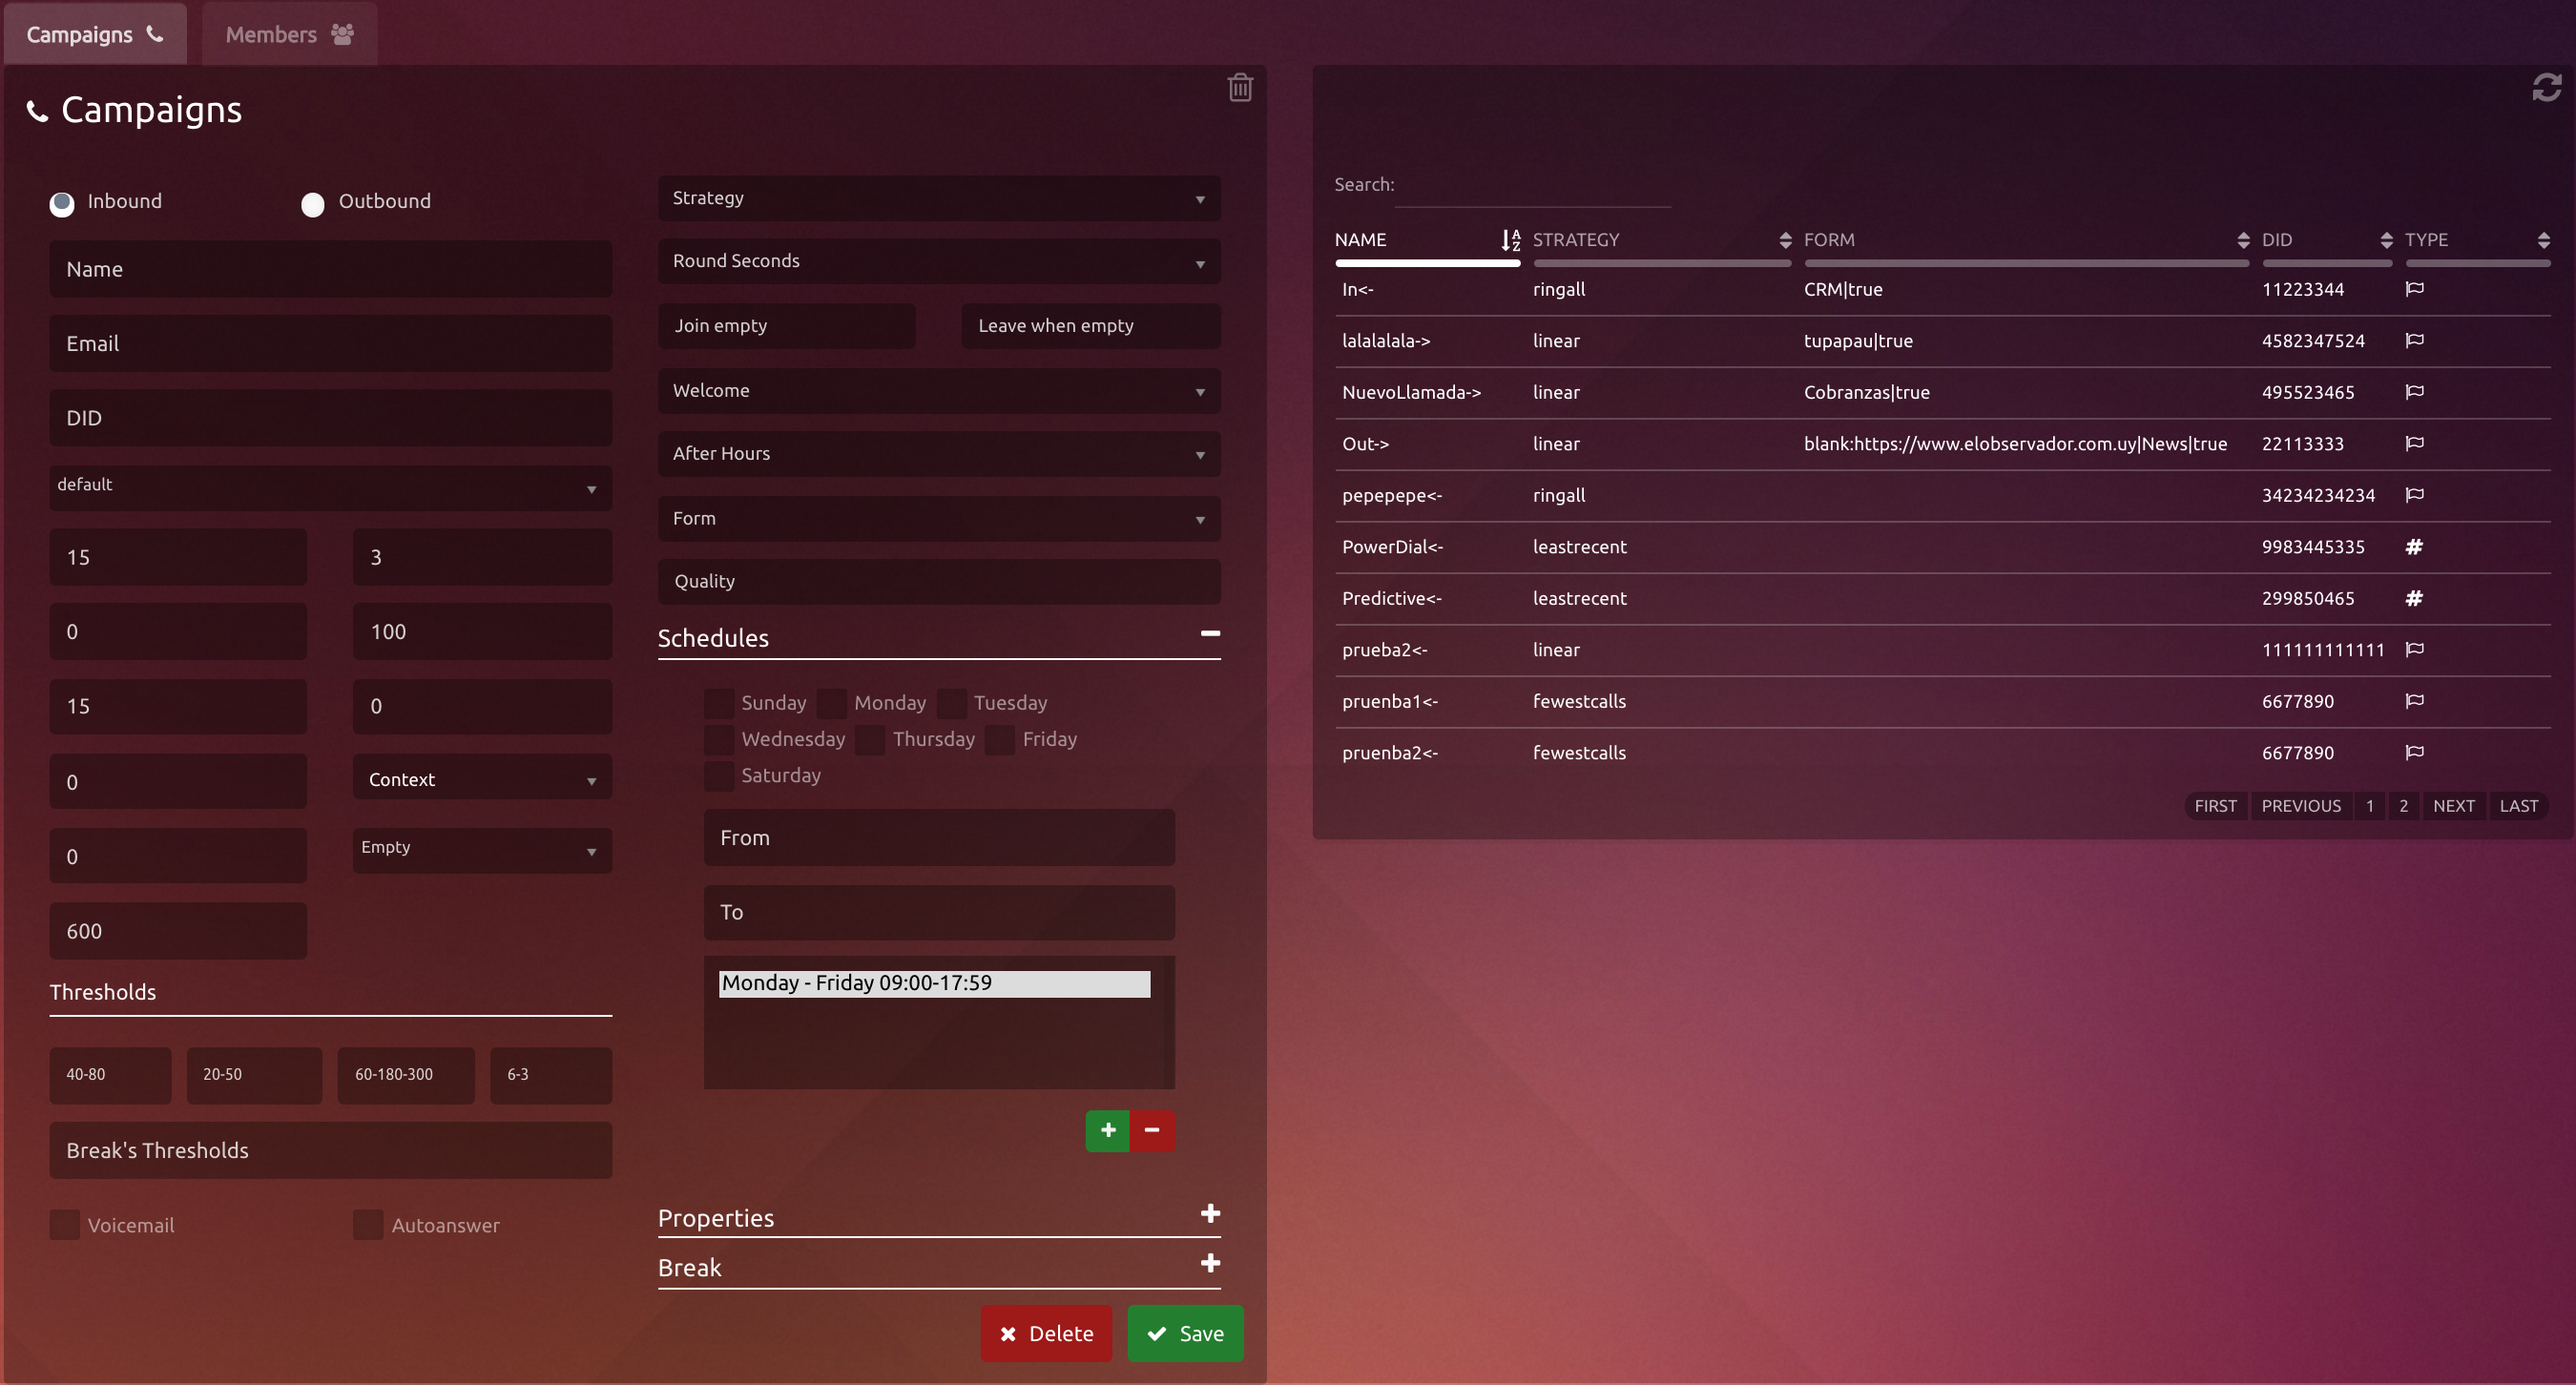
To see how to create incoming and outgoing campaigns in uContact, go to Voice Campaigns
Voice Campaigns and Dialers Members
| Info |
|---|
Keep in mind that creating a dialer also creates a Campaign associated with it. Dialers members are added to the campaign of it. |
| Expand | ||
|---|---|---|
| ||
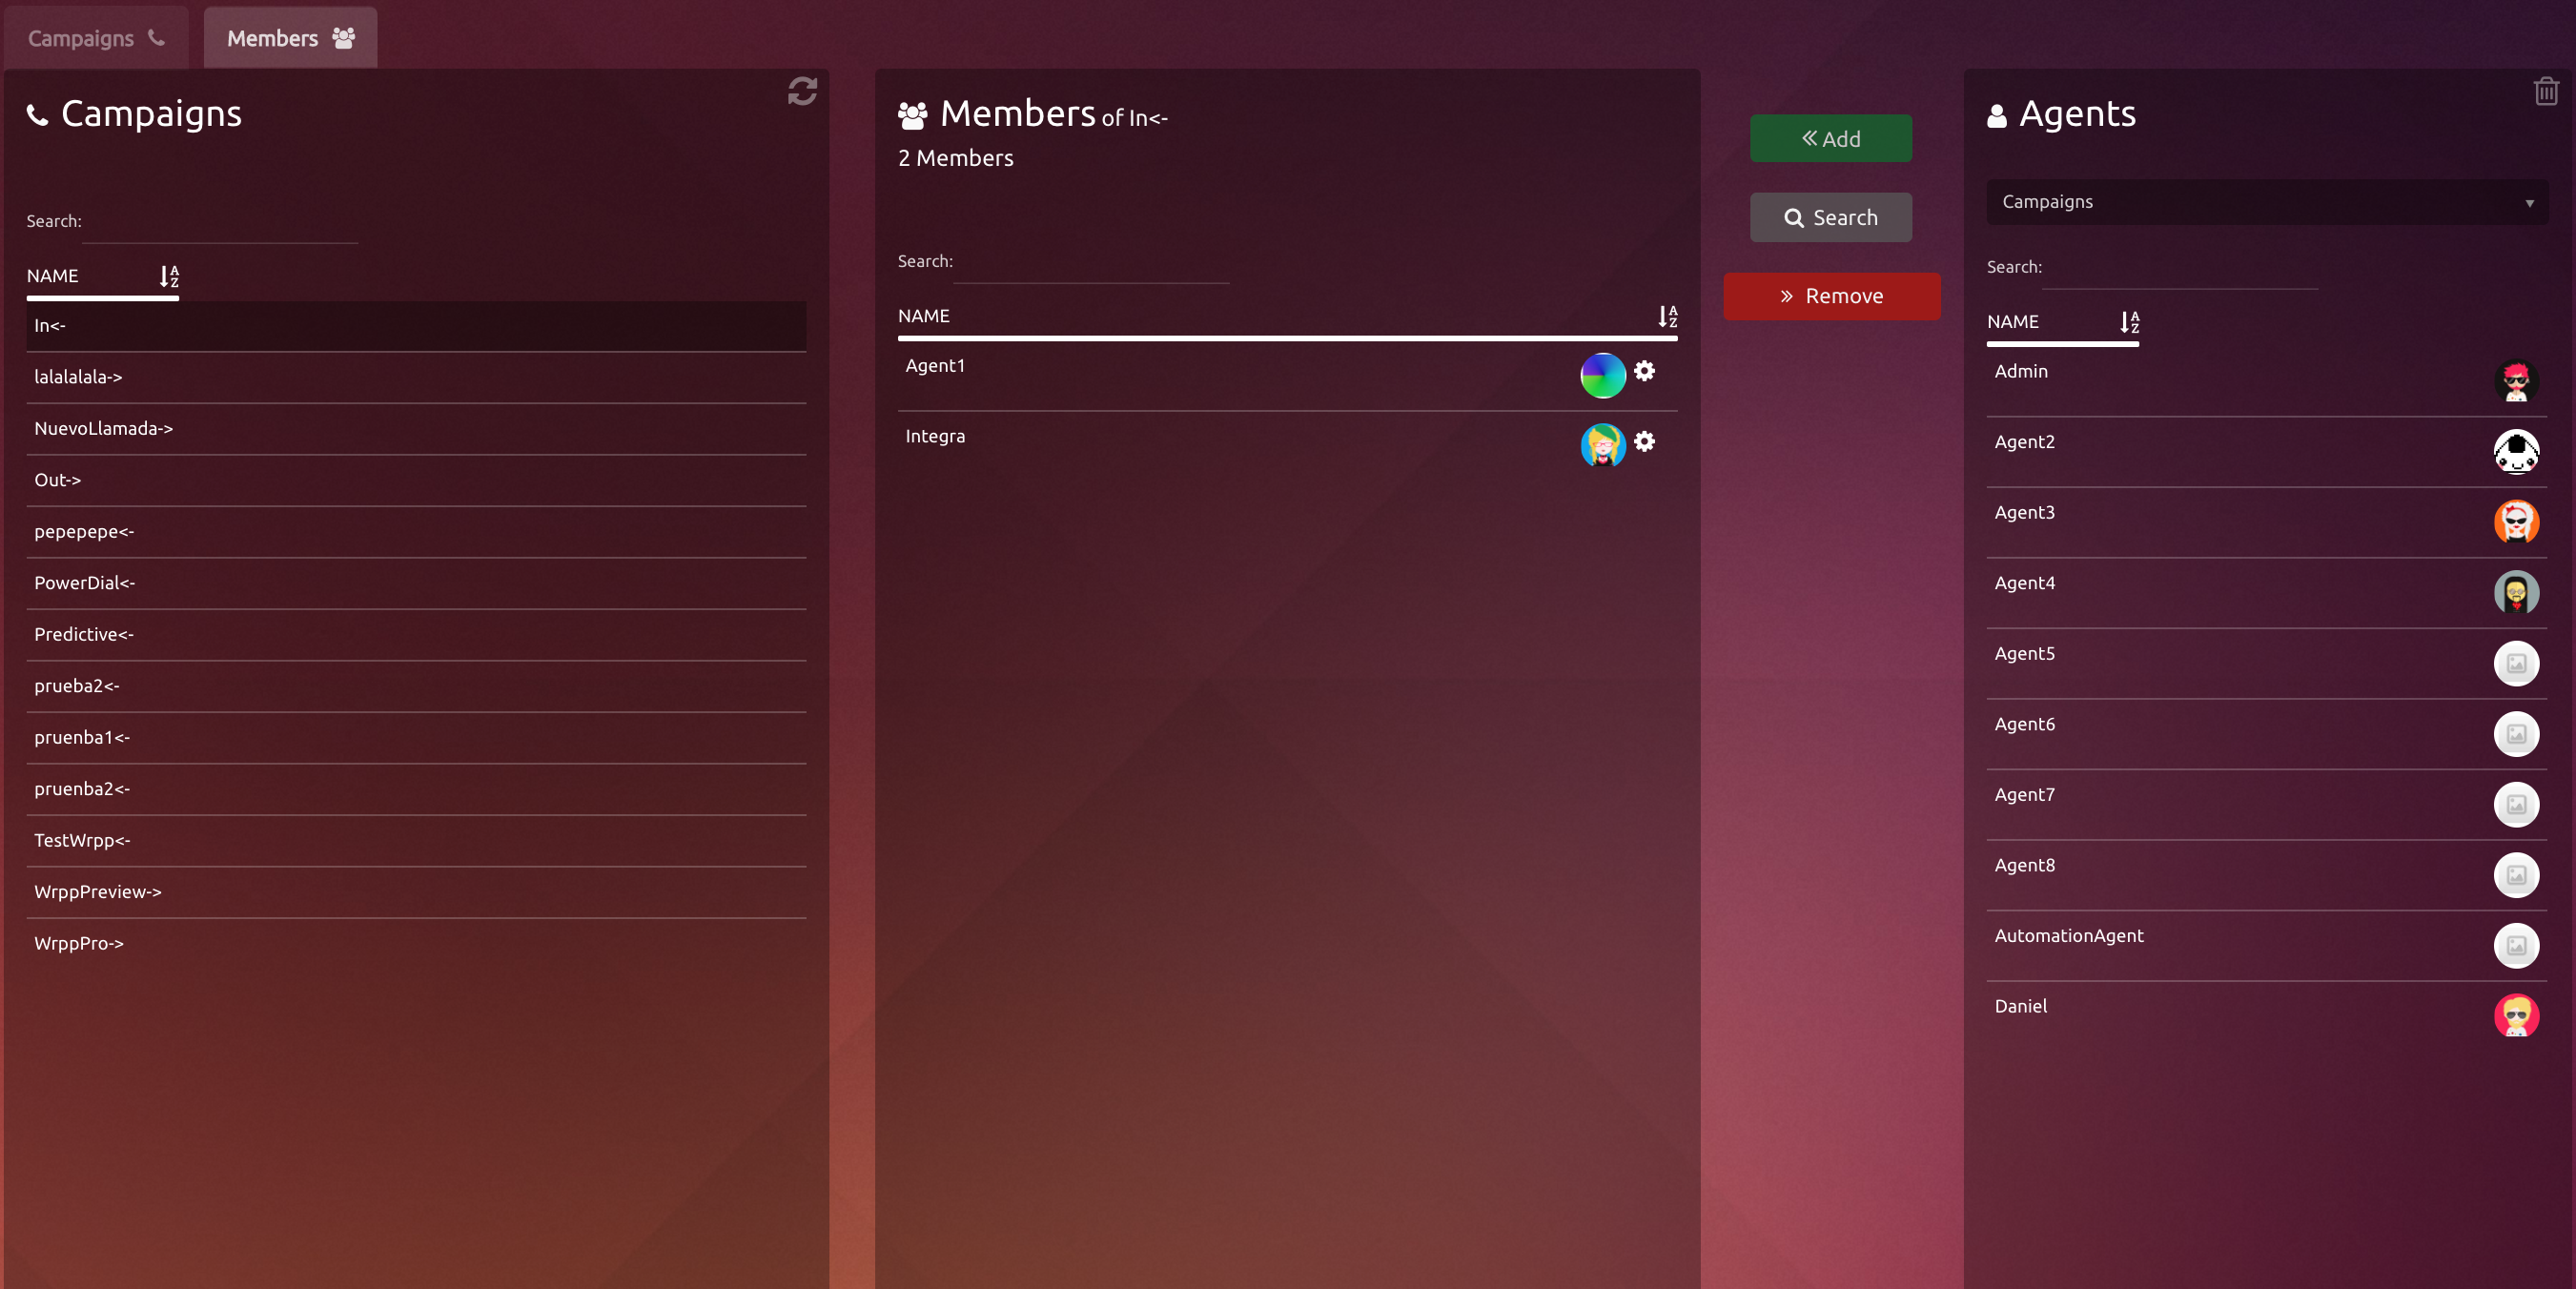
In this screen will see 3 columns
 To add a member just follow the next steps:
Multiple selection
|
| Expand | ||
|---|---|---|
| ||
This column lists all campaigns related to the user's security group. In it you can select one or more campaigns by one click, either to add agents, remove them or simply observe their members. To deselect the campaign we simply click on it again. |
| Expand | ||
|---|---|---|
| ||
It allows you to view the agents assigned to the selected campaign and also remove agents from one or from groups from the campaign. Penalty 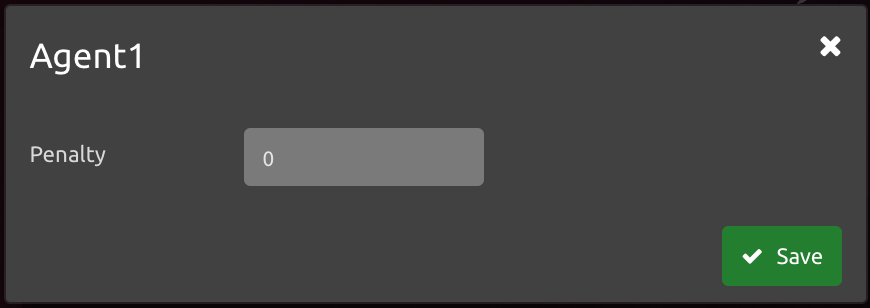 The less penalty an agent has, the more calls they will enter. Value between 0 and 100 to indicate the agent's skill, the lower the penalty, the greater the skill. |
| Expand | ||
|---|---|---|
| ||
List of agents within the User Security Group. In it you can select one or more agents by one click, to add to the selected campaigns. To deselect an agent we simply click on it again. |
| Expand | ||
|---|---|---|
| ||
Between the Members and Agents column we will see three buttons:
Search mode We simply type the agent's name and press Search. The table will show all the results that match the name entered.(Image) 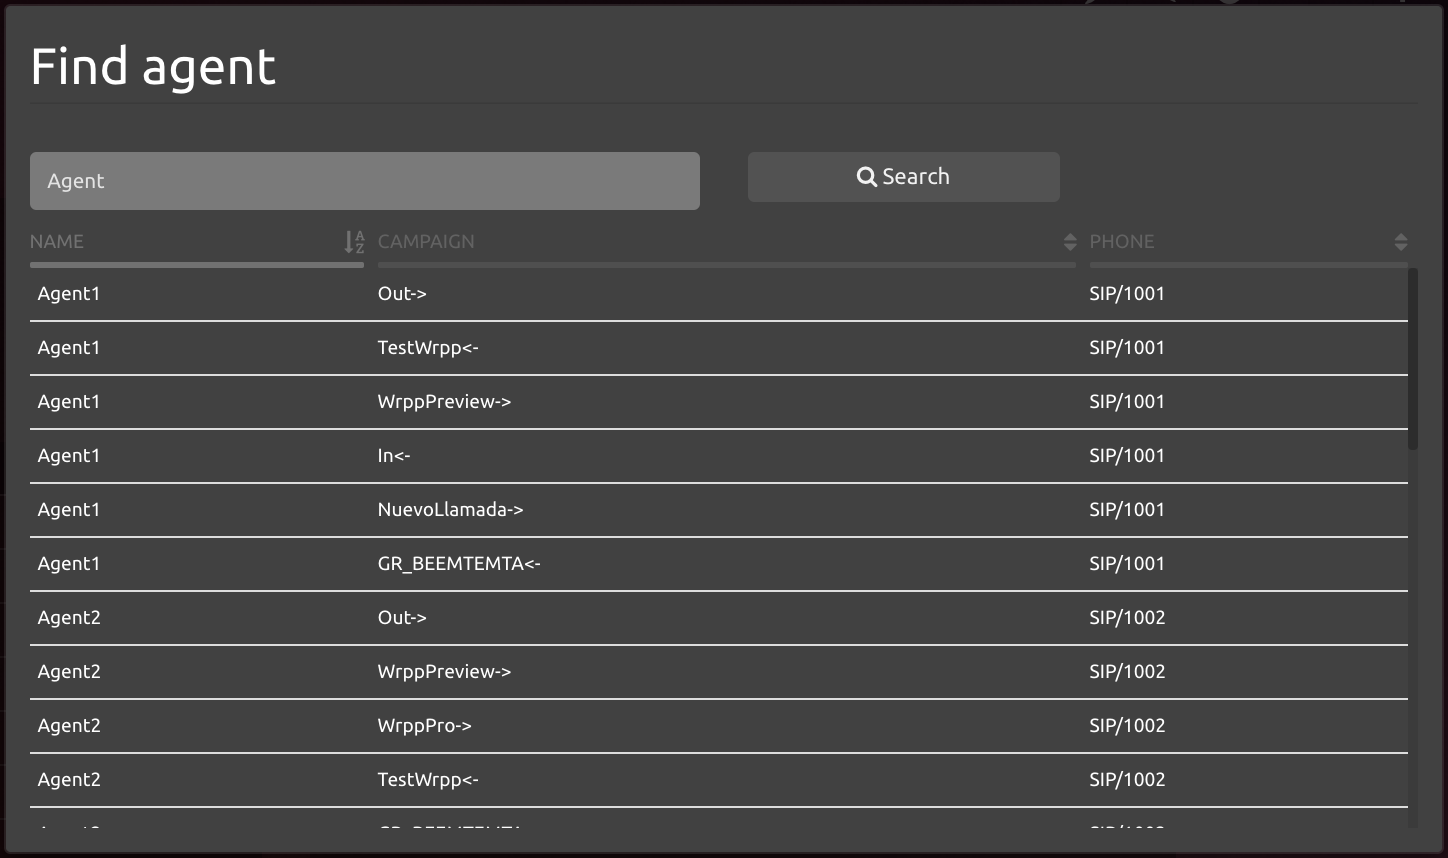 |
Agent
| Info |
|---|
To see how the agent interacts with phone calls visit Agent - Calls |
Supervision
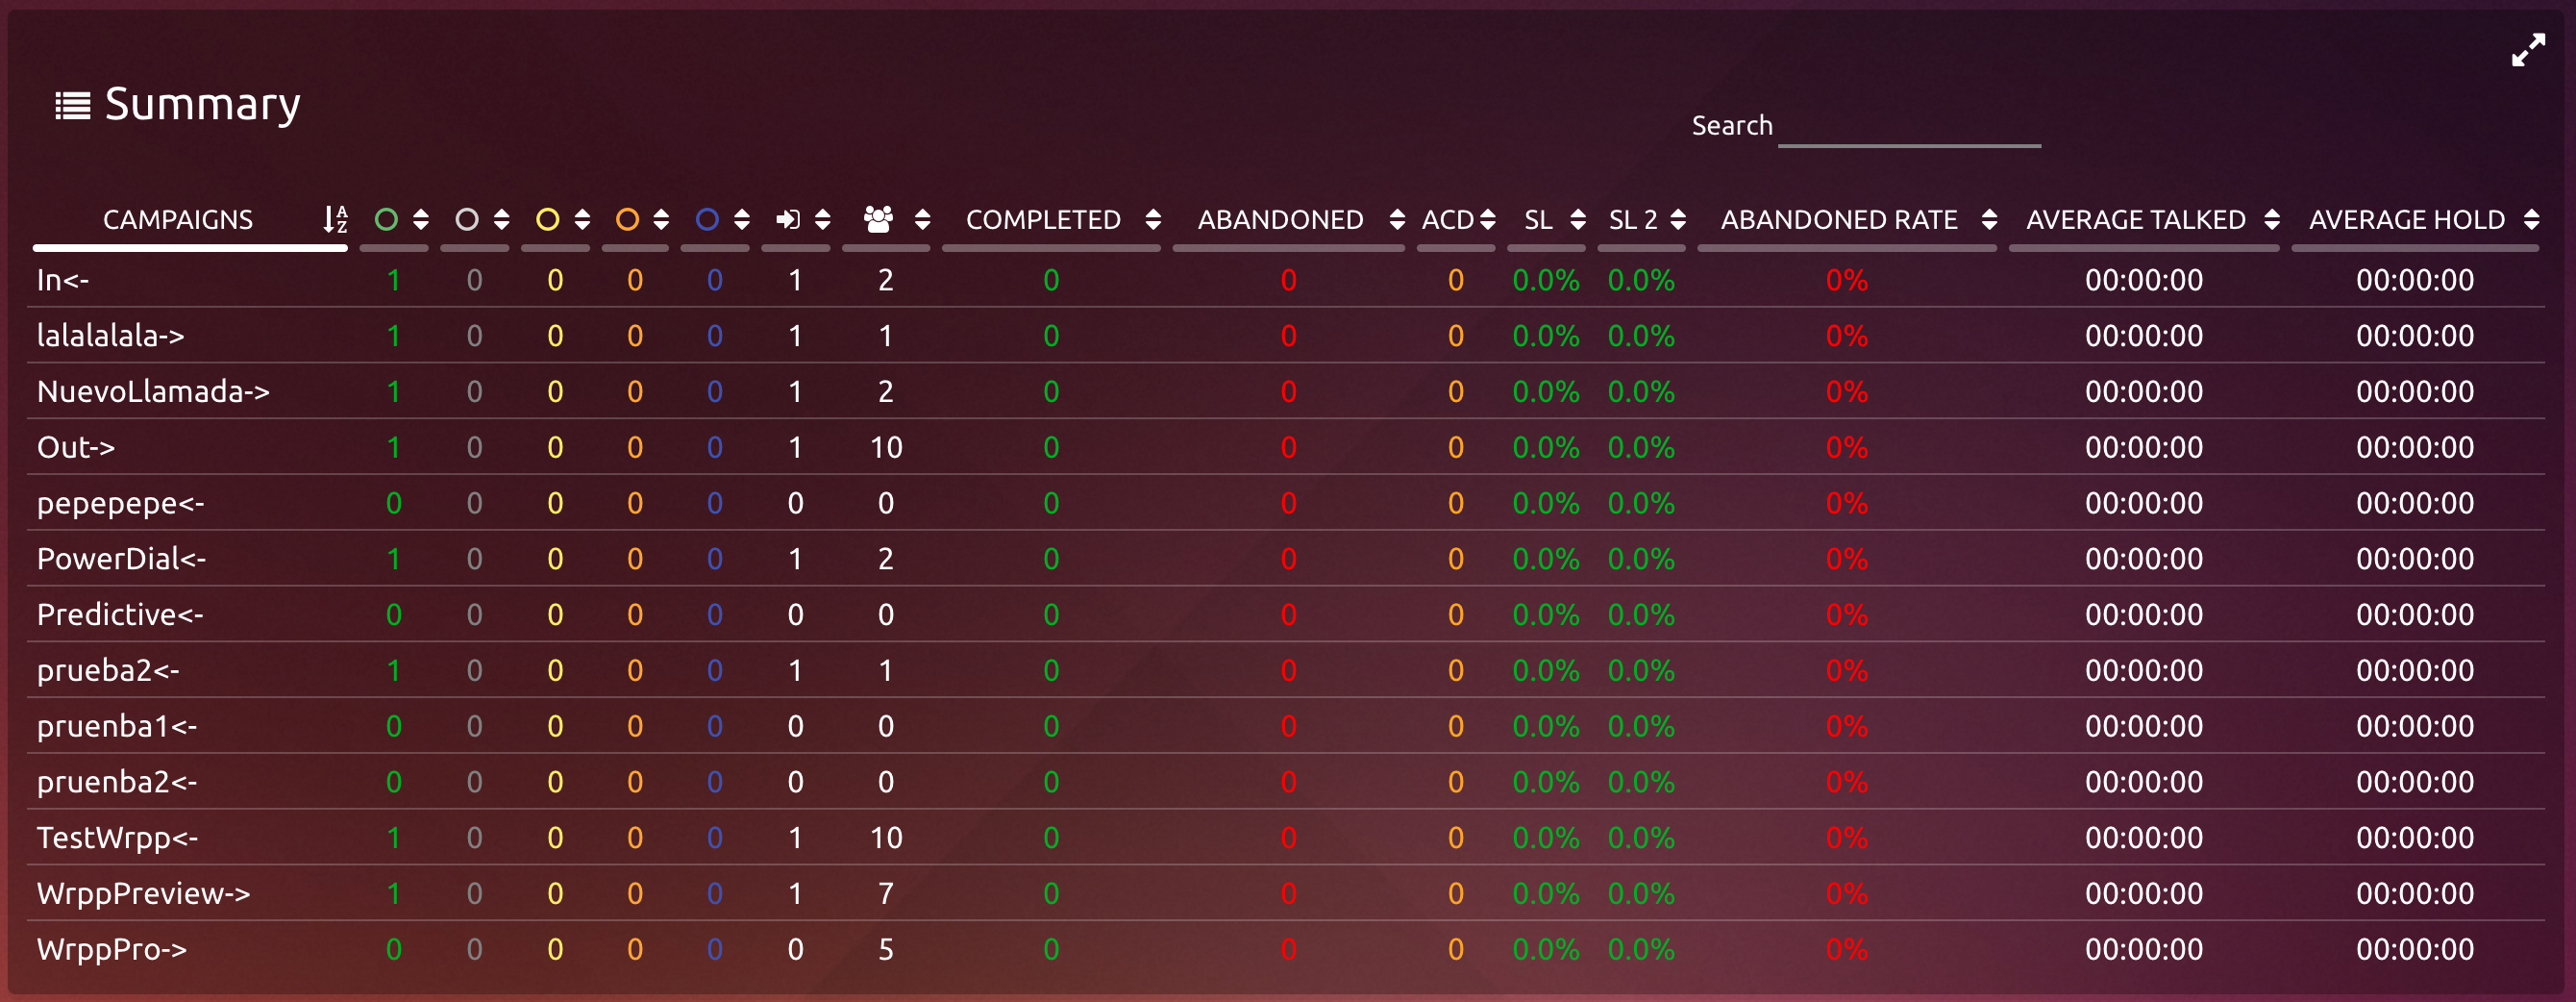
Summary of Campaigns and Voice Dialers
Basic statistics as a summary of the status of campaigns in real time.
This information is shown in a table in which we will quickly see one line per campaign(Image)
| Expand | ||||
|---|---|---|---|---|
| ||||
Here the user is able to see:
|
| Expand | ||
|---|---|---|
| ||
The Supervisor, on the notifications bar, has a summary of the Campaign Summary. |
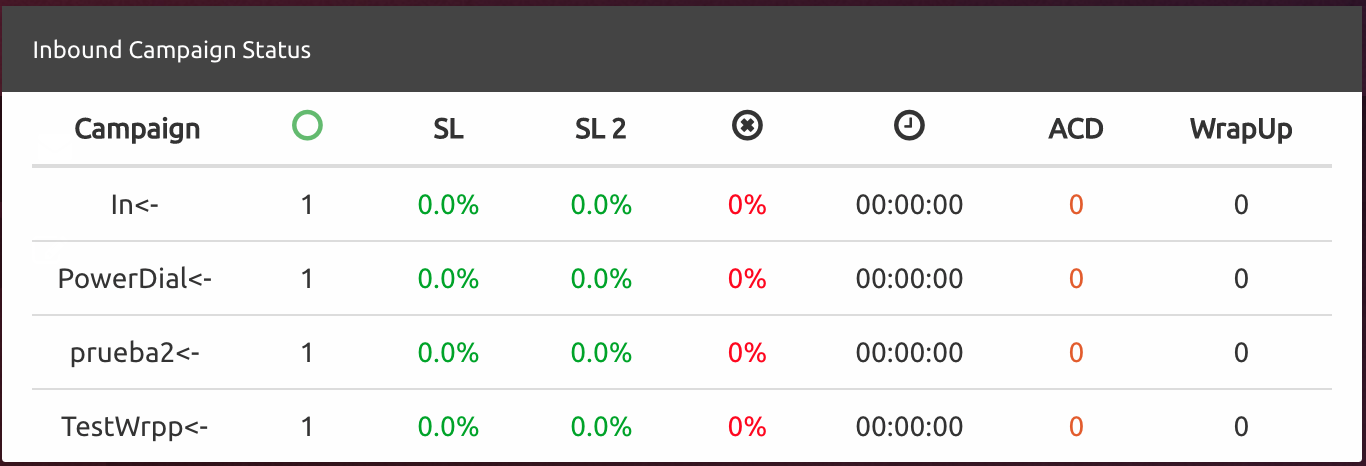 This one shows
|
Monitoring of Voice Campaigns and Dialers
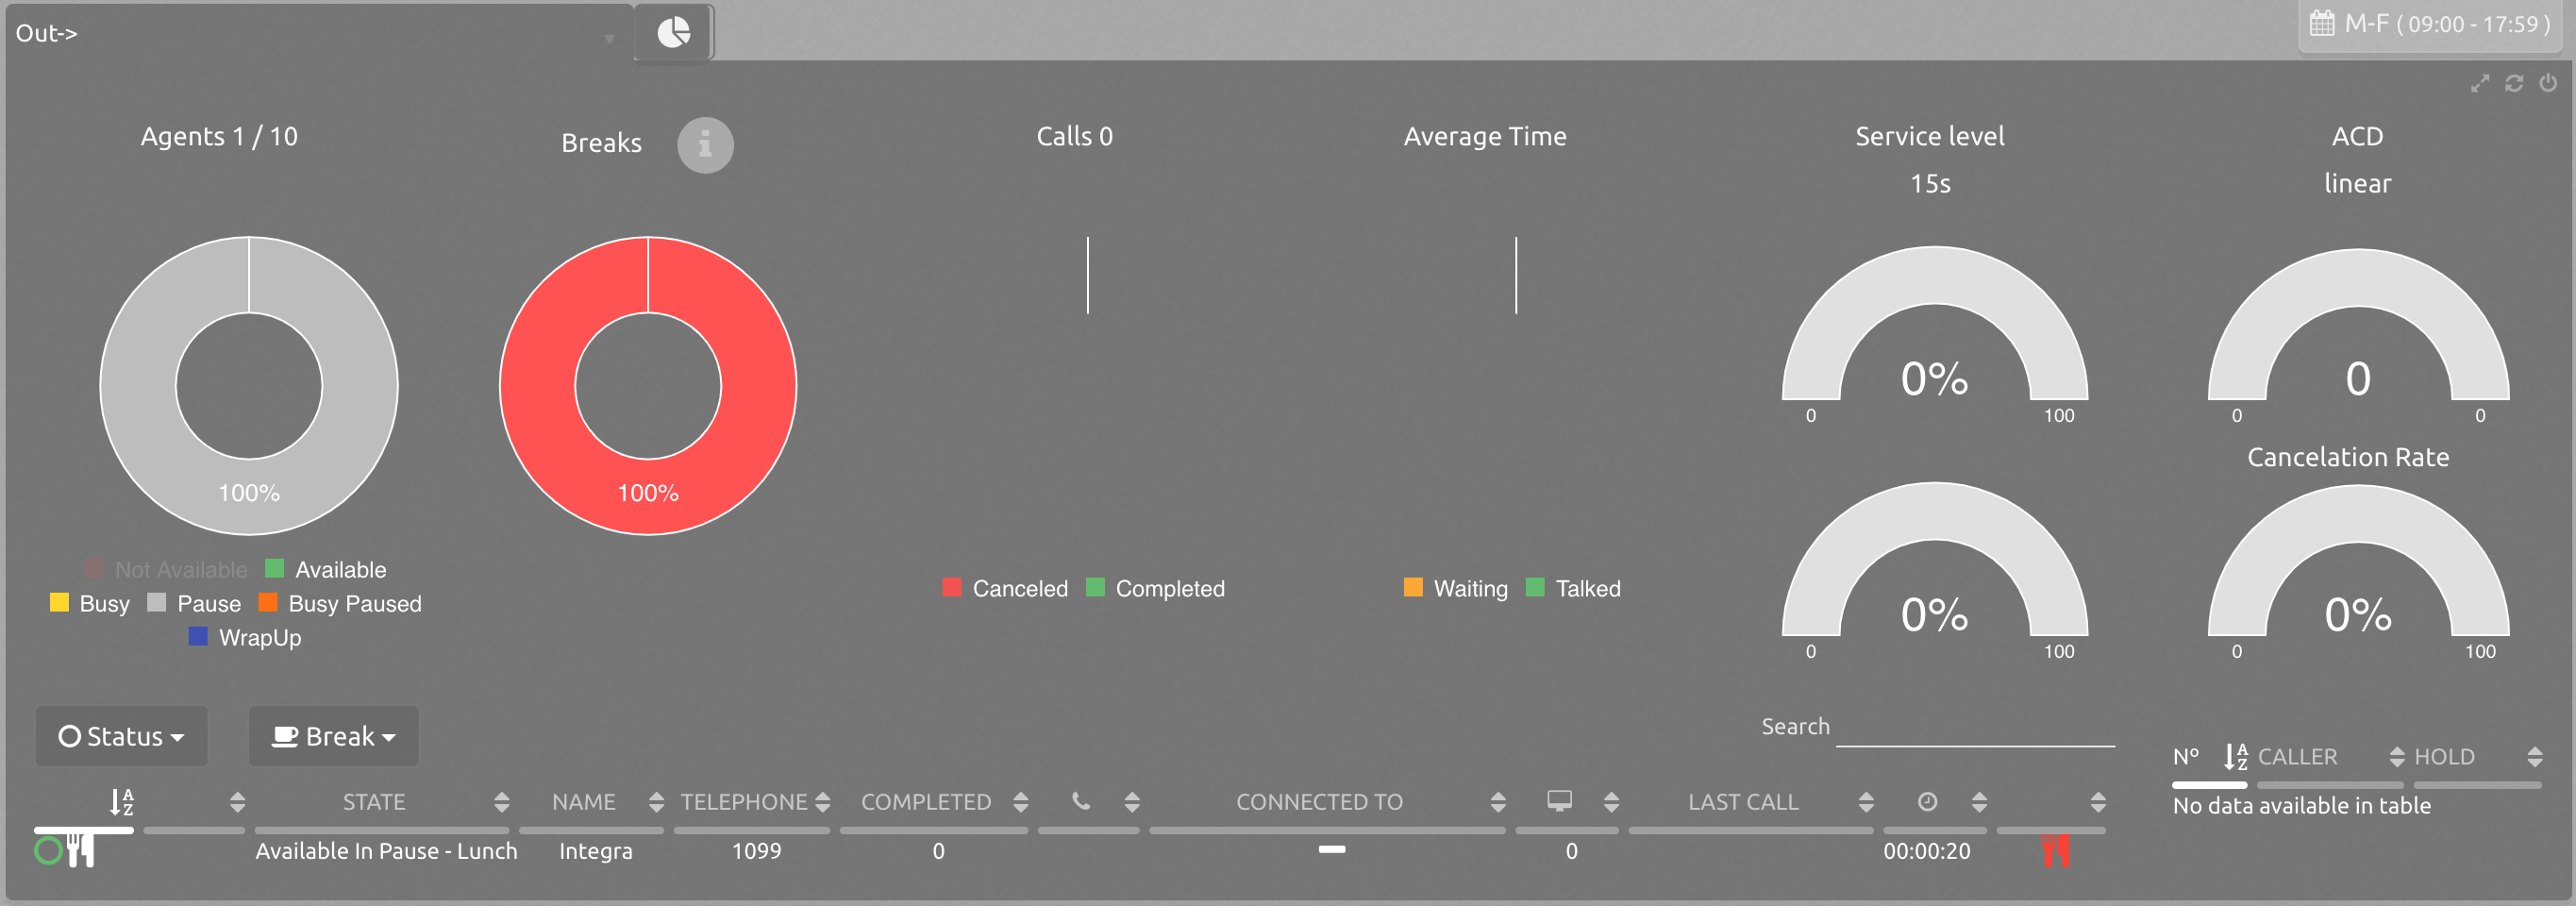
Full Detail for queue status in real time.(Image)
| Expand | ||
|---|---|---|
| ||
Agents Breaks Calls Times Service Level Abandon Rate ACD Graphic Cancelation Rate |
| Expand | ||
|---|---|---|
| ||
Grid with list of agents that are assigned to that queue. State: Color identifier extension state. Type of call: Shows if the call is outgoing (arrow up) or incoming (arrow down). Name: Agents name. Telephone: Technology and phone number of the agent. Opened Forms: Total number of forms opened for each agent. Clarification: If the user left forms opened before logging off, this ones will still appear as opened. When the user logs in again, the forms will get closed. Have in mind the effects on dispositions, depending on the form assigned. Completed: Number of calls answered (inbound or outgoing). Duration: Duration of the current or last call made. Connected to: Telephone number of the last call or current call made or received. Last call: Date / Time of last call answered. Time: Shows the time that the agent is on the actual state. Alert: Column where all configured alerts on the thresholds can be found. These are:
|
| Expand | ||
|---|---|---|
| ||
Grid with a list of calls waiting (incoming). Caller ID: Displays the number of the call. Position: Shows the position of the call in the queue. Wait: Timeout waiting for the call queue. |
| Expand | ||
|---|---|---|
| ||
When selecting an agent from the list, a bar will appear with the monitoring options, which allows us to monitor the agent directly from the computer where the portal is open (without the need of having a specific associated internal) Selecting any of the options (without the stop) a timer begins to run next to the name of the agent.  The options are:
In the bottom right corner we can find:
In the lower left corner we see a filter icon which allows you to filter the agents that are available and all, since in several cases there are many agents that could be unavailable and disturb the visual. On the other hand you can use a filter for displaying the agents that are in use and see their activity. |
Agent Profile
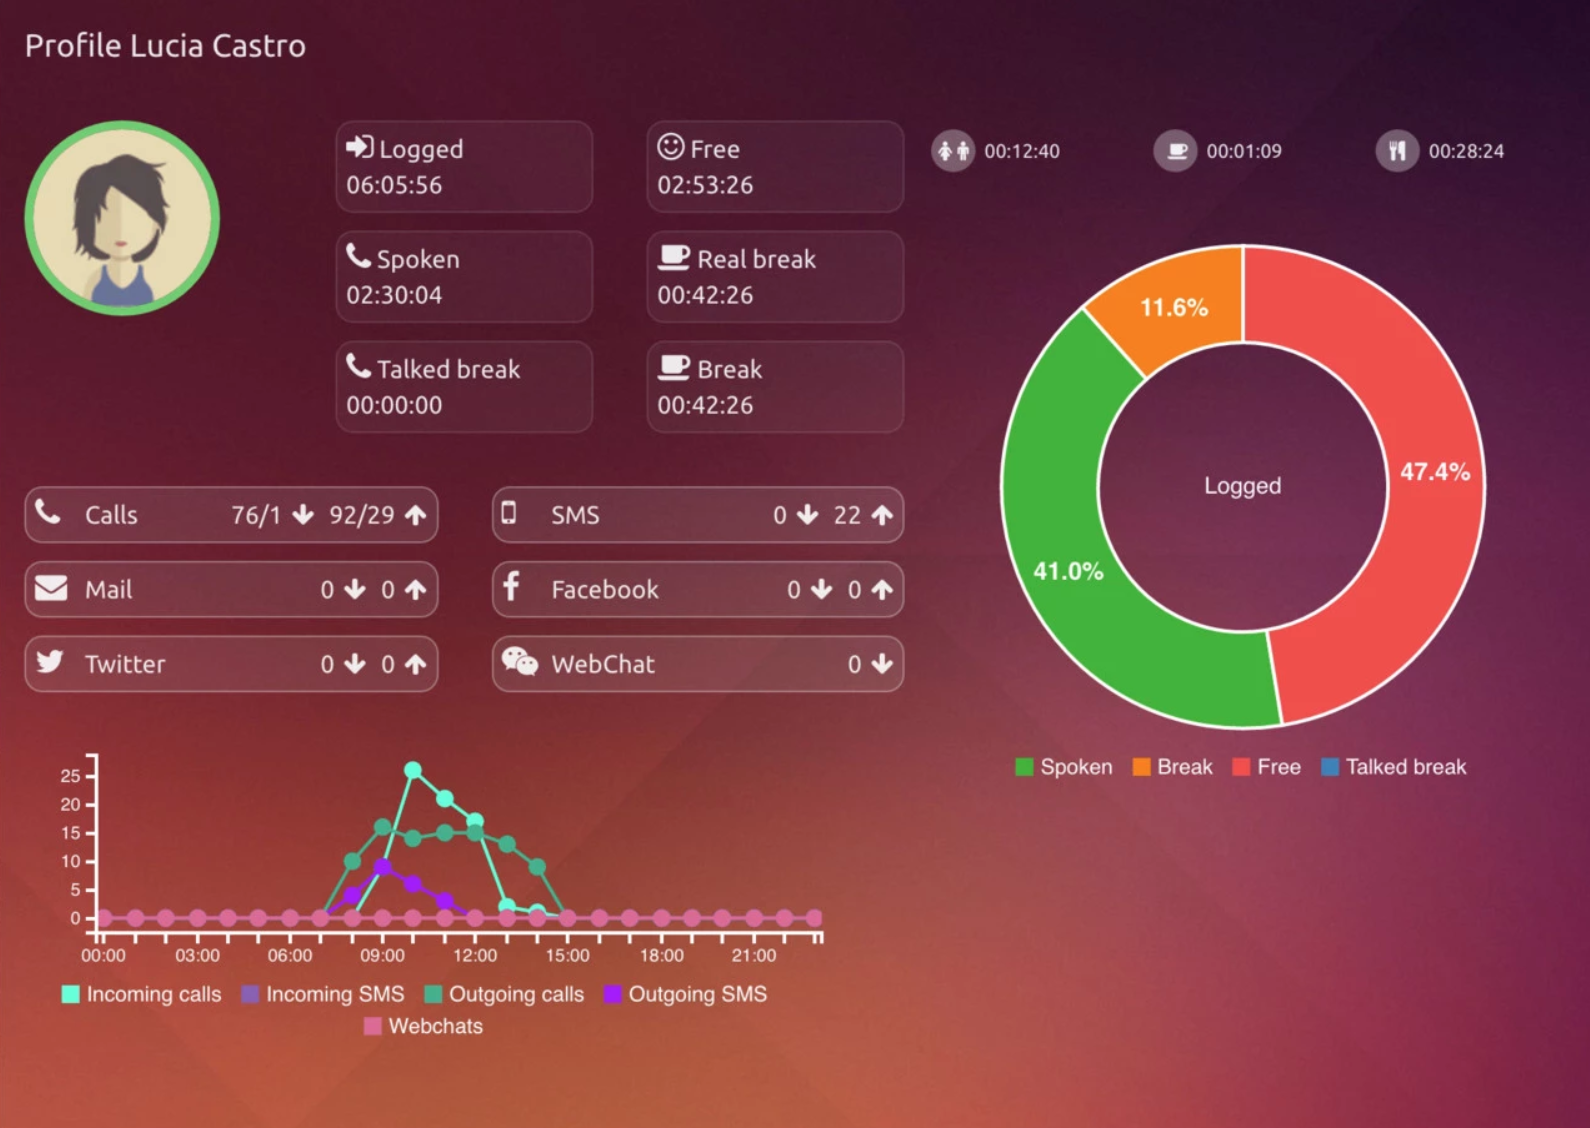
When selecting an agent from the table, the info button will appear on the monitoring options.
| Expand | ||
|---|---|---|
| ||
Interactions On this screen the user can see his progress, incoming and outgoing calls, sms, mails, as well as interactions with social networks like Twitter or Facebook and the webchat of the day. Times The user can also see the time he was logged in, time on breaks, spoken time and time he was free. Free time is the time in which the agent was logged in without being on a break or making a call without having in count the time spoken during a break. The resulting formula is: Free Time = Logged - Spoken - Break + Talked break. Talked break: Is the time that, while being on a break the agent made calls. Real break: Is the total break time, without the time being on a call during a break. Tables and graphs On the right, the user can see a timeline detailing his activities, a table that indicates the time spent on every break and a graph of the day by hour. The graph is divided by hour, it shows the amount of calls and sms of the user (incoming and outgoing). If the mouse pointer is placed over a specific time, the user can see the amount of calls and sms for that hour. 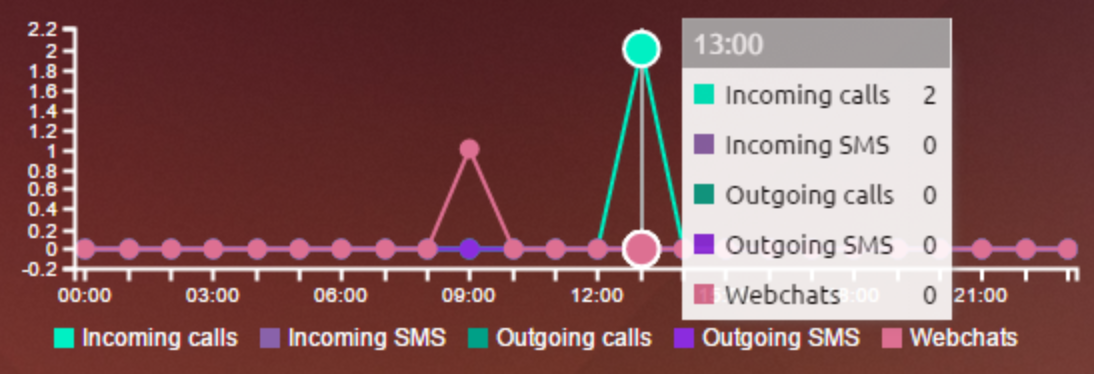
|
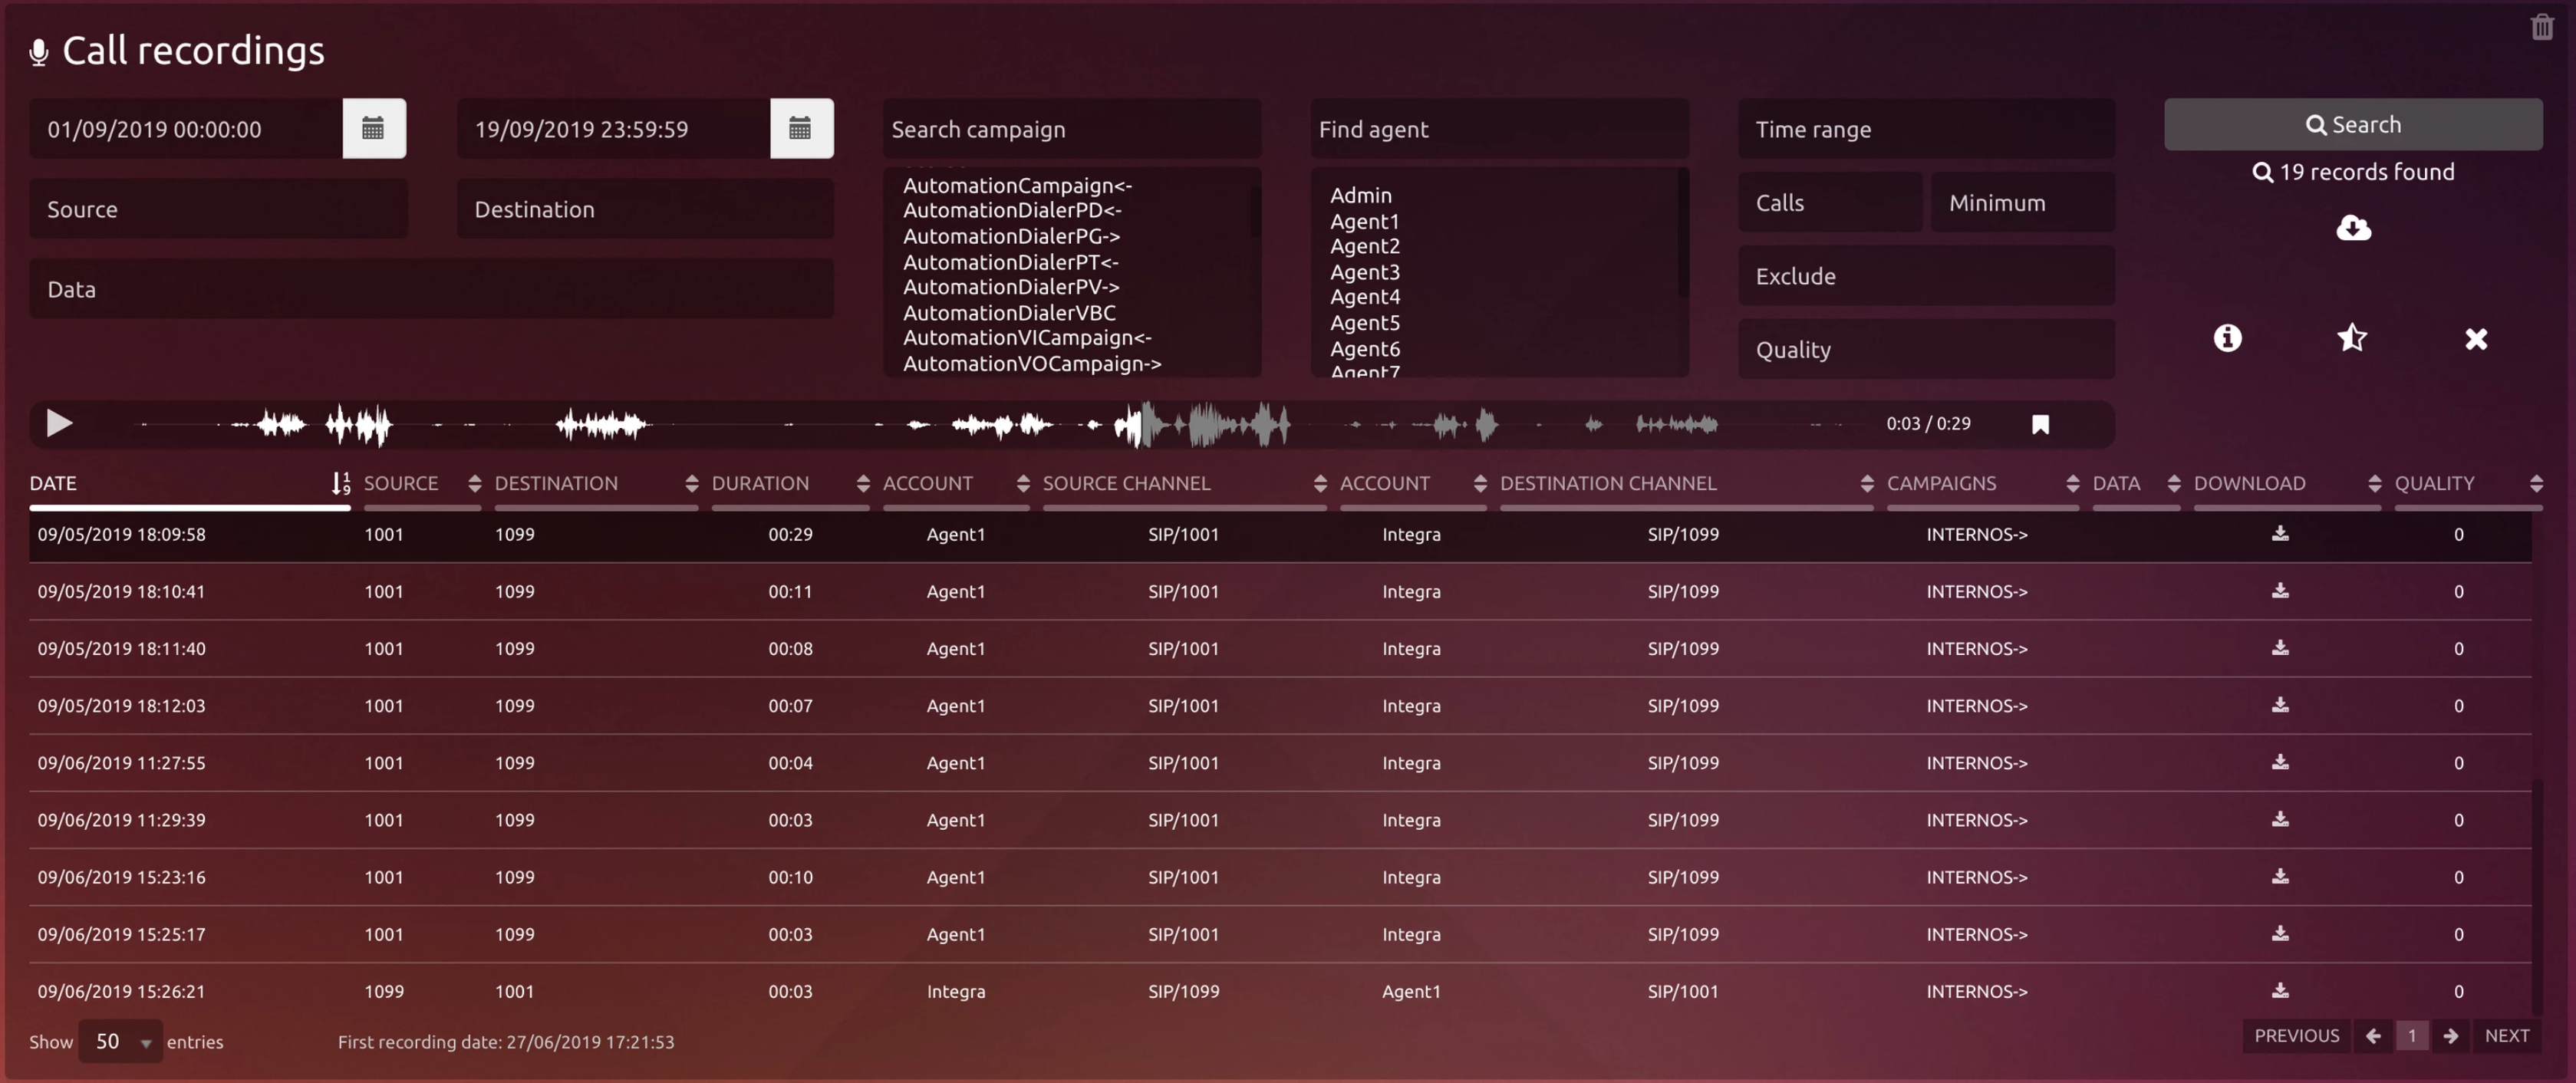
Recordings
Menu for supervising the calls records of the system.
Listen of recordings, searching by date/hour, classification, origin and destiny.
| Expand | ||
|---|---|---|
| ||
Filters to get recordings
Filters on obtained recordings
|
| Expand | ||
|---|---|---|
| ||
|
| Expand | ||
|---|---|---|
| ||
to hear the recording associated with the record, the recording is heard if the range is within stored recordings (if it was not passed to backup or eliminated entirely), the default is 30 days available online, are then passed to the folder BackupRecords which remain for 150 days until irreversible deletion (configurable from PBX). The waveform allows to see the voice action moment. Tag: Button to enter a check mark (with comments) in real-time recording. You can select the marks and the recording will start directly at the time of the mark. To see the marks access to the Information window. |
| Expand | ||
|---|---|---|
| ||
When clicking in a recording, would appear the following options: InformationAllows to access to the selected recording information, being able to see its qualification so as the username, tags and comments.
QualityAllows the user to give a score to the recording. The score is set to every question of the quality model ,the questions are set on the quality model configuration. The total score is the average of all the question. The supervisor can download the quality information as PDF of EXCEL and comment next to the each evaluation. You can qualify a single quality model per recording. DeleteDeletes the selected conversations.
|